
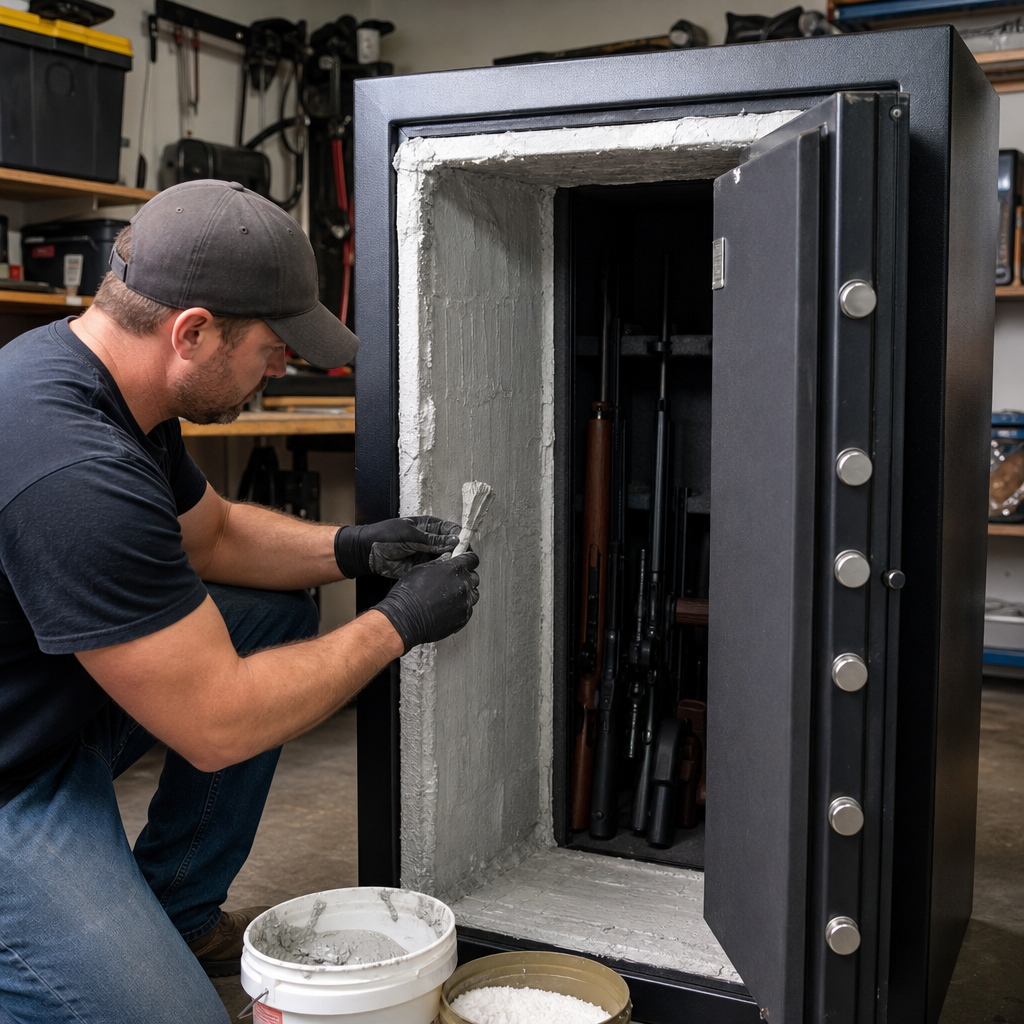
A gun safe’s fire rating is the amount of time its interior can stay below a critical temperature while the outside is exposed to extreme heat, and improving that rating with practical upgrades can make the difference between protected firearms and devastating loss. In plain terms, a “30-minute fire safe” is designed to keep contents under roughly 350 degrees Fahrenheit for about half an hour in a standardized test, while better-built models may claim 60, 90, or 120 minutes under higher temperatures. That number matters because wood stocks char, optics fail, lubricants break down, papers ignite, and ammunition packaging deteriorates long before a steel box itself visibly fails. I have worked on budget safes, older cabinets, and midrange residential security containers, and the same lesson keeps coming up: many owners focus on locks and ignore heat. For a sub-pillar topic like custom and DIY gun safe modifications, fire protection is the most consequential place to start because it affects every item stored inside, not just the safe shell.
DIY methods can improve a gun safe’s real-world performance, but they do not magically convert a thin steel cabinet into a laboratory-certified fire safe. That distinction is important. A manufacturer’s rating is based on controlled testing protocols, construction details, and repeatable measurements. Home modifications, by contrast, mainly reduce heat transfer, slow smoke intrusion, seal gaps, and manage interior humidity after a fire event. The most useful upgrades include adding non-combustible insulation, improving door seals with intumescent material, building an insulated exterior enclosure, reducing conductive heat bridges, and changing where and how the safe sits in a room. When these methods are chosen carefully, they can meaningfully extend the time before interior temperatures spike. This article serves as a hub for custom and DIY gun safe modifications by explaining what works, what does not, and how to prioritize improvements without compromising security, access, or warranty coverage.
How Fire Damages a Gun Safe and Why Ratings Vary
Fire protection starts with understanding how heat gets in. In house fires, a safe is attacked by three mechanisms at once: radiant heat from surrounding flames, convective heat from hot gases, and conductive heat through steel walls, the door frame, anchor bolts, and concrete contact points. Steel is strong but it is also an efficient conductor, which is why a single-wall cabinet heats rapidly. Better safes slow this process by creating thermal barriers with gypsum board, ceramic fiber, proprietary composite fills, and expanding door seals. They also use stepped door designs and thicker bodies to reduce direct flame paths. If you know where heat enters, your DIY plan becomes much more effective.
Ratings vary because test methods vary. Some companies use independent labs such as Intertek or ETL, while others rely on in-house testing. Common benchmarks involve exterior temperatures around 1200 to 1400 degrees Fahrenheit and an interior threshold near 350 degrees, because paper chars around 405 degrees and many finishes begin failing earlier. Fire ratings also depend on safe mass, door gap geometry, insulation thickness, and whether the test includes a cool-down period. Cool-down matters. In a real fire, the safe may continue heating internally after flames are out. Owners often see a safe survive the burn phase but lose contents during the soak period. That is why low-cost ratings can look good on paper yet disappoint in actual losses. Understanding these variables helps you judge where a DIY improvement can help and where basic construction limits remain.
Best DIY Fire Rating Upgrades for Budget and Midrange Safes
The highest-value upgrade for many budget safes is sealing the door perimeter with quality intumescent fire seal. This material expands when heated, helping block smoke and slow hot gas entry through the door gap. It is commonly used around fire doors and furnace enclosures, and high-temperature products from brands serving commercial construction are preferable to generic foam weatherstrip. Surface prep matters: degrease the frame, test door clearance, and use a seal size that does not interfere with locking bolt travel. A poorly chosen seal can prevent the door from fully latching, which creates a worse problem than the one you started with. When installed correctly, an intumescent gasket is one of the few affordable modifications that directly targets a major failure point.
Insulation is the next step, but the material choice is critical. Standard fiberglass batt insulation is not ideal inside a safe because it can slump, hold moisture, and offer limited resistance to direct high heat. Better DIY options include Type X drywall layers in an external enclosure, mineral wool boards, and ceramic fiber products rated for furnace or kiln applications. Of these, mineral wool is often the best balance of safety, cost, and accessibility for homeowners. It is non-combustible, dimensionally stable, and easier to work with than ceramic blanket. In several retrofit projects I have seen, the most practical method was not opening the safe body at all, but building a tight-fitting insulated surround that left ventilation and door swing clear. That approach avoids drilling into the safe shell and preserves structure.
| DIY Method | Main Benefit | Best Use Case | Primary Limitation |
|---|---|---|---|
| Intumescent door seal | Reduces smoke and hot-gas entry at the door gap | Budget safes with visible perimeter clearance | Must not interfere with boltwork or door closure |
| Mineral wool enclosure | Slows radiant and convective heat transfer | Safes in garages, utility rooms, or closets | Adds bulk and requires careful framing |
| Type X drywall wrap | Adds low-cost thermal mass and bound water protection | Exterior surround behind finish panels | Messy, heavy, and less durable if exposed |
| Ceramic fiber layer | High-temperature resistance in compact thickness | Advanced DIY retrofits with proper handling | Higher cost and stricter dust precautions |
External enclosures deserve more attention than they get. A simple framed alcove lined with Type X drywall and mineral wool can add meaningful delay before heat reaches the safe body. The principle is straightforward: create a sacrificial shell that absorbs heat first. Type X drywall contains chemically bound water that releases as steam under heat, slowing temperature rise. Mineral wool resists temperatures above 1800 degrees Fahrenheit and limits airflow in the cavity. For best results, keep the enclosure close to the safe without making hard contact on every side, because small air gaps can reduce conductive transfer. Leave enough clearance to open the door fully, anchor the safe to slab or structure, and avoid trapping moisture. This kind of enclosure is especially useful in garages, where flammable liquids and rapid fire growth are common.
Placement, Anchoring, and Room Design Changes That Improve Survival Time
Where the safe sits can matter as much as what the safe is made from. In post-fire inspections, corner placement against an exterior masonry wall almost always outperforms a garage-center installation next to fuel, solvents, lawn equipment, or a vehicle. Interior closets on lower floors usually expose the safe to less direct flame and less radiant loading than open rooms. Basements can be favorable for temperature moderation, though they introduce flood and humidity concerns. Avoid locations directly under lightweight truss roofs, because collapse can dump burning debris onto the safe and increase heat soak. In two-story homes, first-floor placement generally beats upstairs placement because fire intensity often increases as heat accumulates and structural failure progresses above.
Anchoring also influences fire performance. An unanchored safe can tip, deform its door opening, or end up exposed on more surfaces if debris shifts around it. Proper anchoring to concrete with rated wedge or adhesive anchors helps keep the safe upright and in the orientation its seals and door geometry were designed to handle. If the safe is bolted through the floor, remember that anchors and bolts become conductive heat paths, so use only the required number and avoid oversized metal plates that bridge heat into the interior. Some owners place a safe directly on bare concrete, which can help with stability and moderate some heat from below, but concrete can spall under intense fire or transfer moisture afterward. A thin non-combustible thermal break pad designed for heavy equipment can reduce conduction without compromising support if load capacity is verified.
Room design choices extend protection. Installing residential sprinklers, hardwired interconnected smoke alarms, and maintaining a clean zone around the safe often does more for contents survival than adding another cosmetic steel panel. Keep cardboard boxes, ammunition cans, solvents, gun cases, and dehumidifier packaging away from the safe exterior. Build shelving from steel rather than wood around it. If the safe sits in a closet, use a solid-core door and Type X drywall on the closet walls during renovation. Those changes lower fire exposure and buy response time for firefighters. This is one reason a hub on custom gun safe modifications should not stop at the safe itself. Effective fire protection is a system, not a gadget.
Materials, Tools, and Safety Practices for DIY Gun Safe Modifications
The right materials are non-negotiable. For enclosure work, use 5/8-inch Type X drywall, mineral wool boards sized for stud cavities, steel framing or kiln-dried lumber kept outside likely flame paths, fire-rated sealant at joints, and intumescent strips listed for door or penetration protection. For advanced builds, ceramic fiber blanket can supplement hot spots, but it should be handled with gloves, long sleeves, eye protection, and a respirator suitable for fine particulates. Adhesives matter too. Standard construction adhesive can fail early in heat, produce smoke, or release odor inside the safe. Use products with published temperature performance and compatibility with steel and masonry substrates. If you modify interior shelving, choose powder-coated steel, aluminum with caution around heat conduction, or hardwood sealed lightly; avoid foam-heavy organizers that can off-gas or burn.
Tool selection should reflect the safe’s role as a security device. Any cutting, drilling, or welding on the shell risks damaging relockers, hard plates, lock wiring, or the factory’s fire liner. On electronic-lock safes, even shallow fasteners can hit cable runs or insulation pockets. Unless you have the manufacturer’s drawings or direct guidance, do not penetrate the body or door to add insulation. Safer methods include freestanding surrounds, adhesive-applied seals on non-moving frame surfaces, and external barrier panels. If you must remove the interior paneling to inspect construction, photograph every step, disconnect power to accessories, and verify that boltwork remains unobstructed before reassembly. I have seen owners improve insulation only to discover that a shelf bracket blocks a relocker plate or pinches a keypad harness. A modification that undermines lock reliability is not an upgrade.
Ventilation and corrosion control are equally important. Better fire sealing can increase normal humidity inside the safe, especially in basements and garages. After any fire-oriented upgrade, monitor the interior with a hygrometer and maintain relative humidity around 45 to 50 percent using a GoldenRod, rechargeable desiccants, or a small compressor-based room dehumidifier outside the safe. Fire resistance and rust prevention are linked. Trapped moisture ruins bluing, optics coatings, documents, and stocks long before any fire occurs. Every modification should be evaluated for its effect on daily storage conditions, not just rare disaster scenarios.
What DIY Methods Cannot Do and When to Upgrade the Safe Instead
DIY improvements have real limits. They cannot replicate the engineered door geometry, composite wall construction, and validated testing of a purpose-built high-fire safe. They also cannot fix thin steel that warps quickly, poor weld continuity, weak hinges, or a body that leaks around every seam. If your safe is essentially a residential security container with decorative drywall and an optimistic label, you may gain incremental protection from seals and an enclosure, but you should not assume it now performs like a premium safe from AMSEC, Fort Knox, Liberty’s higher lines, Browning’s better-insulated models, or a true burglary-fire unit built with poured fill. The cost-benefit line matters. Once your retrofit budget approaches a significant fraction of a better safe, replacement becomes the smarter long-term move.
A practical decision framework is simple. Upgrade with DIY methods when the safe already has decent steel, functional locking hardware, and enough value in contents to justify layered protection. Replace the safe when the shell flexes noticeably, the door gap is inconsistent, rust is active inside seams, lock reliability is questionable, or the unit lacks anchor integrity. Also replace if you store irreplaceable documents, suppressor paperwork, rare firearms, or high-end optics whose value exceeds the safe by a wide margin. The goal is not to chase a label; it is to create a credible time buffer during the kind of residential fire you are most likely to face. For many owners, the best path is a hybrid: improve placement and room construction now, add a door seal and enclosure this season, and plan for a higher-rated safe when budget allows.
The most effective DIY methods to increase the fire rating of your gun safe are the ones that address real heat paths without compromising security: better door sealing, non-combustible external insulation, smarter placement, stable anchoring, and room-level fire protection. Those upgrades work because they slow smoke entry, reduce radiant and convective loading, and buy time during the burn and cool-down phases that destroy contents. They are especially valuable for owners of budget and midrange safes who want practical gains without risky shell modifications. At the same time, no retrofit should be oversold. A homemade enclosure can help substantially, but it does not equal a certified, purpose-built fire safe tested under controlled conditions.
As the hub for custom and DIY gun safe modifications, this topic connects directly to related decisions about interior organization, lighting, dehumidification, anchor systems, and lock upgrades. Fire resistance is not an isolated feature; it affects where the safe belongs, what materials you put around it, and how you preserve firearms over decades. Start with the high-return improvements: clear combustibles, move the safe to a better location, add a listed intumescent seal, and consider a mineral-wool-and-Type-X surround. Then assess whether your current safe is worth further investment. If you want the strongest result, combine DIY upgrades with a long-term plan to step into a better fire-rated unit. Review your setup this week and make one concrete improvement before the next season raises your risk.
Frequently Asked Questions
What does a gun safe’s fire rating actually mean, and how should I interpret 30-, 60-, or 90-minute claims?
A gun safe’s fire rating is a measure of how long the interior is expected to stay below a damage threshold while the exterior is exposed to extreme heat. In most discussions, that critical interior temperature is around 350 degrees Fahrenheit, because paper, wood stocks, optics adhesives, lubricants, and other stored valuables can begin to suffer major damage above that point. So when you see a “30-minute” rating, it generally means the safe is intended to keep contents below that threshold for roughly half an hour during a standardized fire test. A 60-, 90-, or 120-minute rating suggests greater resistance, but the exact meaning depends heavily on how the manufacturer tested it.
That last point is important because not all fire ratings are equal. Some are based on independent laboratory testing, while others come from in-house estimates. Test temperatures, heating curves, and pass/fail criteria can vary. A safe tested at one temperature profile may perform differently in a real house fire, where heat can build unevenly and structural collapse, water from firefighting efforts, and prolonged smoldering all add stress. In practical terms, a higher fire rating is generally better, but it should be viewed as one layer of protection rather than a guarantee.
For DIY improvement purposes, understanding the fire rating helps set realistic goals. Home upgrades usually do not “certify” a safe to a new official rating, but they can improve thermal resistance, reduce heat transfer, and buy valuable time. That extra time may be the difference between contents remaining intact and suffering irreversible damage. The smartest way to interpret fire ratings is as a baseline: know what your safe was designed to do, then use sensible upgrades and placement strategies to improve performance without assuming the safe has become equivalent to a factory-built, independently tested fire-rated model.
What are the most effective DIY methods to increase the fire resistance of a gun safe?
The most effective DIY improvements focus on slowing heat transfer and sealing vulnerable gaps. One common approach is adding layers of fire-resistant drywall, often Type X gypsum board, around the exterior of the safe or inside a surrounding enclosure. Gypsum contains chemically bound water that helps absorb heat as it is driven off during a fire, which is one reason it is widely used in fire-rated wall assemblies. Building a snug but ventilated fire-resistant cabinet or closet around the safe can be more practical than trying to alter the safe’s shell itself. This strategy adds thermal mass and creates another barrier the fire must overcome before heat reaches the safe body.
Another valuable upgrade is improving the door seal. Many higher-end fire safes use intumescent seals that expand when exposed to heat, helping block smoke and hot gases from entering around the door perimeter. If your safe does not have an effective expanding seal, adding a high-quality fire-rated gasket can help reduce one of the most common weak points. This should be done carefully, because poor installation can interfere with door closure, locking alignment, or moisture control. The goal is a tight, even seal that helps resist heat and smoke without compromising normal operation.
Safe location also makes a major difference and is often the best “DIY method” because it costs little and improves results immediately. Placing a safe on a concrete slab in a lower level, away from exterior walls, windows, garages, and rooms with high fuel loads can reduce exposure to the hottest parts of a fire. Avoid putting a safe where burning debris from a collapsing structure is likely to pile on top of it. If possible, install it in a corner with fire-resistant surrounding materials such as masonry or multiple layers of drywall. Together, these practical upgrades can improve survivability far more than cosmetic modifications that do little to slow heat.
Can I line the inside of my gun safe with fireproof materials to improve its rating?
You can add fire-resistant materials inside a gun safe, but this approach has limits and must be done thoughtfully. Interior liners such as thin fire-resistant board, ceramic fiber insulation in appropriate protected applications, or additional paneling may slow some radiant and conductive heat transfer, but they also reduce usable space and can interfere with shelving, door pockets, and firearm access. More importantly, the interior of a safe is not usually the best place to make major fire upgrades, because once the safe’s steel body becomes extremely hot, the internal temperature can still rise significantly even with added lining.
There is also a safety and moisture consideration. Some high-temperature insulating products are not ideal for enclosed personal storage unless they are properly encapsulated, because they may shed fibers, hold moisture, or react poorly over time. Fire-resistant drywall and similar materials can also release moisture during heat exposure, which is helpful in a fire but may contribute to rust concerns in normal conditions if the safe is not managed correctly. If you add any lining, you should pair it with proper humidity control such as a dehumidifier rod or desiccant system, and confirm that the modification does not obstruct lockwork, relockers, hinges, or bolt movement.
In most cases, improving the environment around the safe is more effective than simply lining the interior. A surrounding enclosure, upgraded door seal, and better installation location usually provide more meaningful benefits. If you do add internal fire-resistant layers, think of them as a supplemental measure rather than a complete solution. They may help protect documents, optics, and heat-sensitive accessories for a longer period, but they do not transform a lightly built safe into a true high-performance fire safe. For best results, combine modest internal improvements with external barriers and smart placement.
Does building a fire-resistant enclosure around a gun safe really help, and how should it be done?
Yes, building a fire-resistant enclosure around a gun safe can be one of the most effective DIY upgrades because it addresses the problem at the source: reducing how quickly intense heat reaches the safe. A well-built enclosure made with fire-rated wall construction, such as multiple layers of Type X drywall over wood or steel framing, can create an additional buffer zone that slows temperature rise. If the safe sits inside a closet or alcove built with fire-resistant materials, the fire must first breach that assembly before fully attacking the safe itself. That delay can be extremely valuable in a fast-moving residential fire.
The most effective enclosures are designed with both fire resistance and practicality in mind. The safe should remain accessible, properly anchored, and positioned so that the surrounding materials do not interfere with door swing, ventilation, or maintenance. Many homeowners use a small dedicated closet lined with one or two additional layers of Type X drywall, carefully taped and finished to reduce openings. The surrounding structure should be as continuous as possible, because gaps, penetrations, and unsealed seams allow hot gases to enter quickly. If the enclosure includes a door, that door becomes a critical weak point, so using a solid, well-fitted, fire-rated door assembly is ideal.
Placement within the enclosure matters too. If possible, leave enough clearance so the safe is not directly touching highly heat-conductive materials that could transfer heat rapidly. Anchoring the safe to a concrete floor inside the enclosure is preferable. Keep flammable storage out of that same closet, because paint, ammo packaging, solvents, and cleaning chemicals can increase the local fire load. A properly built enclosure does not create an official new fire rating for the safe, but it can absolutely improve real-world performance by slowing heat exposure, limiting direct flame contact, and reducing the rate at which the safe interior approaches damaging temperatures.
Are there any DIY fire-rating upgrades I should avoid because they are ineffective or unsafe?
Yes. Some popular “upgrades” sound useful but offer little real protection or create new risks. One of the most common mistakes is wrapping the safe in generic insulation, foam board, moving blankets, carpet, or decorative wood cabinetry without understanding how those materials behave in heat. Many of these products are combustible, produce toxic smoke, or actually trap heat against the safe once they ignite. A gun safe should never be surrounded by materials that increase the fire load or accelerate burning in the immediate area.
Another poor choice is using sealants, adhesives, or aftermarket gaskets that are not rated for high-temperature applications. In a fire, low-quality materials can fail early, off-gas, melt into gaps, or interfere with the door’s ability to close and latch properly. Similarly, drilling into the safe body to add materials, hardware, or panels can compromise burglary resistance, damage the factory fire barrier, void warranties, and create direct thermal bridges. Any modification near the lock, relockers, hinges, or boltwork should be approached with extreme caution, because even minor mistakes can affect both security and function.
Finally, avoid relying on DIY changes as a substitute for insurance, documentation, and realistic expectations. Even a well-upgraded safe may not survive a severe, long-duration structure fire or a collapse scenario without some loss. The goal of DIY fire improvements is to add time and improve odds, not to make the safe invincible. The smartest approach is to use proven fire-resistant materials, focus on surrounding protection and placement, maintain humidity control, and avoid any modification that adds combustible material or interferes with the safe’s normal operation. When in doubt, conservative upgrades and sound installation practices are far better than flashy modifications that do not hold up under real fire conditions.