Installing a gun safe in your home requires careful planning and execution to ensure it’s stable and secure. In this article, we’ll guide you through the basic installation techniques, focusing on how to level the surface for your gun safe.
1. Preparing for Installation
Before beginning the installation, it’s important to prepare. This includes gathering necessary tools like a power drill, anchor bolts or screws, a wrench or socket set, safety goggles, and a spirit level. Additionally, ensure the safe’s path from delivery to its final location is clear and consider using a dolly for transport, especially for heavier models.
2. Choosing the Right Location
Finding a suitable area with a smooth and stable floor is crucial. For safes over 500 pounds, a concrete floor is usually best, as it provides stability and the ability to secure the safe effectively. Be mindful of the levelness of the floor; an uneven surface can cause problems later on.
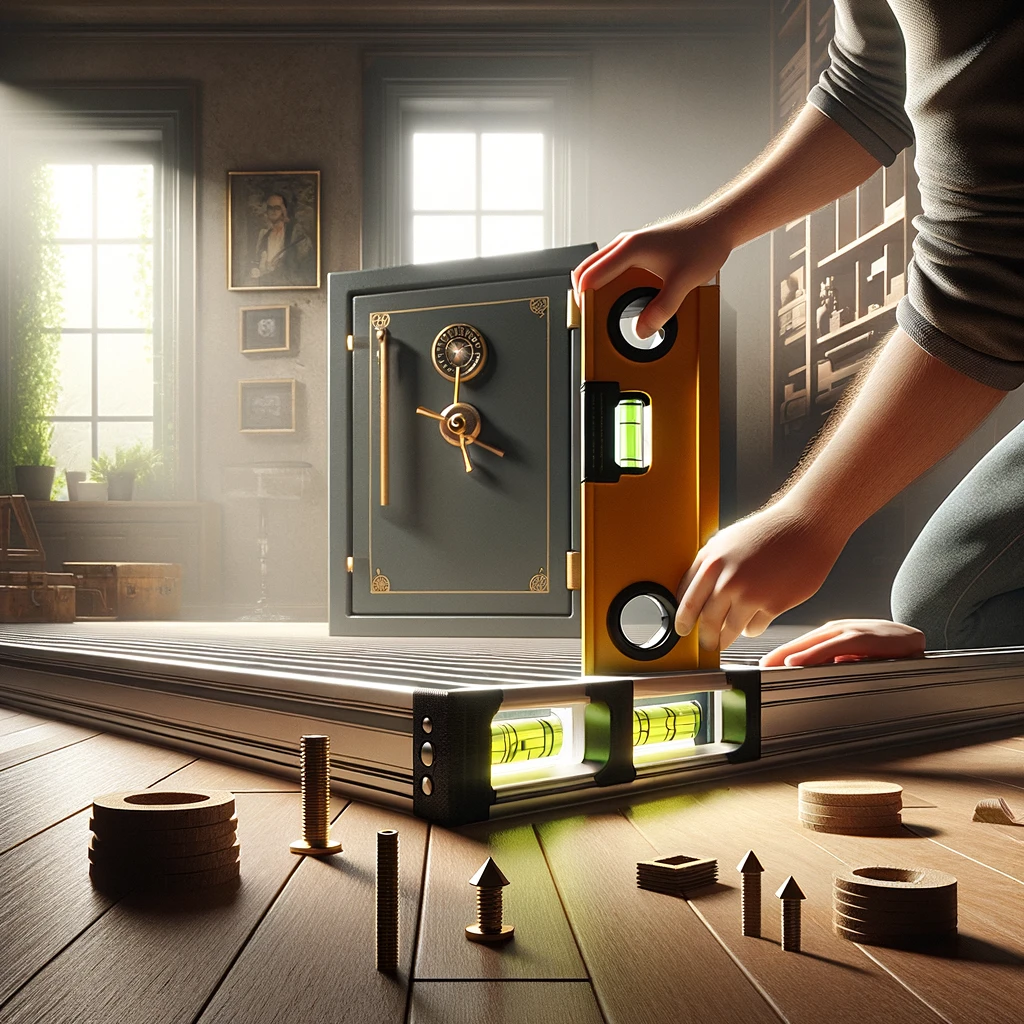
3. Leveling the Surface
Once the safe is in its desired position, it’s vital to check that it’s perfectly level. Use a spirit level for this purpose. If you find any unevenness, it can usually be corrected with shims. This step is crucial for the safe’s lock mechanism, door alignment, and overall stability.
4. Anchoring the Safe
- On Concrete Floors: Mark the floor through the safe’s pre-drilled holes, drill into the concrete, and then use concrete anchors to secure the safe.
- On Wooden Floors: Locate the floor joists with a stud finder, mark where the safe aligns with the joists, and drill pilot holes before securing the safe with heavy-duty wood screws or bolts.
- On Tile or Stone Floors: These surfaces can support a gun safe if the weight is evenly distributed. However, anchoring directly to these floors is often not recommended due to the risk of cracking the tiles. Instead, consider wall anchoring.
5. Ensuring Safety and Stability
After anchoring, double-check the safe’s stability by gently trying to move it. If there’s any movement, re-tighten the anchors. Regularly inspect the anchors over time, especially if the safe is accessed frequently.
6. Professional Installation vs. DIY
While DIY installation can be cost-effective and offers personal satisfaction, it also carries the risk of improper installation and physical strain. Professional installation, although more costly, provides expertise, efficiency, and safety. Choose based on your comfort level, the safe’s size, and the complexity of the installation process.
7. Additional Considerations
- Handling the Safe: Ensure the safe is transported upright, with the door locked shut. Check for any damages upon delivery.
- Moisture Barrier: Consider placing a scrap carpet or mat under the safe to prevent corrosion.
- Regular Maintenance: Conduct regular floor maintenance around the gun safe to avoid impairment to its structural integrity.

8. Handling and Moving the Safe
The handling and moving of your gun safe is a critical step. If you’re doing it yourself, be sure to:
- Use a heavy-duty appliance dolly, preferably one rated for the safe’s weight. For stairs, consider a stair-climbing dolly.
- Check for any damages upon arrival and report them immediately.
- Move the safe upright, with the door locked. Do not move the safe with the door open or while it’s lying on its back.
- Remove the safe from the pallet before moving it. Secure the safe with straps or ropes to the dolly.
- Do a dry run with the empty box (if available) to ensure it will fit through doorways and staircases.
9. Floor Protection and Moisture Barrier
Placing a moisture barrier underneath the safe is an important step, especially for those living in humid environments or with safes installed on carpet or wood flooring. A non-flammable material like a rug or heavy fabric can protect the floor from scratches and moisture.
10. Safe Door Adjustments
Post-installation, it’s not uncommon for the safe door to need adjustments:
- Check for any extra play in the door and tighten as necessary, ensuring not to overtighten as this can damage the locking mechanism.
- A properly adjusted door should open and close smoothly without excessive force.
11. Safety Precautions
Throughout the installation process, prioritize safety:
- Always wear safety goggles when drilling.
- Use gloves to protect your hands from sharp edges and debris.
- Ensure the area is free of tripping hazards and adequately lit.
12. Regular Inspection and Maintenance
It’s important to regularly inspect and maintain your gun safe:
- Check the level and stability periodically, especially after any seismic activity.
- Inspect and retighten anchoring bolts as necessary.
- Clean and lubricate the lock mechanism according to the manufacturer’s instructions.
13. Customization and Optimization
Consider additional customization for your gun safe:
- Install internal lighting for better visibility.
- Consider dehumidifiers if moisture is a concern.
- Organize the interior to maximize space and ensure quick access to contents.
14. Avoiding Common Mistakes
Be mindful of common installation mistakes:
- Not anchoring the safe, which can make it easier to move or pry open.
- Choosing an incorrect location that’s too visible or inaccessible in an emergency.
- Ignoring the safe’s weight limits when placing it on upper floors or unsupported surfaces.
15. Legal Compliance and Insurance
Lastly, it’s important to comply with local laws and regulations regarding firearm storage. Also, consider informing your insurance provider about the installation of a gun safe, as it might impact your policy or coverage.
In Summary
Installing a gun safe requires meticulous planning, proper tools, and attention to detail. Whether you choose to DIY or hire a professional, understanding these steps and considerations will help ensure a secure and functional installation. A well-installed gun safe not only secures your firearms but also contributes to the overall safety of your home.
Remember, a properly installed and maintained gun safe is a key component of responsible firearm ownership.