
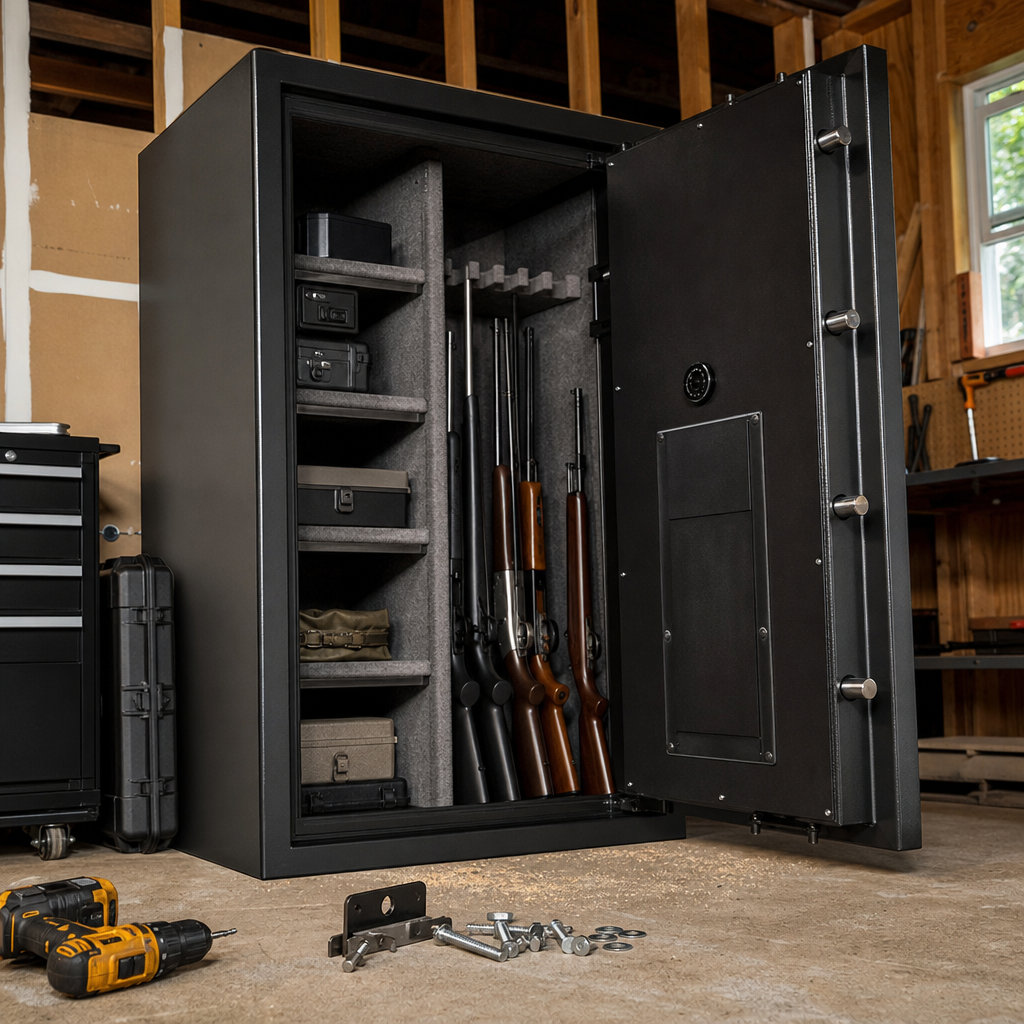
DIY projects for making a gun safe more theft-resistant can dramatically improve real-world security, especially when the factory setup leaves obvious weak points. In practical terms, theft-resistant means harder to pry, tip, cut, remove, or open quickly with common burglary tools. That distinction matters because most residential gun safes are not true high-security vaults; many are residential security containers designed to delay entry, not defeat a determined attacker forever. After working around safes in homes, workshops, and small firearm rooms, I have seen the same pattern repeatedly: the safe itself may be decent, but installation, anchoring, surrounding structure, and simple upgrades decide whether a thief gives up or gets inside.
Custom and DIY gun safe modifications are popular because owners want stronger protection without immediately replacing an expensive safe. The best projects focus on the attack methods burglars actually use. In a smash-and-grab burglary, thieves usually have only a few minutes. They try to rock the safe onto its back, attack thin side panels with pry bars, remove exposed hinge pins if the design allows, or haul the entire unit away for later attack. A safe that is bolted correctly, boxed into framing, fitted with tighter door-side reinforcement, and supported by monitored alarms becomes a much less attractive target. That is the core idea behind making a gun safe more theft-resistant: increasing time, noise, effort, and risk.
This hub article covers the most effective custom and DIY gun safe modifications, how they work, where they help, and where they can backfire. It also points toward the broader gun safes and safety topic by connecting physical hardening with placement, humidity control, fire considerations, lock maintenance, and household access control. If you are deciding where to start, begin with the basics: anchor the safe to concrete or structural wood, reduce pry access around the door and sides, upgrade visibility and alerts, and evaluate whether your current safe body thickness and lock design justify further investment. Good DIY work does not replace smart product selection, but it can significantly improve theft resistance when done carefully.
Start with realistic threat assessment and safe classification
The first step is understanding what you own. Many products sold as gun safes are classified as Residential Security Containers under UL 1037 rather than burglary safes rated under TL standards. That does not make them useless, but it does mean the steel body may be relatively thin, often using 12-gauge to 14-gauge sheet in entry-level models. In my experience, owners overestimate steel thickness and underestimate how much leverage a long pry bar can generate against a lightly anchored cabinet. Before modifying anything, confirm door construction, body gauge, hinge style, boltwork direction, lock type, and manufacturer anchoring points. The answer determines whether DIY reinforcement makes sense or whether money is better spent upgrading the entire unit.
Threat assessment should match your environment. A second-floor closet in a suburban home has different risks than a garage safe visible from the driveway. If theft is the main concern, focus on removal resistance and pry resistance. If unauthorized access by children is the concern, lock reliability and user discipline matter more. If fire is the main concern, some structural modifications can interfere with expanding fire seals or compromise drywall-based fire liners. This is why smart safe modification starts with a simple question: how would someone attack this exact safe in this exact room? Walk around it, measure clearances, identify exposed sides, and assume a burglar has a pry bar, cordless angle grinder, moving blanket, and hand truck.
Anchor the safe correctly to prevent tipping and removal
If a gun safe is not anchored, that is the first problem to solve. Unanchored safes are routinely tipped onto their backs so the door frame can be attacked with body weight and long pry bars. Smaller units are sometimes carried out whole. The most effective DIY upgrade for theft resistance is proper anchoring into concrete slab or substantial structural framing. On concrete, use manufacturer-approved anchor holes with quality wedge anchors or concrete screw anchors sized to the hole diameter and safe weight. Common choices include 3/8-inch or 1/2-inch anchors, but the right size depends on the safe and substrate. Tighten evenly, use hardened washers where appropriate, and verify the base sits flat so the shell is not twisted.
For wood floors, anchoring requires more care. Lag screws into subfloor alone are not enough. You want to hit floor joists or install steel backing plates below the floor to spread load. In upstairs installations, I prefer locating joists, drilling precisely, and using through-bolts with large washers or steel plates when access from below is possible. This is stronger than relying on lag threads in wood. If the safe has a thin internal floor liner, add a steel plate inside at anchor points to reduce pull-through risk. After installation, test movement at the top corners. A properly anchored safe should not rock, shift, or lift perceptibly under force. That single project can turn a quick theft into a noisy, time-consuming job.
Use wall, closet, and alcove framing to reduce pry access
One of the most effective custom gun safe modifications is not on the safe at all. It is in the surrounding structure. Burglars need space to swing tools and insert pry bars. By recessing a safe into a closet corner, framing tight side walls, or building a finished alcove around exposed panels, you reduce leverage opportunities dramatically. I have seen ordinary safes become far harder to attack simply because the hinge side, one body side, and the top were boxed in with stud framing and layered sheathing. A pry bar is much less useful when there is no room to work and no exposed seam to attack.
Good enclosure design still respects service needs. Leave enough clearance for door swing, lock service, dehumidifier cords, and inspection. Avoid trapping moisture. If the safe uses external hinges, confirm the door can open fully before building a side wall. For higher resistance, line enclosure walls with plywood under drywall, or use steel sheet behind finish surfaces near likely pry points. The goal is not to make a secret room. The goal is to deny access to vulnerable edges and make tool placement awkward. This strategy works especially well for garage safes, basement safes, and closet installations where a custom surround can be integrated without advertising the safe’s location.
Reinforce weak points without damaging lockwork or fire lining
DIY reinforcement can help, but it must be targeted. Many owners consider welding extra steel plate to the door or body. That can work on some steel safes, yet it also risks warping panels, damaging internal fireboard, affecting fit, and voiding warranties. A better approach is bolt-on reinforcement where feasible. For example, an internal steel backing plate near anchor points, relocker zones, or thin lock-mount areas can improve resistance without heating the shell. Some owners add formed steel channel around vulnerable door-frame areas, but clearances must be exact. If the added metal interferes with bolt throw, gasket compression, or lock spindle alignment, you can create a reliability problem that is worse than the original weakness.
The most common safe weak points are the body sidewalls, the door gap on the opening side, and exposed top surfaces on short safes. On lighter units, adding external steel skin to exposed sides can increase attack time against pry and cut tools, especially when combined with an enclosure that conceals fasteners. However, added steel is heavy, and weight concentration matters on wood floors. Reinforcement should also be balanced against cost. If you are adding several hundred pounds of steel to a thin-body container, the smarter long-term choice may be replacing it with a heavier model built from thicker plate. Modify where the upgrade meaningfully changes the attack profile, not just where it looks impressive.
Upgrade locks, relocking features, and access controls
Lock upgrades can improve security and reliability, but they are not the first theft-resistance project to prioritize if the safe can still be tipped over or carried away. Once anchoring and placement are handled, evaluate the lock. Quality mechanical locks from Sargent and Greenleaf or La Gard have long track records. Electronic locks can also be excellent when sourced from reputable manufacturers and maintained properly. The key is choosing a model with proven durability, correct installation, and if appropriate, features such as dual control, time delay, penalty lockout, or audit capability for shared-access environments. Cheap keypad swaps bought only for convenience are often a downgrade.
Relockers deserve attention. Many better safes include glass relockers or mechanical relocking devices that fire when the lock area is punched or drilled. If your safe lacks them, retrofitting may be possible, but this is usually a specialist job because incorrect work can disable the safe or leave it vulnerable. DIY owners can still improve access control in simpler ways: replace default codes immediately, use long random combinations, shield keypad entry from cameras or onlookers, and keep override keys secured off-site if the safe uses them. For homes with teenagers, contractors, cleaners, or temporary guests, disciplined code management is often more important than adding another layer of steel.
Add detection, concealment, and layered deterrence
A theft-resistant gun safe works best as part of a layered system. Burglars avoid delay when alarms, lights, cameras, and uncertain room access increase exposure. In practice, some of the most effective DIY improvements are low-cost electronic additions. Place a door contact or tilt sensor on the safe or enclosure. Add a vibration sensor if false alarms are manageable. Use a monitored alarm panel or at least a smart sensor that pushes immediate notifications. Position a camera to watch the approach path rather than the keypad itself, preserving code privacy while recording unauthorized access. Motion-activated lighting in garages and basements also changes burglar behavior.
| DIY upgrade | Main threat addressed | Typical benefit | Common mistake |
|---|---|---|---|
| Concrete anchoring | Removal and tipping | Stops quick carry-out and pry leverage | Using undersized anchors or weak slab edges |
| Closet or alcove enclosure | Pry attacks | Reduces tool access to sides and door gaps | Blocking door swing or ventilation |
| Internal steel backing plates | Anchor pull-through and local attacks | Strengthens thin sheet areas | Interfering with interior layout or boltwork |
| Alarm contacts and tilt sensors | Undetected tampering | Creates fast notification and deterrence | Poor sensor placement causing nuisance alerts |
| Concealment cabinetry | Target selection | Reduces discovery and slows planning | Making the concealment obvious or fragile |
Concealment is useful when done subtly. A safe hidden behind cabinetry, in a finished closet, or behind a non-obvious storage wall is less likely to be targeted during a short burglary. The limitation is important: concealment is not a substitute for anchoring and hardening. If discovered, a weak safe remains weak. Also avoid decorative concealment that screams hidden compartment. Clean, ordinary built-ins and standard closet finishes are more credible than theatrical secret doors in most homes. The best layered setup combines restrained concealment, solid anchoring, restricted tool access, and immediate alerting so the attacker faces uncertainty from the first minute.
Know the limits of DIY work and when replacement is smarter
Not every safe justifies extensive modification. If the door fit is poor, the body steel is very thin, weld quality is inconsistent, or the lock mounting area is weak, adding accessories may not meaningfully change the outcome. I have seen owners spend heavily on lights, organizers, and cosmetic panels while ignoring the fact that the container could be peeled open with basic tools once laid down. A practical decision rule is simple: if your planned modifications approach a large fraction of the cost of a better-built safe, compare total cost against replacement. Features worth paying for in a higher-grade unit include thicker plate body construction, more robust door edges, integrated relockers, better boltwork support, and documented test ratings.
DIY work also has legal, insurance, and warranty implications. Drilling new holes, welding the shell, or changing lock components may void manufacturer support. Some insurers care about how firearms are stored, especially after theft. Follow local laws, manufacturer instructions, and professional advice when modifications affect lock integrity or structural loading. The best outcome is a gun safe that resists common burglary methods, remains reliable in daily use, and still supports the rest of your firearm safety plan. Use this hub as your starting point for custom and DIY gun safe modifications, then build methodically: secure the safe, control tool access, strengthen weak points where it matters, and add detection. If your current safe cannot be made meaningfully stronger, let that finding guide your next upgrade.
The main benefit of these projects is straightforward: they buy time, create noise, and increase the chance that a thief abandons the attempt before gaining access. That is the standard a homeowner should aim for. Start with an honest inspection of your safe and room, fix the biggest weakness first, and document every improvement as part of your broader gun safes and safety plan. Then move to the next article in this subtopic and choose the project that closes your most obvious gap.
Frequently Asked Questions
What DIY upgrades make a gun safe more theft-resistant without replacing the entire safe?
The most effective DIY improvements usually focus on slowing down the most common smash-and-grab attack methods: tipping, prying, dragging, and quick access to weak mounting points. In many homes, the biggest upgrade is properly anchoring the safe to a concrete slab or to substantial structural framing, because an unanchored safe can often be tipped onto its back and attacked with better leverage. Once a safe is immobilized, it becomes much harder for a burglar to peel the door, attack the sides, or simply remove the whole unit for later opening. Just as important is reinforcing the installation area itself. Building a tight alcove around the safe, adding side wall obstructions, or recessing the unit into a closet or corner can reduce pry-bar access and limit swing room for tools.
Other useful DIY projects include improving the hardware and concealment around the safe rather than modifying the lock body or internal mechanism. For example, upgrading anchor hardware, adding heavy backing plates where appropriate, reinforcing subfloor installations, and improving the surrounding structure can all raise the effort required to defeat the setup. Some owners also add anti-tip barriers, create tighter cabinetry around the safe, or install security layers such as motion lighting, alarm contacts, or cameras that increase the likelihood of detection. The key point is that theft resistance is usually improved more by strengthening the installation and environment than by trying to turn a residential safe into a true vault. A well-mounted, hard-to-access safe in a constrained location is far more resistant to opportunistic burglary than the same model sitting loose in an open garage.
Is bolting a gun safe to the floor really necessary, and what is the best way to do it?
Yes, bolting a gun safe down is one of the highest-value upgrades you can make, because it addresses one of the most common and realistic burglary scenarios: removal or tipping. A surprising number of residential safes can be compromised much more easily once they are laid on their back or side, where the attacker can use body weight and long pry bars more effectively. If the safe is not anchored, thieves may also use dollies, straps, or multiple people to remove it entirely and open it later in a more private location. Proper anchoring changes that equation by forcing the attack to happen on site, under time pressure, noise, and risk of discovery.
The best anchoring method depends on the floor structure. Concrete is generally the strongest option, using appropriately sized concrete anchors installed according to the safe manufacturer’s guidance and the anchor manufacturer’s specifications. On wood-framed floors, success depends heavily on tying into strong structural members rather than just thin subfloor material. In some cases, a reinforced platform, blocking between joists, or steel backing plates may be used to distribute load and improve pull-out resistance. Whatever the surface, the installation should be precise, tight, and checked for movement after fastening. A poorly anchored safe can still shift, which undermines theft resistance. This is also one of those projects where following the safe manufacturer’s instructions matters, because anchor locations, hole sizes, and load assumptions vary. If there is any uncertainty about slab quality, framing strength, or load-bearing capacity, professional input is worth considering.
Where should I place a gun safe in the house to make it harder to steal or pry open?
Placement has a major impact on theft resistance, and in many cases it matters almost as much as the safe model itself. The best locations usually combine concealment, structural support, and restricted tool access. A ground-floor location on concrete is often ideal because it simplifies anchoring and supports the safe’s weight without stressing upper-floor framing. Corner placement is also helpful, especially when the safe is positioned so one side and the rear are tightly constrained by walls. This reduces the working room available for pry bars and makes it harder to attack vulnerable seams. Closets, utility rooms, and built-in enclosures can be especially effective if they limit visibility and keep the safe from being immediately accessible during a rushed break-in.
By contrast, open garage placement, highly visible basement placement, or installation in the middle of a room often gives a burglar too much room to work. A safe that can be approached from all sides is easier to tip, pry, and inspect. It is also wise to think beyond simple visibility. Consider whether the path to the safe gives thieves room to use a dolly, whether doors and hallways help or hinder removal, and whether the surrounding materials could be exploited during an attack. Good placement also supports faster detection; if the area can be protected by alarms, cameras, or occupancy patterns, that adds another layer of resistance. The most theft-resistant setup is usually one where the safe is hard to find, hard to access, hard to move, and hard to attack with full leverage.
Can I reinforce the area around my gun safe to reduce pry attacks and removal attempts?
Yes, and this is one of the smartest DIY approaches because it targets the real-world weaknesses of many residential security containers. Rather than trying to rebuild the safe itself, you can make it significantly more difficult to get tools into the right positions. For example, creating a built-in surround, framing tight side clearances, or recessing the safe into a closet or alcove can reduce access to the door edges and body seams where pry attacks are most effective. Even a few inches less tool clearance can matter, because burglars often rely on speed and leverage, not precision. If they cannot get a long bar into place or cannot swing a hammer freely, the attack becomes slower, louder, and less attractive.
Reinforcing the surrounding area can also help prevent removal. A thoughtfully designed installation may limit dolly access, block strap routing, or prevent the safe from being tilted far enough to maneuver out. Some owners build cabinetry or wall structures around the unit, but the design needs to respect door operation, ventilation concerns where relevant, and the weight of the safe. The goal is not decorative trim alone; it is controlled access and reduced attack geometry. It is also important not to create a setup that traps moisture, interferes with lock maintenance, or violates the safe manufacturer’s installation recommendations. Done correctly, structural reinforcement around the safe can provide a meaningful theft-resistance gain by denying thieves the open workspace they typically want.
Are there any limitations or safety considerations I should understand before doing DIY theft-resistance projects on a gun safe?
Absolutely. The first and most important limitation is that most residential gun safes are designed to delay entry, not to function as true high-security vaults. DIY upgrades can improve resistance to common burglary methods, but they do not make a thin-walled container invulnerable. That realistic mindset is essential, because it helps you invest in upgrades that actually matter, such as anchoring, placement, concealment, and detection, instead of cosmetic modifications that add little real security. It is also critical to avoid changes that weaken the safe, interfere with the lock, or void the manufacturer’s warranty. Drilling new holes, altering door structure, or modifying fire insulation without guidance can create new problems while offering limited theft-resistance benefit.
There are also practical installation concerns. Gun safes are extremely heavy, and moving or positioning one incorrectly can damage floors, crack tiles, strain framing, or cause serious injury. Anchoring into concrete or structural members requires the correct tools, hardware, and drilling technique. Moisture management matters as well, especially in garages, basements, and exterior-adjacent walls, because rust and condensation can affect both the safe and its contents over time. Finally, security should be approached as a layered system. A safe performs better when paired with alarm monitoring, good doors and locks, lighting, surveillance, and disciplined access control. DIY projects can dramatically improve theft resistance, but the best results come from understanding the safe’s real role: buying time, increasing effort, and making your home a harder target than the next one.