A temperature-control system in your gun safe protects firearms, optics, documents, ammunition packaging, and wood stocks from the slow damage caused by heat swings, trapped humidity, and stagnant air. In practical terms, temperature control means managing three linked conditions inside the safe: air temperature, relative humidity, and dew point. If the steel shell cools faster than the air inside, moisture condenses on metal surfaces; if humidity stays elevated for weeks, bluing, springs, screws, and scope internals begin to suffer. I have installed these systems in compact closet safes, large fire-rated safes in garages, and modular vault rooms, and the pattern is always the same: owners focus on theft resistance, then discover climate is the real day-to-day threat. This guide explains how to install a temperature-control system correctly, when to use heating rods, desiccants, dehumidifiers, insulation upgrades, circulation fans, and smart sensors, and how this project fits into broader custom and DIY gun safe modifications.
Most gun owners searching for a gun safe temperature-control system are really asking four questions: what problem am I solving, what equipment should I buy, how do I install it safely, and what other upgrades should I consider while the safe is empty. The answers depend on where the safe lives. A safe in a conditioned bedroom may only need a GoldenRod-style heater and a hygrometer. A safe in a garage, basement, outbuilding, or coastal climate may need heat, air circulation, sealed cable routing, external power planning, and continuous monitoring. Good temperature control is not about making the interior warm like a room heater. It is about keeping the inside slightly warmer and more stable than the surrounding environment so moisture does not settle on steel. As a hub for custom and DIY gun safe modifications, this article also points to related improvements such as lighting, shelving reconfiguration, pistol racks, door organizers, anchor hardware, and power pass-through management.
Assess the Safe, the Room, and the Real Risk Before Buying Parts
Before you install anything, evaluate the safe itself, the room around it, and the materials stored inside. Fire-rated gun safes usually have gypsum or proprietary insulation that slows temperature transfer during a fire, but that same heavy construction can trap ambient moisture during normal use. Thin steel cabinet-style safes react faster to room changes, which can mean more frequent condensation in damp spaces. Location matters even more. Basements often run cool with elevated humidity. Garages heat up during the day, cool rapidly at night, and frequently create dew-point problems. Exterior walls, concrete slabs, and unconditioned closets also increase risk because steel surfaces can become colder than surrounding air.
The most useful first step is measurement. Put a calibrated digital hygrometer and thermometer inside the safe for at least a week before choosing components. Better units also log minimum and maximum values. I prefer models from SensorPush, Govee, and Inkbird for monitoring because they reveal trends, not just snapshots. Aim to keep relative humidity roughly between 40 and 50 percent for most firearm collections. Brief movement outside that range is not automatically harmful, but sustained levels above 55 percent raise corrosion risk, especially on blued steel, case-colored finishes, and internal mechanisms. Wood stocks also dislike large swings because they can swell, shrink, or change point of impact over time.
Power planning is the next checkpoint. Many modern safes include a factory pass-through hole for electrical cords. If yours does, inspect the grommet and confirm that routing a low-draw heating device will not pinch the wire against the door or compromise the fire seal. If there is no pass-through, do not drill casually. You can hit relockers, bolts, hard plate, wiring for electronic locks, or fire insulation. On premium safes, drilling may void warranties or reduce fire performance. When owners ask me what part of a DIY gun safe modification causes the most expensive mistakes, unauthorized drilling is near the top of the list.
Choose the Right Temperature-Control Components for Your Conditions
The core options are heating rods, rechargeable or disposable desiccants, compact compressorless dehumidifiers, circulation fans, and monitoring sensors. Heating rods are the standard answer for most gun safes because they create a slight temperature lift, usually only a few degrees, which encourages gentle convection and keeps interior surfaces above the dew point. GoldenRod is the best-known brand, and similar low-wattage bars from Hornady and Lockdown work on the same principle. They do not dry air aggressively on their own; instead, they prevent condensation and improve moisture distribution so damp pockets do not form.
Desiccants work differently. Silica gel canisters and reusable Eva-Dry units absorb moisture directly, making them useful in small safes, cabins without power, and travel storage. Their limitation is capacity. In a damp garage, a desiccant alone saturates quickly and becomes a maintenance item you must regenerate on schedule. Electric mini-dehumidifiers can remove moisture more actively, but many are designed for closets or bathrooms, not sealed safes, and they often require reservoir emptying. For that reason, I usually treat them as secondary tools unless the safe is unusually large or sits in a very humid environment with reliable external drainage and monitoring.
Air movement is underrated. A small low-noise fan helps break up stagnant layers near the floor, corners, and back wall where moisture can linger behind long guns. Fans do not reduce humidity by themselves, but they make heating rods and desiccants more effective. Sensors are equally important. Without a hygrometer, you are guessing. With one, you know whether your setup holds 45 percent humidity in July or spikes to 62 percent after a storm front. That data tells you whether you need more heat, more absorption, better room conditioning, or relocation of the safe.
| Component | Best Use Case | Main Advantage | Main Limitation |
|---|---|---|---|
| Heating rod | Most powered residential gun safes | Prevents condensation with low energy use | Needs electrical access |
| Silica gel desiccant | Small safes or backup moisture control | No wiring, simple installation | Requires regular recharging or replacement |
| Mini electric dehumidifier | Large damp spaces with active monitoring | Can remove more moisture than passive options | Takes space and adds maintenance |
| Circulation fan | Safes with dead air zones or dense storage | Improves consistency inside the safe | Does not dry air alone |
| Bluetooth or Wi-Fi sensor | Any safe where conditions matter | Shows trends and alerts before damage starts | Battery upkeep and signal limits |
Install the System Safely and Without Compromising the Safe
Start with a complete unload. Remove every firearm, magazine, optic, suppressor, document, and shelf panel. Vacuum dust from the floor and corners, then wipe interior steel with a clean dry microfiber cloth. If you find existing rust, address it before climate hardware goes in; otherwise you are sealing an active problem inside. Next, identify the manufacturer’s recommended cord route. Many safes place the pass-through low on the rear panel. Run the cable through the grommet, leave a drip loop outside if the safe is in a basement or garage, and secure slack so it cannot interfere with the door seal or shelving.
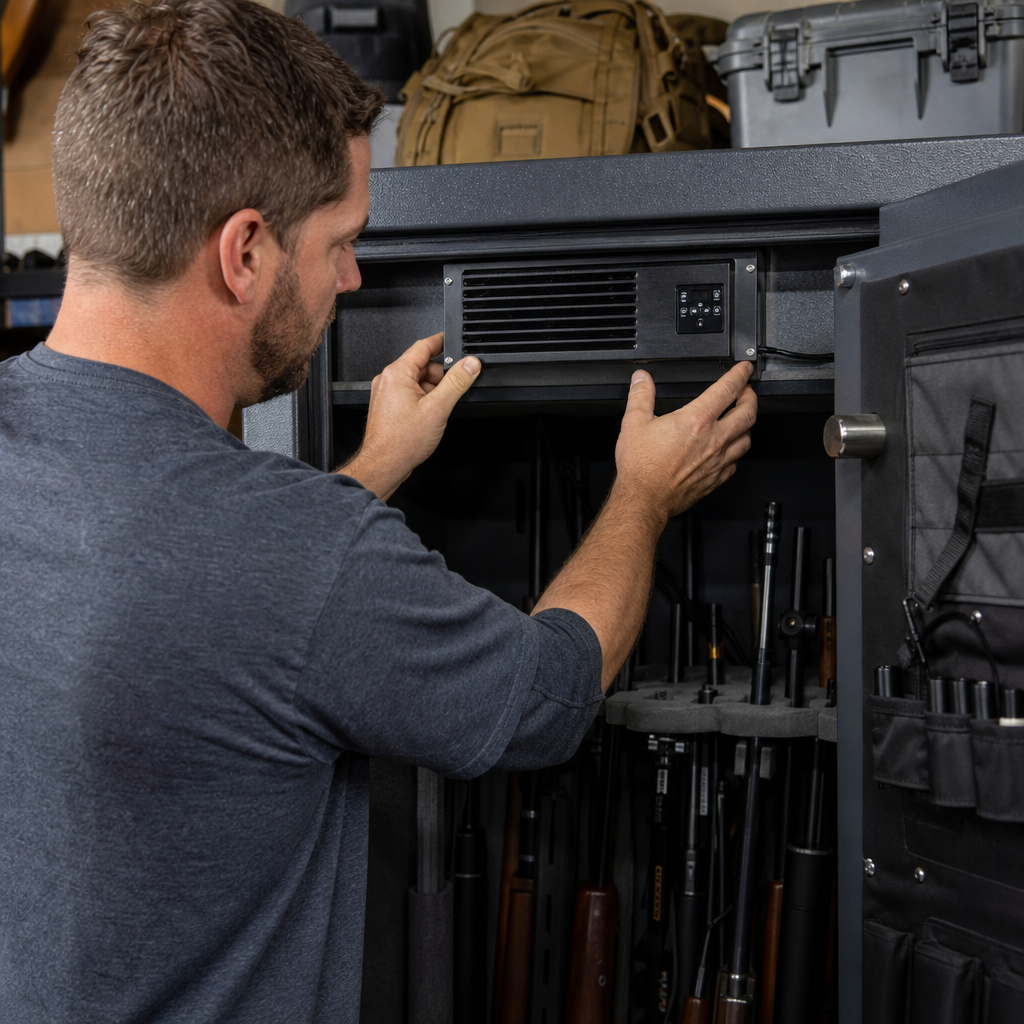
Mount the heating rod near the floor because warm air rises and creates a slow convective loop. Most rods include clips or brackets; use the supplied hardware or approved adhesive mounts if the safe design allows it. Do not place the rod directly under fabric pouches, foam, paper boxes, or loose gun socks. It runs warm, not dangerously hot, but clearance matters. If you are adding a fan, mount it where it can circulate air behind long guns rather than blasting directly at one shelf. USB fans can work if your safe already has a power kit, but keep total load modest and use surge protection outside the safe, not inside it.
Desiccants should sit where air can reach them easily, usually on a lower shelf or door organizer pocket, not buried behind cases. Place your sensor at mid-height away from the heating rod so readings reflect the average interior condition. After installation, close the safe and monitor readings for several days without opening the door unnecessarily. Expect a stabilization period. If humidity remains high, do not assume the heater failed. Check the surrounding room first. A safe cannot permanently defeat a basement running at 70 percent relative humidity. In many homes, the right answer is a room dehumidifier outside the safe combined with an internal heating rod inside it.
If your safe lacks a pass-through and the manufacturer does not approve drilling, use no-power methods or consult a locksmith or safe technician. I have seen owners punch holes through drywall-lined interiors and discover too late that they pierced fire insulation or an internal reinforcement plate. A professional can sometimes add power access in a low-risk location, but only after confirming the safe’s construction drawings or inspecting the body carefully. For high-end safes, paying for that expertise is cheaper than reducing the safe’s performance.
Build a Complete DIY Safe Environment With Complementary Modifications
Temperature control works best when it is part of a broader gun safe organization and modification plan. This is why it belongs at the center of custom and DIY gun safe modifications rather than as a standalone accessory. Start with layout. Overcrowding restricts airflow, especially when rifles are packed tightly with soft cases, slings, and door-hung accessories. Reconfigurable shelving from SecureIt, SnapSafe, and aftermarket panel systems can create breathing space between firearms and move optics away from the back wall, where condensation often appears first. Pistol racks also help by separating handguns instead of stacking them in foam-lined bins that trap moisture.
Lighting is another smart paired upgrade. LED light kits consume little power and make it easier to inspect metal surfaces for early rust, dust buildup, or stock damage. If you already route power into the safe, adding magnetic or motion-activated LEDs is straightforward. Choose low-heat LEDs and manage cables cleanly along corners with adhesive clips rated for enclosed spaces. Door organizers improve access, but avoid stuffing every pocket. Dense storage of papers, choke tubes, batteries, and boxed accessories can block circulation near the door, which is often the first area owners inspect and therefore the one they falsely assume represents the whole safe’s condition.
Anchoring and placement also affect climate control. A safe bolted directly to a bare concrete slab can stay cooler than the room and create a recurring condensation cycle. Raising the safe slightly on treated blocking, a manufacturer-approved plinth, or a sealed moisture barrier can help. Keep a small gap from exterior walls when possible. In garages, avoid positioning the safe under uninsulated metal doors or against walls that receive direct afternoon sun followed by rapid nighttime cooling. These are practical lessons learned from service calls: environment beats gadget choice almost every time.
Finally, review what you store. Firearms should be lightly protected with corrosion-inhibiting products such as Barricade, Eezox, or Break-Free Collector where appropriate, especially if they are blued or stored long term. Leather slings, foam cases, and cardboard ammunition boxes can hold moisture. Important documents belong in sealed sleeves or a secondary document box. The best gun safe temperature-control system reduces risk, but material choices inside the safe still matter.
Maintenance, Troubleshooting, and When to Upgrade Beyond DIY
Once installed, treat the system as active equipment, not a one-time purchase. Check humidity readings weekly at first, then monthly after you understand seasonal patterns. Test desiccants on a schedule and recharge them before they are fully saturated. Dust fans and inspect cords for abrasion. During spring and fall weather swings, compare safe readings with room readings; if both climb together, fix the room. A whole-room dehumidifier, HVAC balancing, air sealing, or relocation may provide a larger benefit than adding more devices inside the safe.
Troubleshooting follows a simple sequence. If humidity is high, verify the sensor first. Cheap uncalibrated meters can be wrong by several percentage points. Next, confirm the heating rod is warm and positioned low. Then look for a room source: damp concrete, poor ventilation, water intrusion, or an unconditioned wall. If condensation persists on specific guns only, spacing may be the issue. Metal touching fabric, foam, or the back panel can create localized microclimates. If you smell mustiness, inspect every soft item in the safe. Odor is often the first sign that trapped moisture is winning.
There is a point where DIY reaches its limit. If your safe lives in a flood-prone basement, detached garage in a humid region, or a room with chronic water problems, professional remediation may be necessary. Likewise, if you want integrated power distribution, drilled pass-throughs, lock-side cable management, or wall-to-safe environmental control in a vault room, bring in a safe technician or qualified installer. The goal is not to add gadgets; it is to create stable storage that protects the collection year-round.
A well-installed gun safe temperature-control system is one of the highest-value upgrades you can make because it protects every item in the safe at once. Measure conditions, choose components based on the room, install them without compromising the safe, and combine climate control with better organization, lighting, placement, and maintenance habits. That approach turns a basic security container into a stable preservation environment. If you are planning other custom and DIY gun safe modifications, start with climate first, then build the rest of your setup around it.
Frequently Asked Questions
What does a temperature-control system in a gun safe actually do?
A temperature-control system does more than simply make the inside of the safe warmer or cooler. Its real job is to stabilize the environment so your firearms and stored valuables are not exposed to the conditions that cause rust, corrosion, stock damage, optic issues, and moisture-related deterioration over time. Inside a gun safe, the three conditions that matter most are air temperature, relative humidity, and dew point. These are closely connected. If the steel body of the safe becomes cooler than the air trapped inside, moisture can condense on metal parts just like water forms on a cold drink. That thin film of moisture is enough to start surface oxidation on barrels, actions, screws, springs, and other exposed components.
A properly installed system helps prevent that cycle by gently warming the interior air, promoting circulation, and reducing the chance that humid air will settle and condense on cooler surfaces. In many setups, the goal is not to create a “hot” safe but to keep the inside slightly warmer and more stable than the room around it. That small temperature difference can dramatically reduce condensation risk. When paired with humidity monitoring or a dehumidifying component, the system also helps keep relative humidity in a safer range for firearms, optics, documents, ammunition boxes, and wood furniture. In short, temperature control is really environmental control: it protects steel from rust, wood from swelling or cracking, and sensitive accessories from the slow damage caused by heat swings, trapped humidity, and stagnant air.
What components do I need to install a temperature-control system in my gun safe?
Most gun safe temperature-control setups are built around a few practical components, and the exact combination depends on your safe size, your climate, and where the safe is located. The most common foundation is a low-wattage safe heater or dehumidifier rod installed near the bottom of the safe. This gently warms the air so it rises, creating a mild convection cycle that keeps air moving and helps prevent condensation on steel surfaces. In humid regions or in basements, many owners also add a rechargeable desiccant unit or an electric dehumidifier to absorb excess moisture. A digital hygrometer-thermometer is highly recommended so you can monitor both temperature and relative humidity instead of guessing.
Additional useful pieces include pass-through plugs or cable ports, adhesive or magnetic cable clips for neat routing, shelf-safe circulation fans if your safe has tight compartments, and weather-resistant power strips mounted outside the safe if you need to support multiple devices. Some owners also install smart sensors that track temperature and humidity trends over time, which can be especially helpful if the safe is in a garage, outbuilding, or climate-variable room. If you store optics, paper records, collectible firearms, or guns with wood stocks, monitoring matters just as much as active control because it helps you detect problems before they become visible damage.
When choosing equipment, look for products specifically designed for enclosed storage spaces and sized for the cubic capacity of your safe. Oversized systems can waste energy or create unnecessary heat, while undersized units may do little to control conditions. It is also important to make sure any electrical device is UL-listed or otherwise safety certified, has a durable cord, and can operate continuously if needed. The best system is usually simple, reliable, and easy to inspect: one heat source near the bottom, one monitor at mid-height, and enough airflow throughout the interior so there are no stagnant pockets behind cases, on upper shelves, or in corners.
Where should I place the heater, sensor, and other parts inside the gun safe?
Placement is one of the most important parts of a successful installation. In most gun safes, the heater or dehumidifier rod should be mounted low, usually along the floor at the back or side. That position matters because warm air rises. By starting the heat at the bottom, you create a gentle upward airflow that circulates through the entire safe. This helps equalize temperature, reduces cold spots on the steel walls, and lowers the chance of moisture settling on firearms stored near the bottom. If your safe came with a factory pass-through hole or electrical access port, placing the heater near that area often makes cord management easier and cleaner.
Your hygrometer or temperature-humidity sensor should generally be placed around the middle of the safe, not directly next to the heater and not pressed against the door or outer wall. You want a reading that reflects the overall interior environment, not a hot spot or a cold boundary surface. In larger safes, it is helpful to check readings on more than one shelf, especially if the top section stores documents, optics, or handguns in padded cases. Circulation fans, if used, should be positioned so they move air gently across shelves and into corners without blowing directly onto a single firearm. The goal is even air distribution, not concentrated airflow.
Try to avoid blocking vents, crowding the heater with soft goods, or placing moisture-sensitive items directly against the steel interior. Leave small gaps between long guns, store paperwork in protective sleeves or boxes, and give the system room to work. If you use desiccants, place them where airflow can reach them rather than tucking them behind dense gear. The overall principle is simple: low heat source, central monitoring, unobstructed air movement, and enough spacing that the safe does not become a collection of isolated microclimates. Good placement often makes a moderate system perform better than a more powerful system installed poorly.
What humidity and temperature levels should I aim for inside the safe?
For most gun safes, a relative humidity range of about 40% to 50% is a practical target, with some owners preferring to stay closer to 45% for a good balance between metal protection and wood-stock stability. If humidity climbs much above that range for extended periods, the risk of corrosion increases, especially on blued steel, internal springs, screws, magazines, and any firearm that has fingerprints or light oil films on it. On the other hand, extremely low humidity for long periods can be hard on wood stocks, grips, leather slings, and certain stored materials. The ideal number is not just about comfort; it is about preventing both corrosion and shrinkage-related damage.
Temperature matters, but not in the way many people assume. You do not need to keep the safe hot. In fact, the main objective is consistency and keeping the interior slightly warmer than the surrounding environment when needed so condensation does not form on cooler metal surfaces. Sudden swings are often more problematic than the absolute temperature itself. For example, a safe in a basement or garage may experience rapid changes when outside weather shifts, and that is when dew point issues can cause moisture to appear even if the room does not feel especially humid. Maintaining stable conditions is what protects firearms over time.
The best approach is to monitor both relative humidity and temperature together. Those two readings help you understand whether the interior environment is trending toward condensation risk. If you notice repeated spikes in humidity after storms, seasonal changes, or room temperature drops, that is a sign your system may need better airflow, more dehumidification, or a different safe location. A digital monitor with memory or alerts can be especially useful because it shows patterns instead of a single momentary reading. In practical use, staying in a stable midrange and avoiding long-term humidity buildup is more important than chasing a perfectly exact number every day.
What are the biggest installation mistakes to avoid when setting up temperature control in a gun safe?
The most common mistake is assuming that a gun safe only needs a moisture absorber tossed onto a shelf. Desiccants can help, but on their own they are often not enough to manage condensation, stagnant air, and seasonal temperature swings, especially in humid climates or unconditioned spaces. Another major error is installing a heater without monitoring the actual conditions inside the safe. Without a hygrometer and temperature readout, you have no way to tell whether the system is doing its job or whether certain shelves and corners are still holding excess moisture. Guesswork is one of the biggest reasons long-term rust problems go unnoticed until visible damage appears.
Poor placement is another frequent issue. Heaters mounted too high, sensors placed right beside a heat source, cords pinched in the door seal, or tightly packed shelves that block circulation can all reduce performance. Overloading the safe with soft cases, paperwork, and gear also traps pockets of humid air. Firearms should not be jammed together, and sensitive items should not be pressed directly against the steel walls. It is also a mistake to ignore the room the safe sits in. If the safe is placed on a cold concrete floor, against an exterior wall, or in a damp basement corner, the safe interior will be harder to stabilize no matter what you install inside. Raising the safe slightly, improving room ventilation, or using a climate-controlled location can make a major difference.
Finally, some people overcorrect by trying to create excessive heat rather than steady control. Too much heat is unnecessary and can dry out wood or stress adhesives and stored materials over time. The smarter approach is a balanced system: gentle heat, continuous or periodic moisture control, reliable monitoring, and regular inspection. Check your readings seasonally, recharge or replace desiccants as needed, inspect cords and mounting points, and look over firearms for any early signs of condensation or corrosion. A gun safe environment should be quietly stable, not aggressively altered. If your system is simple, measured,