
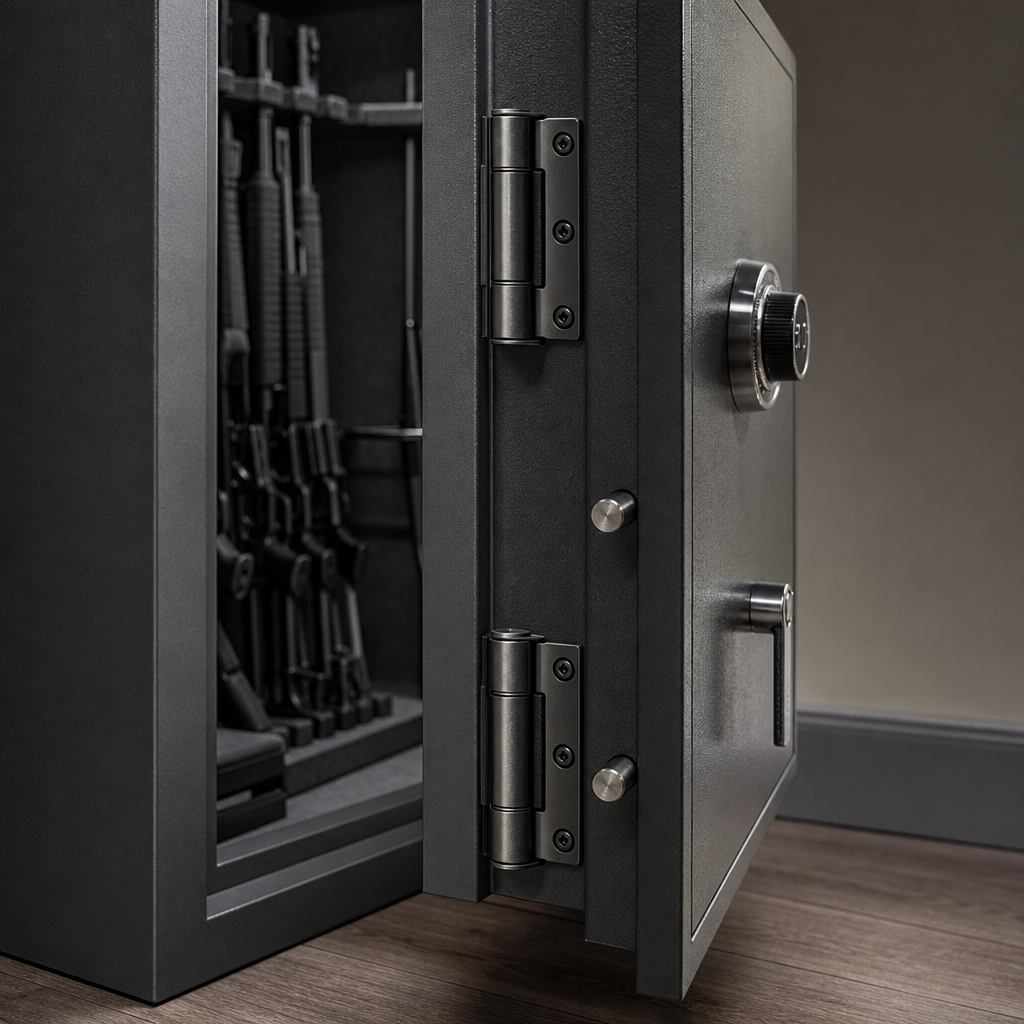
Upgrading your gun safe’s hinges is one of the most practical ways to strengthen physical security, improve door alignment, and extend the service life of a safe that sees regular use. In the gun safes and safety category, hinge work sits at the center of custom and DIY gun safe modifications because it affects pry resistance, fire-seal contact, locking performance, interior access, and even whether future upgrades fit correctly. When I assess older residential safes, I often find the same pattern: owners focus on locks, dehumidifiers, and shelving, while the door hardware quietly carries the heaviest mechanical load every day. Hinges are the pivot point of the entire system.
A gun safe hinge is the bearing-supported joint that allows the door to swing while holding substantial weight, often hundreds of pounds on larger composite or plate-steel models. External hinges mount outside the body and usually allow a door to open 180 degrees. Internal hinges sit inside the frame line, offering a cleaner profile and some protection from direct attack, though they commonly limit opening angle. Security, in this context, means more than preventing removal of the hinge pin. A properly designed safe door is retained by active bolts, dead bars, and a reinforced door jamb, so hinges alone do not determine breach resistance. Still, weak, worn, or poorly installed hinges can create pry gaps, sag, scrape, and reduce the effectiveness of the locking side.
That is why hinge upgrades matter. A well-executed modification can tighten door fit, restore smooth movement, support a heavier door organizer, and make forced entry harder by reducing flex at the frame. It can also serve as the starting point for broader custom and DIY gun safe modifications, including frame reinforcement, relocking improvements, anchor upgrades, humidity control, lighting, shelving reconfiguration, and better long-gun access. This hub explains how to evaluate existing hinges, choose stronger replacements, install them safely, and understand where hinge work fits within a complete gun safe modification plan.
How Gun Safe Hinges Affect Security and Why Many Factory Setups Need Attention
The first question most owners ask is simple: do better hinges really make a gun safe more secure? The correct answer is yes, but indirectly. On a quality safe, the locking mechanism and door edge retention do the real work during an attack. However, hinges influence the door’s geometry. If the hinge side sags even slightly, the top corner on the opening side can drift, creating an exploitable gap for pry tools. I have seen budget safes with visible daylight at one corner after years of door weight, especially after owners added pistol pockets and document panels that increased load by 15 to 30 pounds. That gap does not mean immediate failure, but it gives a thief a better starting point.
Many factory hinge issues stem from cost controls rather than outright bad design. Common weak points include undersized weld-on barrel hinges, mild steel hinge pins with poor surface finish, minimal bearing area, and loose manufacturing tolerances that allow accelerated wear. Imported cabinet-style safes often use decorative external hinges that look substantial but have small pins and thin weld attachment points. Over time, repeated opening cycles produce sag, metal dust, and misalignment. In humid areas, corrosion adds friction, especially where owners lubricate with the wrong product. Thick grease can trap grit; penetrating oil can migrate where it should not and contaminate fire seals or door liners.
Security also changes when you modify the safe elsewhere. A door organizer, power outlet kit, interior drywall replacement, or steel panel storage rack can change weight distribution. The hinge that was barely adequate from the factory may become the next failure point. For that reason, hinge upgrades are often best treated as a foundational modification. If you plan custom shelving, higher-capacity rifle racks, or an upgraded mechanical or electronic lock system, evaluate the hinges first so the rest of the project is built on a stable platform.
Inspecting Your Existing Hinges Before You Upgrade
Before buying anything, inspect the safe carefully. Start with door movement. Open the door fully, then close it slowly and watch whether the gap around the perimeter stays even. If the top opening-side corner drifts down or rubs, you likely have sag. Next, lift gently on the outer edge of the open door. Any noticeable vertical play suggests pin or bearing wear. Listen as well. Squeaks can be simple lubrication issues, but grinding, popping, or binding usually points to alignment or metal wear.
Then examine the hinge structure itself. On external hinges, look for cracked welds, paint separation around the weld toe, pin mushrooming, rust bleed, or visible offset between hinge barrels. On internal hinges, remove interior trim panels if the design allows and inspect pivot brackets, mounting bolts, and stop hardware. Use a flashlight to inspect the frame where the hinge load transfers. Thin-gauge body metal around the hinge area can deform over time, especially on lighter residential security containers. If that metal is flexing, replacing the hinge alone will not solve the problem; the frame needs reinforcement.
Measure the door and estimate weight before choosing a replacement. Height, width, thickness, and door construction all matter. A 10-gauge outer skin over composite fill behaves differently from solid plate. If the safe manufacturer provides door weight, use that. If not, hinge rating should be chosen with margin, not guessed tightly. In my own projects, I treat 25 percent reserve capacity as a minimum and prefer more when adding organizers or steel accessories later.
| Inspection point | What to check | Why it matters |
|---|---|---|
| Door gap | Even spacing on all sides when closed | Uneven gaps indicate sag or frame distortion |
| Vertical play | Lift outer edge of open door gently | Movement suggests worn pins or bushings |
| Weld condition | Cracks, paint separation, rust lines | Shows fatigue at the hinge attachment |
| Opening angle | How far the door swings without binding | Affects access and replacement hinge style |
| Frame strength | Buckling or flex near hinge side | Weak structure limits any hinge upgrade |
| Added door weight | Organizers, documents, handguns, steel panels | Extra mass changes hinge load significantly |
Choosing the Right Hinge Upgrade for Your Safe
The best hinge upgrade depends on the safe’s construction, intended use, and your fabrication skill. For most steel-bodied gun safes with external hinges, heavy-duty weld-on barrel hinges with hardened pins and oil-impregnated bronze bushings offer the strongest balance of durability and serviceability. Bronze bushings reduce friction and handle load better than bare steel-on-steel contact. On higher-end builds, thrust bearings or precision-machined hinges can improve smoothness under very heavy doors, though they demand tighter installation tolerances.
If your safe uses removable external hinge pins, choose a design that retains the pin securely and resists casual tampering. That can include a welded cap, concealed retention set screw, or non-removable pin design. Remember, though, safe security should never rely solely on the pin remaining in place. The door needs fixed hinge-side locking lugs or dead bars so the door cannot be removed if the hinges are cut. If your safe lacks them, adding hinge-side dead bars or interlocking jamb features is often a more meaningful security upgrade than the hinge itself.
For internal hinge safes, replacement can be more complex because geometry is tight. You may need compact heavy-load pivot hardware, upgraded brackets, or redesigned mounting points rather than a simple hinge swap. In these cases, preserving proper door inset and fire-seal compression is critical. A stronger hinge that shifts the door outward by even a few millimeters can compromise seal contact and create closing issues. That is one reason internal hinge modifications are less forgiving for first-time DIY work.
Material selection matters too. Low-carbon steel is common and welds easily, but pin hardness, bushing quality, and machining accuracy drive performance more than base material alone. Stainless components can resist corrosion, yet welding stainless to carbon steel complicates the job and is often unnecessary for climate-controlled interiors. Use hinge components rated for loads above your actual door weight, sourced from industrial suppliers rather than decorative hardware catalogs. Names like McMaster-Carr, Grainger, and specialized safe parts vendors are useful starting points because they publish dimensions and load data clearly.
Installation Basics, Tools, and Common DIY Mistakes
Hinge replacement is not a casual afternoon project if the safe door is heavy. The door must be supported safely before any cutting or welding begins. In my shop work, I use cribbing blocks, a hydraulic table or adjustable stands, wedges, and marking gauges so the door cannot shift unexpectedly. At minimum, you need reliable support, a welder appropriate to the safe’s steel thickness, clamps, measuring tools, layout dye or marker, abrasives for surface prep, and high-quality primer and paint for corrosion protection after the work is complete.
The basic process is straightforward in theory: support the door, remove or cut away old hinges, clean the mounting surfaces to bare metal, establish the correct door position relative to the body, tack the new hinges in place, test swing and gap, then complete welds in a controlled sequence to limit heat distortion. The hard part is alignment. A hinge can be welded strongly and still be wrong. If the hinge barrels are not co-linear, the door will bind. If the door is positioned slightly low during tacking, the latch side may scrape the threshold or miss bolt openings. Use shims and repeat dry-fit checks before final welding.
The most common DIY mistake is underestimating heat movement. Long welds on one side can pull the hinge enough to misalign the door. Stitch welding in alternating passes helps control this. The second mistake is ignoring frame reinforcement. If the body metal is thin, add backing plates or reinforcement ribs at the hinge attachment area. The third is failing to protect lock components and fire lining from weld heat and grinding debris. Remove what you can, shield what you cannot, and vacuum thoroughly before reassembly.
Do not lubricate new hinges blindly after installation. Follow the hinge design. Bronze-bushed hinges may need light machine oil at intervals; sealed bearing hinges may need none. Excess lubricant attracts dust and can stain carpeted interiors. After installation, cycle the door repeatedly, verify boltwork engagement, and check that the handle operates smoothly without extra force.
How Hinge Upgrades Fit Into Broader Custom and DIY Gun Safe Modifications
Because this page serves as the hub for custom and DIY gun safe modifications, it is important to place hinge work in the larger system. The most effective modifications improve the safe as a whole rather than treating each part in isolation. Once hinges are upgraded and the door swings correctly, owners can address hinge-side dead bars, anchor bolt improvements, interior storage, lighting, and environmental control with more confidence because the baseline geometry is sound.
Start with structural security upgrades. Anchoring the safe to concrete with properly sized wedge anchors or epoxy anchors typically delivers a bigger anti-theft gain than any cosmetic change. Reinforcing the door frame, adding anti-pry tabs, and upgrading to a better lock or lock hardplate can materially improve resistance as well. Hinge upgrades support these changes by keeping the door square and reducing flex, which improves bolt engagement and lock reliability over time.
Then consider functional upgrades. Door organizers add useful capacity but also add weight, so they should be installed only after confirming hinge margin. Interior LED lighting kits, goldenrod-style heaters, rechargeable desiccant systems, and modular rifle racks improve day-to-day use without affecting structural security much. Shelf reconfiguration, handgun stands, magazine bins, and document pouches turn a cramped safe into an organized one. If you have ever fought a heavy door that swings poorly while trying to access a rear rifle slot, you already know why hinge performance and interior usability are connected.
There are also limits to DIY work. Fire ratings are difficult to preserve after major door or body modifications because factory seal systems and insulation layouts vary widely. Some changes can void warranties or insurance assumptions. If your safe has a complex relocker system, glass relocker plate, or high-security composite door, a qualified safe technician may be the right choice for hinge and frame modifications. Good DIY practice means knowing when to stop, especially when a mistake could damage the lockwork or reduce the safe’s protective value.
When to Repair, When to Replace, and How to Maintain the Upgrade
Not every hinge issue requires a full upgrade. Minor squeaks, light surface rust, or small alignment drift can sometimes be corrected with cleaning, proper lubrication, hinge pin replacement, or door adjustment if the safe design allows it. Repair makes sense when the hinge geometry is fundamentally sound and the surrounding frame is intact. Full replacement is the better path when you see cracked welds, recurring sag, elongated pin bores, distorted frame metal, or a planned increase in door weight that would push the original hardware beyond its comfort zone.
Once upgraded, maintenance is simple but important. Inspect the hinge area every few months when you check batteries, desiccants, or anchor points. Look for new rubbing marks, paint cracking, metal dust, or changes in closing effort. Keep the floor under the safe clean so debris does not interfere with the door swing. Control humidity with a dehumidifier rod or desiccant because corrosion begins quietly and accelerates wear. If the safe is in a garage, watch for seasonal slab movement that can twist the cabinet and mimic hinge problems.
The key takeaway is straightforward: upgrading your gun safe’s hinges is not just a metalworking project; it is a security, reliability, and usability upgrade that supports every other custom improvement you may want to make. Stronger hinges, proper alignment, and reinforced attachment points help the door seal better, swing smoothly, and resist abuse longer. If you are building out a serious plan for custom and DIY gun safe modifications, start by evaluating the hardware that carries the door. Inspect your current setup, choose components with real load ratings, and upgrade methodically so every later modification rests on a safer foundation.
Frequently Asked Questions
1. Why would I upgrade the hinges on a gun safe instead of just repairing the existing ones?
Upgrading your gun safe’s hinges is often a better long-term solution than simply repairing worn components because hinges do much more than help the door swing open and closed. They directly influence how well the door aligns with the frame, how evenly pressure is distributed across the locking side, and how effectively the door maintains contact with the fire seal. On many older residential safes, the original hinges may still function, but they often develop subtle problems such as sagging, uneven door gaps, binding during operation, or stress that gets transferred to the latch work. Those issues can reduce usability and, over time, compromise security performance.
A proper hinge upgrade can improve pry resistance by restoring or increasing structural support at the door edge. It can also help the door close more squarely, which matters because misalignment can interfere with bolt engagement and put extra strain on the lock mechanism. In practical terms, a safe with upgraded hinges usually feels smoother, closes more consistently, and is less likely to drag, twist, or scrape. That matters if the safe is opened frequently, loaded heavily, or already showing signs of wear from years of use.
Another reason many owners choose to upgrade rather than repair is future compatibility. If you are considering additional modifications such as interior reconfiguration, a dehumidifier pass-through, upgraded shelving, improved lighting, or lock replacement, starting with stable door alignment makes everything else easier. In short, hinge upgrades are not just maintenance; they are a foundational improvement that supports security, durability, and overall safe performance.
2. What are the most important signs that my gun safe hinges need to be upgraded?
There are several clear indicators that your gun safe hinges may be due for an upgrade, and most of them show up in everyday use before they become major failures. One of the most common signs is door sag. If the door appears slightly lower on the opening side, rubs the threshold, or requires lifting pressure to close properly, the hinges may be worn, undersized, or no longer holding alignment under the door’s weight. Even a small amount of sag can create bigger problems over time because it affects seal contact and bolt alignment.
Another sign is inconsistent door movement. If the safe door binds, squeaks excessively after lubrication, swings unevenly, or feels rough in certain parts of the opening arc, the hinge pins, bushings, or weld points may be deteriorating. Visible wear around the hinge mounts, hairline cracks near welds, elongation in attachment holes, or gaps that have widened around the hinge area are all serious clues that the hinges are no longer supporting the door correctly.
You should also inspect the reveal, meaning the visible gap between the door and the frame. If that gap is uneven from top to bottom, or if the fire seal is compressed in some spots and loose in others, hinge alignment may be the root issue. In some safes, problems show up first on the locking side rather than the hinge side. For example, you may notice that the handle becomes harder to turn, the bolts retract less smoothly, or the door needs to be pushed inward before it will lock. That often points to hinge-related misalignment shifting stress across the entire door assembly.
Finally, if the safe has exposed hinges and you are concerned about overall security, upgrading can be worthwhile even before failure appears. Modern heavy-duty hinge options can offer better support, better serviceability, and more consistent long-term performance than older factory hardware. Catching these issues early is important because once door misalignment starts damaging the frame, seal, or lockwork, repair becomes more complicated and expensive.
3. Are external hinges or internal hinges better for gun safe security?
Neither external nor internal hinges are automatically “better” in every situation; the right choice depends on the safe’s design, how the locking bolts engage, and what kind of upgrade you are planning. A lot of people assume internal hinges are inherently more secure because they are hidden, but hinge visibility alone does not determine burglary resistance. On a properly designed gun safe, the door is secured by locking bolts or dead bars on multiple sides, so even if an external hinge were cut, the door should still remain locked in place. That means the overall door construction and boltwork matter more than whether the hinge is inside or outside.
External hinges do offer practical advantages. They typically allow the door to open wider, sometimes up to 180 degrees, which improves access to rifles, shelving, and accessories. They can also be easier to inspect, maintain, and replace, making them a popular choice for custom or DIY modifications. For heavier doors, robust external hinges may provide stronger load support and simpler alignment adjustments, especially when retrofitting an older safe.
Internal hinges, by contrast, protect the hinge hardware from direct tampering and create a cleaner exterior profile. They may be a good fit for owners who prioritize a more concealed look or who are working with a safe designed around that type of door movement. However, internal hinge systems can reduce door swing, make service more difficult, and limit replacement options depending on the available clearance inside the body.
The real security question is whether the upgraded hinge setup preserves proper door fit, maintains full bolt engagement, and keeps the door seated tightly against the frame and fire seal. A poorly executed internal hinge conversion can weaken a safe just as easily as a sloppy external hinge installation. If your existing safe uses external hinges, upgrading to stronger, better-fitted external hinges is often the most practical and secure route. If you are considering a full hinge style conversion, it is important to evaluate weld integrity, door weight, body reinforcement, and whether the safe’s original design actually supports that change safely.
4. Can I upgrade my gun safe’s hinges myself, or should I hire a professional?
That depends on the safe’s construction, your tools and fabrication experience, and the exact type of hinge upgrade you are planning. For some owners, basic hinge maintenance or replacement with closely matched components may be manageable as a DIY project, especially if the safe door can be safely supported and the new hardware does not require major cutting or welding. However, many hinge upgrades go beyond simple parts swapping. On heavier gun safes, the door weight alone introduces serious safety concerns, and precise alignment is critical. A small installation error can lead to binding, poor seal contact, damaged boltwork, or reduced pry resistance.
If the job involves welding on new external hinges, relocating hinge positions, reinforcing the door edge, or converting between hinge styles, professional help is usually the wiser choice. A qualified safe technician, metal fabricator, or locksmith experienced with safes can assess whether the steel thickness, frame condition, and door structure are adequate for the upgrade. They can also ensure the hinge axis is positioned correctly so the door clears the frame and closes squarely. That level of accuracy is difficult to achieve without proper jigs, measuring tools, and experience.
There is also the issue of heat and finish damage. Welding near a fire-lined safe can affect insulation materials, door seals, paint, and internal components if it is not done carefully. In addition, any modification that changes how the door sits in the frame can influence lock timing and bolt travel. A professional can test all of that after installation and make adjustments before the safe goes back into service.
If you do attempt a DIY hinge upgrade, the minimum standard should be careful planning, proper support for the door, exact measurements, and a clear understanding of how the safe locks when closed. Document the original alignment before disassembly, inspect the frame for hidden wear, and never assume the new hinges will self-correct existing problems. For straightforward lubrication, pin replacement, or minor hardware refreshes, DIY may be realistic. For structural hinge upgrades intended to improve security, a professional installation is often the safer and more reliable investment.
5. What should I look for in a hinge upgrade to make sure it actually improves security and longevity?
The best hinge upgrade is not just the strongest-looking part you can buy; it is the one that matches the safe’s door weight, mounting structure, opening geometry, and long-term use requirements. Start with load capacity. A hinge must be able to support the full weight of the door with a margin of safety, especially if the door contains thicker steel, interior organizer panels, or added accessories. Undersized hinges may work briefly but will wear faster, lose alignment, and create the same problems you were trying to solve.
Material quality matters as well. Heavy-duty steel hinges with durable pins and, where appropriate, serviceable bushings generally hold up better under repeated use than light decorative hardware. Pay close attention to weld quality or mounting method, because even excellent hinges will fail if they are attached to weak or thin material without reinforcement. In many successful upgrades, the hinge improvement includes strengthening the mounting area on the door or frame so that stress is spread more evenly.
You should also look at opening angle and door clearance. A good upgrade should improve operation without causing the door to bind against trim, flooring, or the safe body. If your goal includes easier interior access, selecting hinges that allow a wider swing can be worthwhile, but that benefit should not come at the cost of door stability. Alignment is equally important. The hinges should keep the door square in the opening so the locking bolts engage smoothly and the fire seal compresses