
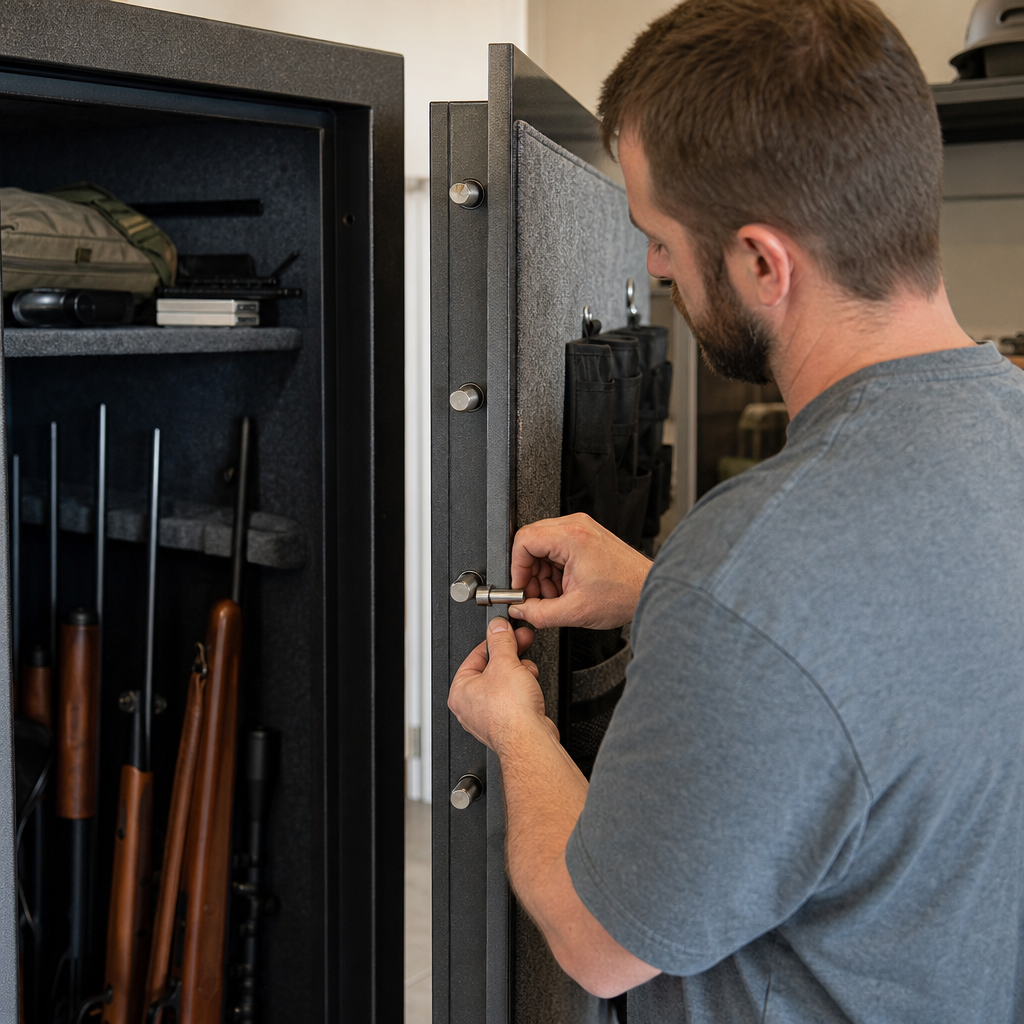
Adding additional locking bolts to your gun safe can improve pry resistance, tighten door engagement, and extend the useful life of a cabinet or residential security container that no longer closes as firmly as it once did. In practical terms, locking bolts are the steel bars or round pins that project from the door edge into the safe body when the handle turns, creating the mechanical barrier that resists forced entry. I have worked on older gun safes with worn linkages, thin factory bolt patterns, and doors that flexed enough to invite attack, and I have seen how a well-planned bolt upgrade can make a noticeable difference in real-world security. This topic matters because many owners assume the dial or electronic lock does most of the protecting, when in fact the boltwork, relockers, hinge arrangement, and body construction determine whether the door stays shut under leverage. It also matters because custom and DIY gun safe modifications sit at the intersection of security, fire protection, warranty coverage, and safety compliance. A bad modification can weaken the door, misalign the lock, void a manufacturer warranty, or create a lockout. A good modification, by contrast, can be part of a broader upgrade path that includes door organizer installation, dehumidifier routing, anchor bolt reinforcement, interior reconfiguration, and lighting improvements. As a hub topic within Gun Safes & Safety, this guide explains not only how to add additional locking bolts, but also when the project makes sense, what tools and materials are appropriate, what tradeoffs to expect, and how this modification fits into the wider category of custom and DIY gun safe upgrades.
When Additional Locking Bolts Actually Improve Security
Additional locking bolts help most when the original safe has sparse bolt coverage, wide unsupported door spans, or obvious flex near the top and bottom corners. On many entry-level gun safes, active bolts appear only on the handle side, while the hinge side relies on fixed dead bars. That setup is common and not automatically unsafe, but if the handle side uses only three short bolts across a tall door, pry resistance can be limited. Adding bolts can distribute force across more contact points, reducing the likelihood that a pry bar will peel the door edge away from the frame. In my experience, the biggest gains come from increasing vertical coverage rather than simply installing thicker bolts in the same locations.
That said, more bolts do not automatically equal a more secure safe. Security depends on bolt throw length, bolt support, door plate thickness, frame reinforcement, and the strength of the internal bolt carriage. If a safe uses 14-gauge steel with a light door pan, adding six large bolts without reinforcing the door can create new stress points or binding. Likewise, if the lock body, cam, and drive bar remain weak, an attacker may defeat the linkage before the extra bolts matter. The best use case is a structurally decent safe whose boltwork is conservative from the factory. Think of common residential gun safes from Liberty, Cannon, Stack-On, Winchester, or Sports Afield that have room for improved bolt distribution but still use a serviceable body and frame.
Owners often ask whether added bolts increase fire protection. The direct answer is no. Bolts are a burglary-resistance feature, not a fire barrier. However, a door that seats more evenly can improve gasket compression, which may marginally help smoke and heat sealing if the safe already has an expanding intumescent seal. That is a secondary benefit, not a reason to do the modification.
How Gun Safe Boltwork Functions Before You Modify Anything
Before drilling or welding, understand the original boltwork system. Most gun safes use one of three layouts: direct-drive boltwork, where the handle or spindle drives the bolts with minimal linkage; geared systems, where a central rack or gear train moves multiple bars; and plate systems, where a cam rotates a carrier plate that advances locking pins. The lock itself, whether mechanical Group 2 style or electronic keypad lock, typically blocks movement through a fence, cam, or lock bolt. It does not hold the door shut by brute force. The moving bolts and dead bars do that.
A standard active bolt setup includes the handle spindle, cam plate, vertical link bars, bolt carrier, guides, and stop points. Some safes also include spring-loaded relockers that trigger if the lock is punched or forcibly removed. If you add bolts carelessly and interfere with relocker travel, you can compromise a critical anti-tamper function. I have opened interiors where owners added homemade brackets that looked sturdy but blocked the relocker plate from firing, effectively downgrading the safe.
Measure four things before planning changes: door thickness, internal clearance behind the panel, bolt diameter, and bolt throw. Bolt throw is the distance a bolt extends into the frame. For many residential safes, this ranges from around 1 inch to 1.5 inches. More throw is useful only if the frame opening and strike pockets support it. Also inspect door sag, because a misaligned door will cause new bolts to scrape or bind, especially at the corners. A long straightedge, feeler gauges, machinist square, and calipers are better than guessing.
Planning a Bolt Upgrade as Part of Custom and DIY Gun Safe Modifications
Within the broader world of custom and DIY gun safe modifications, adding additional locking bolts should be treated as a systems project, not a one-part swap. The safest sequence is assessment, design, mock-up, reinforcement, fitting, testing, and only then cosmetic finishing. If you skip directly to cutting metal, you risk misalignment that is difficult to correct once the door liner goes back on.
In practice, most DIY upgrades fall into three categories. First is the add-on bolt pattern, where new active bolts are tied into the existing carriage so they move with the original handle. Second is the hybrid pattern, where extra dead bolts are added on the hinge side or at the top and bottom, while the original active bolts remain unchanged. Third is the full custom boltwork rebuild, which replaces carriers, guides, and sometimes the door steel itself. For most homeowners, the first two categories are realistic; the third is closer to locksmith or fabrication-shop work.
Consider related modifications at the same time. If you intend to add LED lighting, a goldenrod dehumidifier, a door panel organizer, or anchor reinforcement, open access to the interior panel only once and plan wire routing, fastener locations, and clearance together. A crowded door interior can make future lock servicing harder. Good hub-level planning saves time and prevents one upgrade from undoing another.
| Modification Path | Best Use Case | Typical Tools | Main Risk |
|---|---|---|---|
| Add-on active bolts | Safe has solid existing linkage with room for more contact points | Drill press, welder, calipers, transfer punches | Binding from poor alignment |
| Hybrid active plus dead bolts | Need better edge coverage without redesigning full boltwork | Drill press, files, steel stock, guide brackets | Interference with door frame or panel |
| Full custom rebuild | Major redesign on older or heavily modified safe | Fabrication tools, welding jig, layout tools | Lock failure or door warp |
Tools, Materials, and Design Choices That Hold Up Over Time
For bolt material, 1018 cold-rolled steel is easy to machine and adequate for many projects, while 4140 offers greater toughness if you have the tooling to cut and finish it properly. Round bolts are common because they travel smoothly in guides, but rectangular bars can provide more bearing surface in some custom layouts. Diameter matters less than support. A 1-inch bolt that rides in a sloppy guide can perform worse than a 0.75-inch bolt with tight tolerances and strong backing plates.
Use steel guide blocks or heavy-wall tubing sections welded or bolted to reinforced door structure. Do not let long bolts cantilever unsupported from thin sheet metal. If the inner door skin is light gauge, add reinforcement plates behind every new guide and around each strike opening. For fastening, Grade 8 hardware is preferable where bolts are bolted rather than welded, and threadlocker should be used selectively, not on parts that require periodic service. Nylon lock nuts work well where vibration could loosen assemblies.
For cutting and fitting, a drill press is the minimum standard. A hand drill can work for pilot holes, but accurate bolt alignment depends on repeatable hole placement. Transfer punches, layout dye, machinist squares, and calipers are not luxury items here; they are what prevent a lockout. If welding is part of the design, keep heat input low and controlled. Excessive heat can warp the door, damage paint, and degrade nearby fireboard adhesives or seals. I prefer tack fitting, repeated dry cycling, then final stitch welding rather than long beads.
Also think about corrosion and finish. Bare steel inside a safe can rust in humid climates. After fitting, deburr every edge, clean thoroughly, prime exposed metal, and apply a durable topcoat or rust inhibitor. Even interior components benefit from clean finishing because rough scale and burrs shed particles into lock components.
Step-by-Step Process for Adding Additional Locking Bolts
Start by unloading the safe completely and verifying that no firearms, ammunition, or valuables remain inside. Disconnect power to any outlet kit or dehumidifier rod. Remove interior shelving and the door panel carefully so you can document the original boltwork with photos. Photograph linkage positions with the door open and closed. Mark factory adjustment points before loosening anything.
Next, inspect and service the original system. Clean out dust, old grease, and debris. Replace visibly bent linkage, worn roll pins, or loose guide brackets before introducing new parts. If the original mechanism is already unreliable, added bolts will amplify the problem. Once the baseline system is smooth, create a full-scale layout of proposed bolt positions. Use cardboard or thin hardboard templates to simulate bolt paths and confirm clearances with the door liner in place.
Fabricate the new bolts and guides, then mount the guides first. With the door open, cycle the handle repeatedly and mark exact travel at the intended bolt locations. Tie new active bolts into the existing carriage using welded tabs, bolted clevises, or a new crossbar, depending on the original design. Maintain consistent travel so all active bolts seat at the same point. A bolt that engages early can stop the handle before the others fully extend.
Once mounted, test with machinist blue or marker on the bolt tips to verify contact in the frame pockets. Open and close the door dozens of times before any final finishing. Check for drag, uneven handle force, and relocker clearance. Only after repeated successful cycles should you enlarge pockets, finish welds, paint components, and reassemble the interior. Then perform a lock test with the door open multiple times before ever closing and locking the safe fully.
Common Mistakes, Safety Risks, and When to Hire a Safe Technician
The most common mistake is focusing on bolt size instead of system geometry. Oversized bolts look impressive in photos, but if the safe body flexes, guides are weak, or throw is uneven, they add little real security. Another frequent error is drilling too close to door edges, which can reduce structural integrity or expose fire insulation. I have also seen DIY installers accidentally create a condition where the handle can be forced backward because stop points were removed during modification.
Safety matters beyond burglary resistance. Any work near the lock body can cause an accidental lockout. Mechanical locks can lose correct fence alignment if the mounting area is distorted, and electronic locks can fail if cable routing is pinched under new hardware. Fireboard and seal materials may contain dust or fibers that should not be inhaled, so wear proper respiratory protection when cutting or disturbing insulation. Eye protection, gloves, and controlled clamping are basic requirements when machining steel inside a confined door cavity.
Hire a qualified safe technician or locksmith if your safe has a glass relocker, hardplate arrangement you do not understand, obvious door sag, or a proprietary internal mechanism with limited clearance. Professional help is also wise if the safe is an actual TL-rated burglary safe rather than a typical residential gun safe. Commercial safes have engineering details that should not be altered casually. Even on consumer gun safes, a technician can often improve pry resistance through adjustment, relocker upgrades, hinge-side dead bar improvements, or better anchoring without a full custom bolt addition.
Complementary Upgrades That Make a Gun Safe Safer and More Useful
As the hub page for custom and DIY gun safe modifications, this topic connects naturally to several related upgrades. Better anchoring is usually the highest-value improvement because a safe that can be tipped over is easier to attack with leverage tools. Use manufacturer-approved anchor points, appropriate concrete or wood-subfloor hardware, and large backing washers or plates where needed. Door organizers can improve storage efficiency, but they add weight to the door and may require hinge adjustment after boltwork changes. Interior LED lighting and power kits are convenient, yet wire routing should avoid moving linkage and never cross relocker paths.
Humidity control is another strong companion project. Additional bolts can improve door seal contact, but rust prevention still depends on a dehumidifier rod, desiccant management, and a room environment with reasonable relative humidity. Interior reconfiguration also matters. After modifying the door, reassess rifle spacing, optic clearance, and shelf balance so the safe remains practical to use daily. A security upgrade that makes the safe frustrating to open, close, or organize tends to be neglected, and neglected safes often end up left unlocked.
Finally, document every change. Keep measurements, photos, receipts for materials, and notes on lock model, bolt dimensions, and adjustment points. That record helps with future servicing, insurance questions, and resale disclosures. It also supports the broader discipline of responsible gun safe ownership: maintaining security hardware with the same care you apply to the firearms stored inside.
Adding additional locking bolts to your gun safe is one of the more advanced custom and DIY gun safe modifications, but it can deliver meaningful gains when done for the right reasons and with disciplined execution. The core lesson is simple: bolt count matters less than boltwork design, alignment, reinforcement, and compatibility with the existing lock and door structure. Start by evaluating whether your current safe actually needs more edge coverage or whether anchoring, adjustment, or maintenance will solve the underlying weakness more effectively. If you move forward, treat the job as a complete system upgrade, use precise layout tools, reinforce every new guide and pocket, and test repeatedly with the door open before final lockup. Remember that this modification lives inside a larger Gun Safes & Safety strategy that includes humidity control, interior organization, door weight management, and serviceability. Done carefully, added locking bolts can make a good safe harder to pry, more satisfying to operate, and better tailored to your storage needs. If your safe has complicated relockers, proprietary boltwork, or structural issues, bring in a qualified safe technician before cutting metal. Review your current setup, map the upgrades that will deliver the biggest real-world benefit, and then choose the bolt modification path that matches your skill level and your safe’s design.
Frequently Asked Questions
1. Why would someone add additional locking bolts to a gun safe?
Adding additional locking bolts can make a gun safe door engage more securely with the body of the safe, especially on older cabinets and residential security containers that have developed looseness over time. In a practical sense, the bolts are the parts that extend from the door edge into the frame when you turn the handle, so increasing their number or improving their placement can help reduce flex, improve pry resistance, and create a tighter fit around the door opening. This is often most beneficial on safes with thin factory bolt patterns, worn internal linkages, or doors that no longer pull in as firmly as they once did.
It is important to understand, though, that additional bolts do not magically turn a light-gauge cabinet into a high-security vault. The body steel, door construction, frame design, relocker arrangement, and lock quality still matter just as much. What extra locking bolts can do is improve door engagement and make certain pry attacks more difficult by spreading resistance across more points. When properly designed and installed, they can also help extend the useful life of an aging safe by compensating for wear and improving the overall feel of the lockwork.
2. Can I add locking bolts to any gun safe, or are there limitations?
There are definitely limitations, and this is one of the most important things to evaluate before starting. Not every gun safe is a good candidate for additional locking bolts. The feasibility depends on the door thickness, internal clearance, existing boltwork layout, frame geometry, hinge arrangement, and whether there is enough structure in the door and body to support new bolt engagement points. On some safes, especially lower-cost units, the door skin may be too thin or the internal mechanism too compact to accept added components without extensive fabrication.
You also need to consider how the existing lockwork operates. Many safes use a central cam, linkage bars, or rack-and-pinion style movement to drive the bolts. If the mechanism is already near its limit, adding more bolts can increase drag and introduce alignment issues unless the whole system is upgraded together. In other cases, the frame may not have enough depth to receive longer or additional bolts, or the fire lining and interior paneling may interfere with modification. The safest approach is to inspect the internal door construction carefully and determine whether the safe has enough rigidity and space to support the change. If the safe is heavily worn, warped, or poorly built from the start, it may make more sense to repair the existing system or replace the unit rather than retrofit more boltwork.
3. What is involved in adding additional locking bolts to a gun safe?
The process usually involves more than simply drilling a few holes and inserting steel pins. A proper retrofit starts with evaluating the current locking system, measuring the door gap, identifying strong mounting points, and deciding where added bolts will provide meaningful benefit. In many cases, the best locations are on the opening side of the door, though top and bottom bolts may also be added depending on the safe’s design. The installer then has to fabricate or adapt bolt carriers, linkage arms, guides, and receiving holes so the new bolts move smoothly with the handle and align correctly with the safe body.
Precision matters at every stage. If the bolts are too loose, they will not meaningfully improve security. If they are too tight or misaligned, the handle can bind, the lock may not fully throw the mechanism, and long-term wear may actually increase. The door panel often has to be opened up to access the internal boltwork, and that can involve removing interior panels, fireboard, trim, or welded covers. After fabrication and fitting, the system needs repeated testing with the door open and closed to confirm full throw, proper retraction, and clean engagement under real operating conditions. In some projects, reinforcing the bolt area with backing plates or upgrading worn linkage components is just as important as adding the new bolts themselves. A professional-quality result depends on good mechanical design, not just heavier metal.
4. Will adding more locking bolts make my gun safe significantly more secure?
It can improve security, but the improvement has to be viewed realistically. Additional locking bolts can make a door harder to pry by increasing the number of engagement points and reducing the amount of unsupported edge movement during an attack. They can also help the door close more firmly, which may reduce rattling, sag-related looseness, and uneven gasket contact. On an older safe with a sparse factory bolt pattern, that can be a worthwhile upgrade.
However, locking bolts are only one part of the overall security picture. If the safe body is made from thin steel, a thief may attack the side, top, back, or door skin rather than the bolt edge. Likewise, if the lock, relocker, or hardplate is weak, adding more bolts does not solve those vulnerabilities. True security comes from the complete design of the container, including anchoring, steel thickness, door fit, lock protection, and resistance to tool attacks. So yes, more bolts can improve pry resistance and mechanical engagement, but they should be thought of as part of a broader upgrade strategy rather than a standalone cure-all.
5. Should I install additional locking bolts myself or hire a professional?
If you have advanced metalworking skills, understand safe lock geometry, and are comfortable fabricating and aligning moving mechanisms, a retrofit may be within reach. But for most owners, this is a job where professional help is the better option. The reason is simple: safe boltwork is a system, and small mistakes can leave the door difficult to operate, unable to lock properly, or in the worst case, jammed shut. Misalignment, excessive friction, poor weld placement, and weak attachment points are all common failure points when modifications are done without a full understanding of how the lockwork behaves under load.
A qualified safe technician or fabricator can assess whether your safe is a good candidate, identify weak points in the existing mechanism, and design the added bolts so they work with the current lock rather than against it. They can also check for related issues such as worn handle cams, bent linkage, hinge sag, frame distortion, and inadequate bolt support. In many cases, a professional may recommend a combination of repairs and reinforcement instead of simply adding more bolts, which often leads to a better long-term result. If your goal is improved function, better pry resistance, and dependable operation, professional evaluation is usually the most efficient and safest path.