
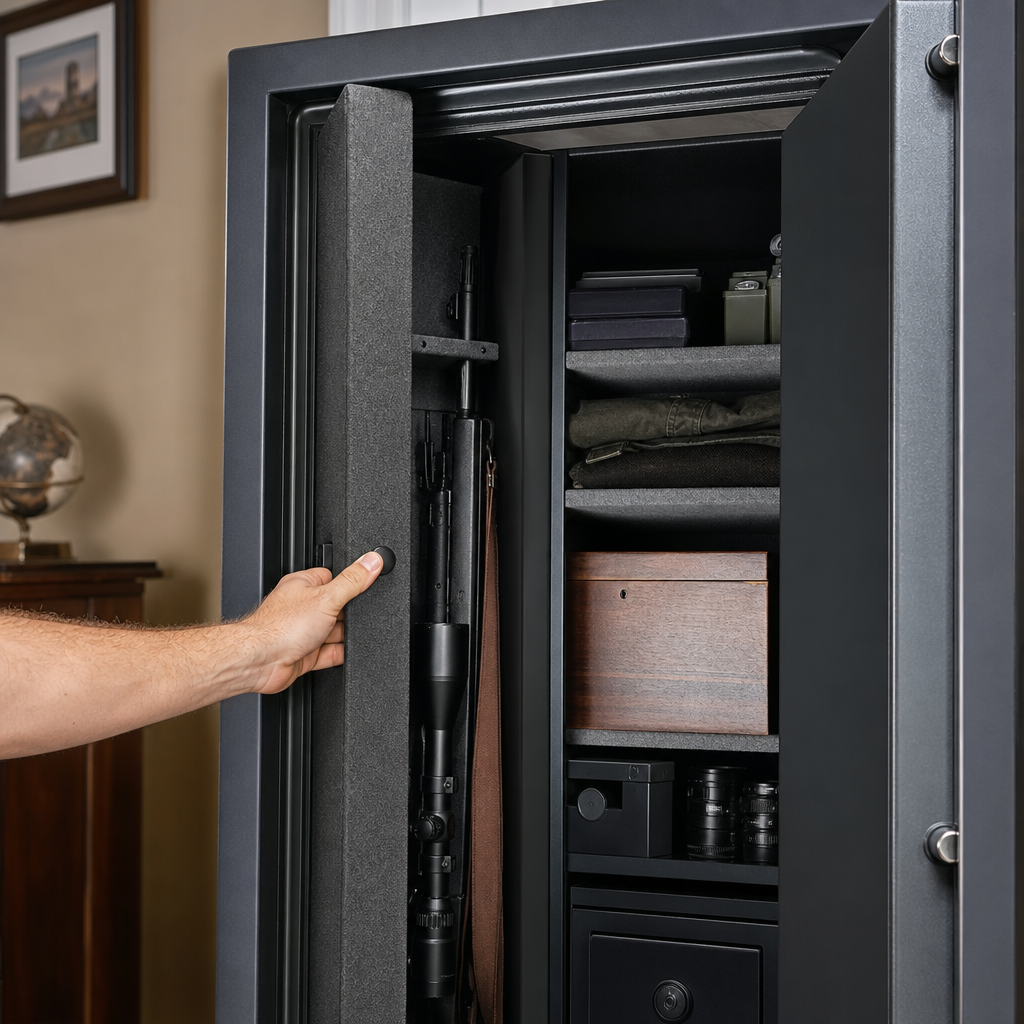
Adding a hidden gun compartment in a large safe can improve organization, speed access to select items, and create a discreet storage layer within an already secure enclosure. In practical terms, a hidden compartment is a secondary, intentionally concealed space built inside the main body of a gun safe, usually behind shelving, false panels, door organizers, or modified interior walls. I have worked on safe interiors where owners wanted a cleaner layout for handguns, documents, suppressors, jewelry, cash, or backup keys without changing the safe’s exterior or weakening its burglary and fire ratings. That distinction matters. A hidden compartment inside a large safe is not the same as cutting into the safe’s steel shell, drilling random cavities, or altering locking bolts. The goal is concealment and better use of interior volume, not structural surgery.
This topic matters because large safes often waste space. Deep interiors swallow small valuables, pistol cases pile up, and quick-access items get buried behind long guns and shelves. A well-designed hidden gun compartment solves those problems while preserving core safety standards. It can also support layered storage, separating defensive firearms from collectibles, NFA paperwork, passports, batteries, cash, and digital backups. For owners building a broader custom storage system, this project sits at the center of custom and DIY gun safe modifications. It connects to shelf upgrades, door panel systems, LED lighting, dehumidifier placement, handgun racks, magazine storage, cable routing, ammo segregation, and interior relining. Done correctly, the modification is reversible, visually clean, and compatible with common safe brands such as Liberty, Fort Knox, Browning, AMSEC, Winchester, and Rhino. Done poorly, it reduces usable space, blocks airflow, interferes with hinges or lockwork, and can even create a safety hazard when firearms are stored in awkward positions.
Before building anything, define the purpose of the hidden compartment. Is it for one defensive handgun, several pistols, emergency cash, important documents, optics, family heirlooms, or a combination? Measure the safe’s interior height, depth, shelf spacing, door swing, and lock-side clearance. Check where the relocker, hard plate, locking bars, and interior door panel sit, because those areas should never be disturbed. Review the manufacturer’s warranty and any fire-liner details, especially on gypsum-lined models, since unnecessary penetrations can compromise protection. In most projects I recommend a “no new holes in the safe body” rule. Instead, use freestanding inserts, shelf-mounted false backs, magnetic retention on internal organizers, or framed compartments anchored to existing shelf supports. That approach keeps the modification within the realm of interior cabinetry rather than metal fabrication, which is safer, easier, and more likely to preserve the safe’s original performance.
Choose the Right Hidden Compartment Design
The best hidden compartment design depends on what you need to conceal and how often you need to reach it. In large safes, the most practical options are a false back panel behind shelves, a concealed drawer under a shelf, a side-wall pocket masked by felt or upholstery, a raised floor with hidden cavities, or a door-mounted panel with an unmarked closure. For long-gun safes, false backs are especially efficient because many models have dead space behind barrel rests or beside adjustable shelving columns. A shallow cavity three to five inches deep can hold handguns, passports, stacked magazines, suppressors where legally allowed, or emergency kits. If the safe has a full interior fabric liner over plywood or MDF panels, you may be able to create a hidden access point within the removable interior furniture without touching the steel shell at all.
Concealed drawers work well when the owner wants repeatable access without unloading rifles. I have built under-shelf drawers with full-extension slides rated for 75 to 100 pounds, faced with matching carpeted trim so they disappear under a shelf lip. Raised floors are useful in extra-tall safes storing shorter carbines or when lower bins already create a platform. Door-mounted hidden spaces can be excellent, but only if the added thickness does not interfere with door closure, locking bolts, or pistol pockets. The rule is simple: if the hidden compartment changes clearances on the lock side, rethink it. A safe door closes within tight tolerances, and even half an inch can cause rubbing, compression, or latch problems.
| Design | Best Use | Main Advantage | Main Risk |
|---|---|---|---|
| False back panel | Handguns, documents, cash | Uses dead space efficiently | Can reduce airflow if packed tightly |
| Under-shelf drawer | Frequent-access pistols and valuables | Fast repeatable access | Slide hardware may snag gear |
| Raised floor compartment | Flat items, backup firearms | Excellent concealment | Consumes vertical storage height |
| Door-mounted hidden panel | Small valuables, documents | Easy reach near eye level | May interfere with door closure |
| Side-wall insert | Slim pistols, knives, paperwork | Low visual profile | Often limited by interior width |
As a hub topic for custom and DIY gun safe modifications, design selection is the decision that shapes every other upgrade. Lighting placement, shelf spacing, handgun racks, and humidity control all follow from where the hidden space goes. If you later add LED strips, door organizers, or a power outlet kit, build the hidden compartment so those upgrades still fit. Planning for future modifications now prevents rebuilding the interior twice.
Materials, Tools, and Safe-Friendly Construction Methods
For most DIY projects, use cabinet-grade plywood, thin MDF, hardwood strips, industrial hook-and-loop fastener, rare-earth magnets in wooden housings, low-profile drawer slides, felt, automotive headliner adhesive, and marine carpet or safe fabric that closely matches the factory liner. I prefer plywood over MDF for structural pieces because it holds screws better and resists sagging in humid conditions. MDF is acceptable for false faces or lightweight dividers, especially when wrapped in fabric, but avoid using it for unsupported shelves in a warm garage safe where moisture swings are common. For padding, closed-cell foam protects finishes better than open foam, which can trap moisture and compress unevenly.
Useful tools include a tape measure, digital caliper for tight clearances, square, utility knife, jigsaw or table saw, drill and countersink, stapler, clamps, and a stud finder-style magnet or borescope for understanding internal panel layouts. Avoid angle grinders, plasma tools, or uncontrolled drilling into the safe body. If you must fasten something near steel, attach to existing shelf frames, wooden interiors, or removable panels. Many premium safes already include modular interiors secured with clips, shelf pins, and panels. Those systems are ideal because you can build inserts that sit inside the original framework and remove them later without evidence of alteration.
Adhesives deserve attention. Solvent-heavy glues can damage interior liners, create fumes in enclosed spaces, and interact poorly with fireboard coverings. Use low-VOC construction adhesive where possible, and let materials cure completely before storing firearms. Also think about corrosion. Any exposed steel fastener in a humid safe can rust and transfer oxidation to a blued firearm. Zinc-coated or stainless hardware is a better choice, and edges should be sanded smooth so no stock, optic, sling, or soft case catches on them.
Step-by-Step Build Process Without Weakening the Safe
Start by unloading the safe fully and documenting the original interior with photos. Measure every dimension twice, including diagonal door clearance and the swing path of shelves or drawers during access. Build your hidden compartment as a stand-alone module first. For example, if you are making a false back, create a lightweight frame from half-inch plywood or one-by-two hardwood, skin it with a thin panel, and wrap the visible surface in matching felt or carpet. The access method can be a pull tab concealed behind a removable accessory, a magnetic latch, or a friction-fit panel. Keep the mechanism simple. Complex hidden releases fail more often, especially in dusty or humid conditions.
For an under-shelf drawer, install slides onto a shelf support frame rather than the safe wall whenever possible. Verify that the drawer clears stored rifles and does not extend into the door’s locking side. If the safe has carpeted shelves, replicate the same finish on the drawer face so the compartment disappears under normal lighting. Test all loaded and unloaded conditions. A drawer that works empty may sag once filled with loaded magazines, steel pistols, or boxed valuables.
With raised floors, create a platform with segmented lids or a single lift-out panel. Leave channels for airflow around dehumidifier rods or desiccant placement. Safes work best when air can circulate from lower warm zones upward. Packing the bottom with sealed cavities can create stagnant pockets where moisture lingers. I have seen this happen in basements, where owners unknowingly made a perfect condensation trap under a false floor. The fix was simple: vent gaps at the rear and side, plus a better silica schedule, but it would have been easier to plan from the start.
Once the module fits correctly, reinstall firearms and accessories in a deliberate order. Hidden does not mean careless. Store any handgun inside the compartment in a stable orientation with trigger protection and enough spacing to avoid metal-to-metal contact. If children or unauthorized adults may ever gain access to the open safe, consider a secondary locked box inside the hidden area. Concealment is not a substitute for secure access control.
Fire, Moisture, Access, and Legal Considerations
Any interior safe modification should preserve the original purpose of the safe: delaying theft, reducing fire exposure, and controlling environmental damage. Fire ratings on residential security containers and higher-end gun safes depend on tested materials, door seals, and insulated cavities. While most hidden compartment projects do not alter those systems directly, aggressive drilling, cutting, or liner removal can. If you do not know whether a wall panel covers fireboard, stop and confirm with the manufacturer. That is especially important with brands that vary interior construction by model year.
Moisture control is a major issue in custom gun safe interiors. Hidden compartments can block airflow, shield rust from routine inspection, and concentrate humidity around foam or fabric. Use a hygrometer, not guesswork. Relative humidity around 45 to 50 percent is a practical target for most gun safes. GoldenRod-style dehumidifiers, rechargeable desiccants, and silica packs all help, but placement matters. A hidden compartment packed with leather, paper, and foam may need its own small desiccant pack and periodic inspection. Check it monthly at first, then adjust your schedule based on readings.
Access speed is another tradeoff. A hidden compartment inside a large safe should not delay emergency retrieval beyond your comfort level. If this is where you keep a defensive handgun, practice opening the main safe, reaching the hidden access point, and acquiring the firearm safely in low light. Add interior LED strips if needed. Battery-powered puck lights are easy, but hardwired LED kits with motion or door-activated switches are more reliable in larger safes.
Legal considerations vary by state and by the items stored. Firearms, suppressors, short-barreled rifles, and records tied to regulated items may each carry separate storage concerns. Some insurance policies also ask how valuables are stored or whether a safe has been modified. If the hidden compartment holds cash, jewelry, or documents, review your policy language. The modification itself is usually not the issue; undocumented contents and unsupported value claims are.
How This Project Fits the Bigger Picture of Custom and DIY Gun Safe Modifications
A hidden gun compartment is the central organizing idea for a smarter safe interior, but it works best as part of a complete modification plan. In most large safes, the next upgrades are adjustable shelving, pistol racks, magazine bins, door-panel organizers, LED lighting, power management, and better humidity control. Think of the hidden compartment as your low-visibility storage tier, while the rest of the interior handles daily access and long-gun presentation. When I redesign a safe interior, I map three zones: primary access, secondary access, and concealed reserve. That framework keeps the owner from stuffing every small item into one hard-to-reach corner.
If you are building this page into a broader Gun Safes & Safety content structure, the related subtopics are clear. Readers typically want to know how to add shelves to a gun safe, how to install safe lighting, how to organize pistols and magazines, how to improve dehumidification, how to add power inside a safe, and which modifications preserve warranty coverage. They also want comparisons between DIY inserts and professionally built interiors. As a hub article, this project links all of those decisions together because compartment placement affects storage density, access speed, and maintenance routines.
The strongest results come from restraint. Keep modifications reversible, avoid cutting the steel body, preserve door clearances, protect airflow, and inspect often. A hidden compartment should feel like part of the original interior, not an awkward box shoved behind rifles. When you match fabrics, align panels, use proper slides, and measure around hinges and lockwork, the finished result is discreet, durable, and easy to live with. Plan the compartment around your actual use case, build with safe-friendly materials, and test access before trusting it with firearms or critical documents. If you are ready to upgrade your storage, start with a measured layout, choose one hidden-compartment style, and build the rest of your custom safe interior around it.
Frequently Asked Questions
What is a hidden gun compartment inside a large safe, and why would someone add one?
A hidden gun compartment is a secondary storage space built within the interior of a larger gun safe and intentionally disguised so it is not obvious at first glance. Instead of changing the outside of the safe, the compartment is usually integrated into the interior layout behind a false back panel, inside a modified shelf section, beneath a floor insert, within a door organizer, or behind sidewall trim. The main purpose is not to replace the safe’s primary security features, but to create a discreet layer of organization and access inside an already secure enclosure.
Many owners add one because large safes can become cluttered over time. Handguns, important documents, jewelry, suppressors where legally owned, cash, backup keys, and other compact valuables often compete for space with long guns and general storage. A hidden compartment allows those specific items to be separated from the main contents, which can make the interior cleaner, easier to navigate, and faster to use. In real-world setups, this often means keeping the most frequently accessed items in a dedicated, concealed spot while preserving the visible shelves for standard storage.
There is also a practical privacy benefit. If someone opens the safe for a routine reason, such as retrieving paperwork or accessing a rifle, the hidden compartment may keep certain sensitive items out of immediate view. That can be useful in shared households, for owners who want a more discreet arrangement, or for anyone trying to reduce visual exposure of especially valuable small items. The key idea is layered storage: the safe provides overall protection, while the hidden compartment adds concealment, better internal organization, and more intentional item placement.
What are the best places inside a large safe to build a hidden compartment?
The best location depends on the safe’s interior dimensions, shelving layout, and how you plan to use the compartment. In most large safes, the most workable hiding spots are behind removable shelves, inside a false rear wall, behind side panels, under a raised floor insert, or within the door panel system. A false back wall is one of the most common approaches because many safe interiors already have carpeted or upholstered panels that can be modified without making the addition look out of place. If there is enough depth behind the visible storage area, a shallow hidden cavity can be created for handguns, documents, or compact valuables.
Shelf-based compartments are another strong option, especially in safes with adjustable interiors. A shelf can be rebuilt with a hollow section, concealed drawer, or magnetic-release panel that blends in with the rest of the shelving. This works well for smaller items and can be especially effective when paired with existing storage boxes or accessories that make the shelf look ordinary. Door organizers can also be modified to conceal flat items, though this area is usually better for lighter contents because of clearance and weight considerations when the door swings.
The best location is one that balances concealment, accessibility, and structural caution. You want a spot that does not interfere with long gun storage, door operation, lighting, dehumidifiers, or anchor points. It is equally important to avoid areas where factory wiring, fireboard, or locking components may be present behind the liner. In general, the most successful hidden compartments are the ones that look like a natural part of the safe’s original interior rather than an obvious add-on. If the compartment forces awkward shelf spacing or visibly reduces usable room, it usually needs a better placement strategy.
Will adding a hidden compartment affect the safe’s fire protection, warranty, or security?
It can, depending on how the compartment is installed. The biggest mistake is treating the interior like ordinary cabinetry and drilling or cutting into the safe body without understanding what is behind the liner. Many large gun safes contain fireboard layers, internal reinforcements, electrical pass-throughs, relocker-related components, or upholstered panel systems attached in ways that are not immediately obvious. If you penetrate the steel shell, disturb the fire lining, or interfere with the locking side of the safe, you may compromise performance and potentially void the manufacturer’s warranty.
That is why the safest approach is usually a non-invasive or minimally invasive interior build. In many cases, a hidden compartment can be added by modifying removable shelving, constructing freestanding false panels, or attaching components to existing interior framework instead of the safe body itself. These methods preserve the exterior shell and reduce the risk of damaging fire insulation or security features. If your safe includes factory-installed electrical outlets, LED lighting, or dehumidifier ports, extra care is needed so the compartment does not block ventilation, pinch wires, or create heat and moisture issues inside enclosed spaces.
From a security standpoint, a well-built hidden compartment can improve concealment, but it should never be seen as stronger than the safe itself. Its role is to hide and organize, not to replace hardened protection. If maintaining fire rating, warranty coverage, and original safe integrity matters to you, check the manufacturer documentation before making changes. For expensive safes or premium fire-lined models, consulting a safe technician or experienced interior fabricator is often the smartest move. A good design adds concealment while preserving the original security and performance of the safe rather than undermining it.
What materials and design features work best for a hidden gun compartment inside a safe?
The best materials are stable, lightweight, moisture-conscious, and visually consistent with the safe’s interior. Common choices include plywood, MDF, hardwood trim, thin steel, aluminum, high-density foam, carpeted panels, and automotive-style upholstery materials that match the existing liner. In many projects, the goal is to make the compartment disappear into the safe’s factory look, so matching the carpeting, felt, or panel fabric can matter just as much as the structural material itself. Lightweight construction is especially helpful because overbuilt compartments can reduce shelf efficiency and add unnecessary strain to adjustable supports or door panels.
As for design features, simplicity usually wins. A concealed panel with a magnetic catch, hidden finger pull, sliding section, lift-out insert, or disguised seam is often more reliable than an overly complex mechanism. The compartment should open smoothly, remain stable when loaded, and avoid rattling or shifting when the door is opened and closed. Interior padding is useful for handguns, optics, suppressors where legal, watches, jewelry, and documents because it prevents wear and keeps small items from moving around. If quick access matters, the opening method should be intuitive to the owner but not visually obvious to anyone else.
Moisture management is another major design factor. Safes are enclosed environments, and hidden spaces can trap humidity if they are packed too tightly or built without thought to airflow. Materials that resist warping and mildew are preferable, and any compartment near a dehumidifier rod or passive moisture control system should not block its effectiveness. A good hidden compartment is not just concealed; it is durable, quiet, easy to access, and compatible with the safe’s interior climate. The most effective builds look factory-finished, function reliably, and support the owner’s actual storage habits instead of just adding novelty.
Should you build a hidden compartment yourself or hire a professional?
That depends on your skill level, the value of the safe, and how complex the design needs to be. A do-it-yourself approach can work well if the project is limited to removable interior elements such as shelves, dividers, false panels, or floor inserts and you are comfortable with precise measuring, clean finishing, and discreet hardware installation. For many owners, a DIY build is appealing because it allows customization around exact firearms, documents, and valuables while keeping costs lower. If you stay within the interior furnishing layer and avoid altering the safe’s steel body or fire protection system, the project is usually much more manageable and lower risk.
Hiring a professional makes more sense when the safe is high-end, the interior is tightly packed, the build needs to look seamless, or there is any concern about interfering with fire lining, electrical features, or door clearance. A professional who understands safe interiors can often identify unused space more efficiently and design a compartment that looks original rather than improvised. That matters if you want a refined result, if the safe stores expensive collections, or if preserving warranty and resale value is important. Professionals can also help with ergonomic access, load distribution, and material choices that hold up better over time.
In practical terms, the best decision is based on risk tolerance. If you can create the hidden compartment entirely as a removable, non-destructive insert, DIY is often a reasonable option. If the design requires cutting, drilling, or modifying anything that may affect the safe’s structure or insulation, professional help is the safer route. Either way, the goal should be a compartment that improves organization, discreet storage, and speed of access without compromising the core function of the safe itself.