
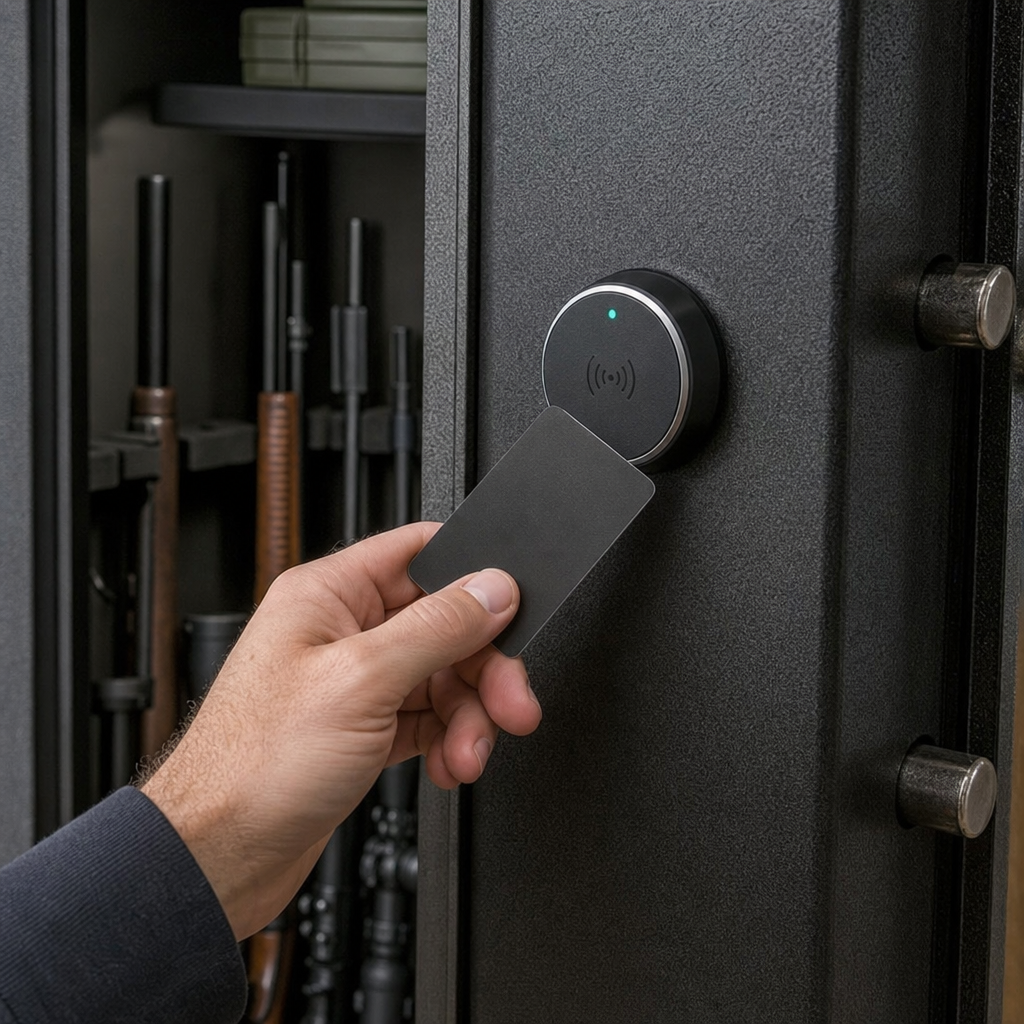
Installing an RFID locking system in your gun safe is one of the most practical custom upgrades you can make when you want faster access, stronger access control, and a cleaner user experience than a traditional key or mechanical dial. In the gun safes and safety category, RFID refers to radio frequency identification, a method that unlocks a device when an authorized tag, card, wristband, or fob is placed within a short read range of the reader. In this context, a DIY gun safe modification means changing the safe’s access hardware, interior layout, electronics, or organization features without replacing the safe itself. I have installed electronic lock retrofits on compact handgun safes, cabinet conversions, and larger residential security containers, and the same lesson applies every time: success depends less on the reader itself and more on planning for door construction, power, fail-secure behavior, and safe handling under stress.
This topic matters because a gun safe must balance two competing requirements that never go away. It must prevent unauthorized access by children, visitors, and thieves, yet it must still allow authorized users to open it quickly in low light, under pressure, and sometimes with one hand. Many factory safes ship with basic keypads or mechanical locks that work well enough, but owners often want quieter operation, less visible wear on buttons, and multiple credential options. An RFID locking system can provide that, especially on bedside handgun safes, closet installations, hidden compartments, and custom cabinet builds. It is also the entry point to broader custom and DIY gun safe modifications, including interior lighting, dehumidification, backup power, tamper alarms, shelf redesign, handgun racks, long-gun barrel supports, door panel organizers, and smart monitoring. As the hub for custom and DIY gun safe modifications, this guide explains how to choose components, install them safely, test them properly, and decide when a modification improves a safe versus when it creates new risks.
What an RFID Gun Safe Lock Actually Does
An RFID gun safe lock combines four parts: a reader, a control module, a locking mechanism, and a power source. The reader detects an authorized credential. The control module verifies it and sends power to the locking mechanism. The lock then retracts a latch, releases a solenoid, or energizes a motor-driven cam so the door can open. On retrofit projects, the locking mechanism is usually either an electric strike-style release for a lightweight compartment or a compact cabinet lock designed for wood, thin steel, or composite enclosures. On heavier steel handgun safes, some kits replace an existing electronic lock face while leaving the door structure mostly unchanged. On full-size gun safes with UL-listed lock bodies, direct DIY replacement is more complex and often not advisable unless the manufacturer supports that specific conversion.
RFID systems differ in frequency and security design. Low-frequency 125 kHz credentials are common in inexpensive cabinet locks and are easy to use, but they usually offer less sophisticated credential management than high-frequency 13.56 MHz systems based on standards such as MIFARE. For a bedside handgun safe, convenience may matter most. For a larger safe storing multiple firearms, serialized credential enrollment, audit capability, and lockout settings matter more. Read range is also important. In practical installations, you want a short and predictable read distance so a tag in a nearby wallet or drawer does not trigger the lock unintentionally. Most quality safe lock kits are intentionally designed for close presentation, often within one to two inches, which improves control and reduces accidental activations.
Not every safe is a good candidate. The best DIY RFID projects involve hidden compartments, steel cabinets, wooden enclosures, modular lockers, and smaller handgun safes where the reader can be mounted on or behind a non-obstructive surface. Thick steel doors can block or weaken signals, so some builders mount the reader behind a plastic trim plate, wood panel, or drilled front escutcheon approved by the kit manufacturer. If your safe uses a certified Group 2 mechanical lock or a UL Type 1 electronic lock on a burglary-rated body, replacing it with an off-the-shelf RFID kit may reduce the protection level of the entire system. In those cases, a better modification may be supplemental access control on an interior compartment rather than altering the main door lock.
Planning the Retrofit Before You Drill Anything
The biggest installation mistakes happen before the first hole is drilled. Start by identifying the safe type, door material, internal clearances, and existing lock path. A thin-wall security cabinet is very different from a 10-gauge steel handgun safe, and both are very different from a composite fire-rated residential security container with layered insulation. Measure door thickness, internal obstructions, bolt travel, swing direction, and available space behind the lock area. I always remove shelves, inspect with a flashlight, and map the back side of the door using painter’s tape so I know where relockers, fireboard, wiring channels, and boltwork sit. You need to know exactly where the reader cable will pass and where the actuator can mount without interfering with door closure.
Power planning is equally important. Many RFID safe locks run on AA batteries mounted inside the door or on an external pack. Others use rechargeable packs or low-voltage DC adapters. Battery-only systems are simpler and cleaner, but they require a disciplined replacement schedule. For defensive firearm storage, install fresh branded alkaline or lithium cells, note the date, and replace them before the low-battery warning becomes urgent. If the system supports external emergency power, verify how it works before installation. Some locks use a concealed 9-volt contact point. Others require temporary USB power. Emergency override keys are common on consumer units, but they create a new key-control responsibility. If you use them, store the override key away from the safe, not in the same room.
Credential strategy should be decided up front. Ask who needs access, what form factor works best, and what backup method you trust. A bedside owner may prefer a wristband at night and a wallet card during the day. A shared household may assign separate fobs and maintain one sealed emergency card. Good systems allow quick enrollment and deletion, which matters if a credential is lost. Also decide how visible you want the reader to be. Some owners prefer a discrete external reader pad. Others hide the antenna behind wood veneer for a seamless concealed-compartment look. Hidden readers can work well, but only if the kit is designed for that material thickness. Too much steel, adhesive foil, or dense substrate between the credential and reader will create intermittent operation.
Tools, Components, and Compatibility Checks
A clean retrofit usually needs more than the lock kit in the box. At minimum, expect to use a drill, step bit, deburring tool, center punch, screwdrivers, hex keys, painter’s tape, ruler or caliper, nonconductive cable clips, and threadlocker that matches the manufacturer’s guidance. For steel safes, sharp cobalt bits help. For wooden cabinets or hidden furniture compartments, Forstner bits often produce cleaner reader openings. I also keep a multimeter on hand to verify battery voltage and continuity on low-voltage leads. If the door interior is cramped, right-angle drivers and magnetic parts trays save time and reduce the chance of dropping screws into inaccessible cavities.
Compatibility checks should cover lock geometry, material thickness, latch strength, and emergency egress behavior. A compact RFID cabinet lock may be rated for a half-inch wood door but struggle with a heavier steel panel that flexes under pull load. Solenoid locks are simple, but they can bind if the strike alignment is off by even a few millimeters. Motorized cam locks tolerate some misalignment but tend to be slower and more expensive. If the safe already uses active locking bolts, your RFID system may only need to release the handle or a blocking bracket. If the compartment relies entirely on the electronic latch to resist opening, choose hardware with real holding strength, not a decorative furniture lock repurposed for firearm storage.
| Modification Area | Best Use | Main Benefit | Key Caution |
|---|---|---|---|
| RFID lock retrofit | Handgun safes, cabinets, hidden compartments | Fast access without keypad entry | Requires power and careful alignment |
| Interior LED lighting | Dark closets and deep safes | Improves visibility during access | Avoid heat and exposed wiring near boltwork |
| Dehumidifier or desiccant upgrade | Long-gun storage in humid climates | Reduces corrosion risk | Needs regular monitoring and replacement |
| Door panel organizer | Maximizing storage space | Keeps handguns and documents accessible | Can interfere with shelving or door closure |
| Smart sensor or tamper alarm | Remote monitoring | Alerts owner to opening or movement | Should not replace physical security |
As a hub for custom and DIY gun safe modifications, it helps to see where RFID fits. It is usually the highest-impact access upgrade, but it should be coordinated with adjacent improvements. If you add interior lighting, route low-voltage wiring so it does not snag on the hinge side. If you install a door organizer, check that stored magazines or pistol holsters do not hit the RFID control box. If you add humidity control, keep power cords away from moving parts and use pass-throughs that do not compromise the door seal. Good safe modification work is cumulative and organized; bad work is a pile of separate gadgets competing for the same limited space.
Step-by-Step RFID Lock Installation Process
Begin with the safe unloaded, ammunition removed, and the door secured in a stable open position. If the safe is freestanding and light enough to shift, anchor it before working. Remove interior panels as needed and disconnect any existing power sources. Use the kit template to mark the reader and lock mounting points. Before drilling, confirm twice that the chosen location clears internal boltwork, shelves, and door liners. Drill pilot holes first, then enlarge gradually. On steel, use cutting oil and moderate speed to avoid overheating bits. Deburr every opening so cables are not damaged by sharp edges. If the reader requires a rectangular cutout, many installers drill the corners and finish the shape carefully with a file rather than forcing a large bit through thin metal.
Next, mount the reader, route the cable, and install the control module where it is protected but still serviceable. Leave enough slack for door movement but not so much that the cable can pinch at the hinge. Mount the latch or strike according to the manufacturer’s alignment spec, not by eye. I usually apply a thin strip of masking tape to the contact points and cycle the mechanism several times to confirm even engagement marks. If the door requires pressure relief to open after unlocking, add a small spring plunger or magnetic push-out device so the release feels immediate. Program credentials only after the hardware is mechanically sound. Then test with the door open at least twenty times, using each credential and any backup override method. Only after repeated successful cycles should you test with the door closed.
Final setup should include battery installation, low-battery alert verification, and a written recovery plan. Label the battery type and replacement interval on the inside panel. Store backup credentials in separate controlled locations. If the lock has user modes such as silent entry, auto relock delay, or tamper lockout, configure them to match the safe’s role. For a bedside handgun safe, shorter relock times and minimal beep volume usually make sense. For a workshop cabinet, audible confirmation may be helpful. The installation is not finished until you test realistic conditions: darkness, one-handed access, cold fingers, and rapid retrieval without fumbling. That real-world testing separates a successful gun safe RFID installation from a bench-tested project that fails when it matters.
Common Problems, Safety Limits, and When Not to DIY
The most common problem is misalignment. If the latch and strike do not meet squarely, the lock may work with the door open but fail under normal closing pressure. The second common issue is RF interference or attenuation caused by metal placement, poor antenna orientation, or hidden mounting behind a surface that is too thick. Third is power neglect. Owners often install a battery-powered lock and assume the warning beeps provide enough notice, but batteries can decline faster in cold rooms, garages, or high-use households. I recommend scheduled replacement and a monthly function check. Also inspect fasteners, because repeated door vibration can loosen mounting hardware over time if threadlocker was not used correctly.
There are also hard limits. An RFID retrofit does not make a thin cabinet equivalent to a true burglary-rated safe. It improves access control, not steel thickness, hinge strength, lock certification, or anchoring security. Consumer RFID locks can be excellent for keeping unauthorized users out of a handgun safe or concealed compartment, but they should not be marketed to yourself as high-security commercial hardware unless they are certified and installed in a matching enclosure. Fire protection is another concern. Drilling through insulated doors or removing internal liners can reduce fire resistance if you do not restore barriers properly. On premium safes with manufacturer warranties, unauthorized modifications may void coverage.
Some jobs should go to a locksmith or safe technician. If the safe has active relockers, glass relocker systems, hardplate, complex boltwork, or a listed lock that supports insurance requirements, do not experiment casually. Professional help is also wise when you need to preserve a fire lining, maintain a specific lock certification, or troubleshoot a lockout on a loaded schedule. A good technician can often suggest a better path, such as adding an RFID-controlled interior pistol vault, a mechanical simplex lock for no-battery access, or a manufacturer-approved electronic conversion kit. The best custom gun safe modifications improve speed, organization, and reliability without sacrificing the core job of safe firearm storage. If you are planning your next upgrade, start with a measured RFID retrofit plan, document every step, and build the rest of your DIY safe system around dependable access and disciplined safety habits.
Frequently Asked Questions
1. What do I need before installing an RFID locking system in my gun safe?
Before you begin, make sure you have both the right hardware and a realistic installation plan. At minimum, you will need an RFID lock kit designed for enclosed storage, an appropriate power source such as batteries or a low-voltage wired supply, mounting hardware, basic hand tools, and enough interior clearance inside the safe door or body for the lock, latch, and reader components. Many gun safe owners also use a drill, step bit, measuring tape, center punch, screwdriver set, and protective eyewear. If your safe is lined with carpet, fabric, or fireboard, you may also need a utility knife or trim tools to expose the mounting area cleanly.
It is also important to verify compatibility before buying anything. Not every RFID cabinet lock is strong enough or sized correctly for a full-size gun safe. Some products are designed for wooden cabinets, drawers, or lightweight locker doors, and they may not provide the holding force, mounting flexibility, or durability needed for steel safe doors. Look for a lock system with a solid latch or strike mechanism, dependable read range, backup access method, and clear installation instructions. If your safe already has a functioning lock, decide whether the RFID system will serve as a supplemental access control device or as part of a more involved custom locking setup.
Finally, think through access and safety requirements. An RFID lock should improve convenience without compromising secure storage. Plan where you want the reader placed, how quickly you need the safe to open, who will have authorized tags, and how you will handle power loss or lost credentials. A good installation starts with careful measuring, understanding the safe’s door construction, and making sure the modification does not interfere with the safe’s original locking bolts, hinges, relockers, or fire protection materials.
2. How do I install an RFID locking system in a gun safe step by step?
The first step is to unload the safe completely and work with the door open in a stable, well-lit area. Remove firearms, ammunition, documents, and any shelving or interior panels that block access to the installation area. If the safe has an interior door panel organizer, remove or loosen it as needed so you can inspect the steel surface from the inside. Identify a location for the RFID reader and locking mechanism that gives you easy access from the outside while avoiding the existing lock body, boltwork, handle linkage, and door reinforcements. Taking time at this stage is critical because a poor mounting location can create binding, weak engagement, or a failed installation.
Next, test-fit the RFID components before drilling anything. Mark the reader position, lock body position, and strike or latch alignment points using the manufacturer’s template if one is provided. Confirm that the latch will engage securely when the door is closed and disengage cleanly when the RFID credential is presented. If the system requires through-holes for wiring or mounting, measure multiple times and check the back side of the metal before drilling. On many gun safes, internal fire lining or upholstery may conceal important clearances, so work slowly and keep the original lock and structural components untouched unless the product specifically supports that type of retrofit.
Once the positions are confirmed, mount the reader, lock, and strike hardware according to the instructions. Route any wires neatly and protect them from pinch points around the door seam or moving linkage. Install the batteries or connect power, then program the RFID tags, cards, fobs, or wristbands. With the door still open, cycle the lock repeatedly to verify reader response, latch movement, and timing. Only after repeated successful open-close tests should you perform a full door-closing test. When closing the door for the first time, do it gently and confirm that the RFID system releases properly before relying on it. A careful installer always performs several test cycles, checks battery status, and confirms the backup override method before returning the safe to regular use.
3. Can I add an RFID lock without removing or replacing the original lock on my gun safe?
Yes, in many cases you can add an RFID locking system as an additional layer of access control rather than replacing the original lock entirely. This is often the most practical approach for DIY gun safe modification projects because it allows you to preserve the factory lock, boltwork, and rated security features while gaining the convenience of RFID access. In this setup, the RFID unit may control a secondary latch, an internal blocking mechanism, or an added access barrier that must be released before the original opening process can be completed. This can be especially useful if you want quicker routine access while still keeping the safe’s original lock as a fallback.
That said, the exact feasibility depends on the safe’s construction and your expectations. Most factory gun safe locks are integrated into a robust mechanical or electronic bolt system, and replacing them outright with a small aftermarket RFID lock is rarely a direct one-to-one swap. A retrofit is more commonly a custom adaptation than a drop-in conversion. You need enough space inside the door or body, a way to mount the RFID latch securely, and confidence that your new hardware does not obstruct the safe’s handle, locking bars, relocker devices, or emergency lock function. In other words, “adding” an RFID system is often much easier and safer than “replacing” the original lock system.
If your goal is true primary lock replacement, proceed carefully. Modifying the original lock architecture can affect the safe’s reliability, warranty, and possibly its insurance or compliance value depending on how the safe is used. For many owners, the best practice is to keep the original lock operational and install the RFID system as a convenience upgrade with its own controlled access role. This gives you faster entry and modern credential-based access while preserving the core security design that the safe was built around.
4. Are RFID gun safe locks secure and reliable enough for everyday use?
RFID locks can be very reliable for everyday use when they are properly selected, correctly installed, and maintained as part of a broader safe access strategy. Their biggest advantage is speed and simplicity. Instead of entering a code or turning a dial, you present an authorized credential and the lock releases within seconds. That can be a meaningful benefit when you want controlled but efficient access. RFID also allows you to manage credentials more cleanly than physical keys alone, since tags, cards, and fobs can often be added or removed without rekeying the system.
However, reliability depends heavily on product quality and installation quality. A poorly mounted latch, a weak strike plate, bad wire routing, marginal battery power, or a reader installed behind too much metal can create inconsistent performance. Steel gun safes can affect read behavior if the reader is not designed or positioned correctly, so installation details matter. You should choose a unit built for secure storage applications, use high-quality batteries if the system is battery-powered, and test read range and unlock consistency from the exact placement positions you intend to use in daily operation.
It is also important to understand that no access system should be treated as infallible. For that reason, a reliable RFID setup should include safeguards such as low-battery alerts, backup credentials, and a manual override or alternative entry method. Good practice also includes periodic function testing and controlled credential management so lost tags do not become a security risk. When those basics are handled properly, RFID can be a practical and dependable upgrade that improves access speed and user experience without giving up responsible firearm storage habits.
5. What mistakes should I avoid when installing an RFID locking system in a gun safe?
One of the biggest mistakes is drilling or mounting hardware without fully understanding the safe door’s internal layout. Gun safe doors often contain reinforcement plates, lock bodies, moving linkages, hard plates, relockers, fire insulation, and upholstery materials that are not immediately visible from the outside. Drilling into the wrong area can damage the safe, disable the existing lock, or create expensive repairs. Always inspect from the inside first, measure carefully, and avoid any area associated with the original locking mechanism unless you have a clear manufacturer-approved plan.
Another common mistake is choosing the wrong RFID lock. Lightweight cabinet locks may work fine on furniture but fail quickly on a steel safe with a heavy door or tighter alignment tolerances. The lock must be able to hold securely, release reliably, and tolerate repeated use in a metal enclosure. It is also a mistake to ignore power planning. If the system runs on batteries, you need to know expected battery life, low-power behavior, and your backup entry procedure. Installing a convenient lock that can leave you locked out because of neglected batteries defeats the purpose of the upgrade.
Finally, many people rush the testing phase. The safest approach is to test everything extensively with the door open before ever depending on the system with the safe closed and loaded. Verify latch alignment, credential recognition, response speed, backup access, and battery condition. Confirm that wires do not bind, screws stay tight, and interior panels do not press against the lock body. A careful installer also avoids handing out too many RFID tags and keeps track of every authorized credential. The goal is not just to make the safe open faster, but to improve access control in a way that remains secure, predictable, and safe over time.