
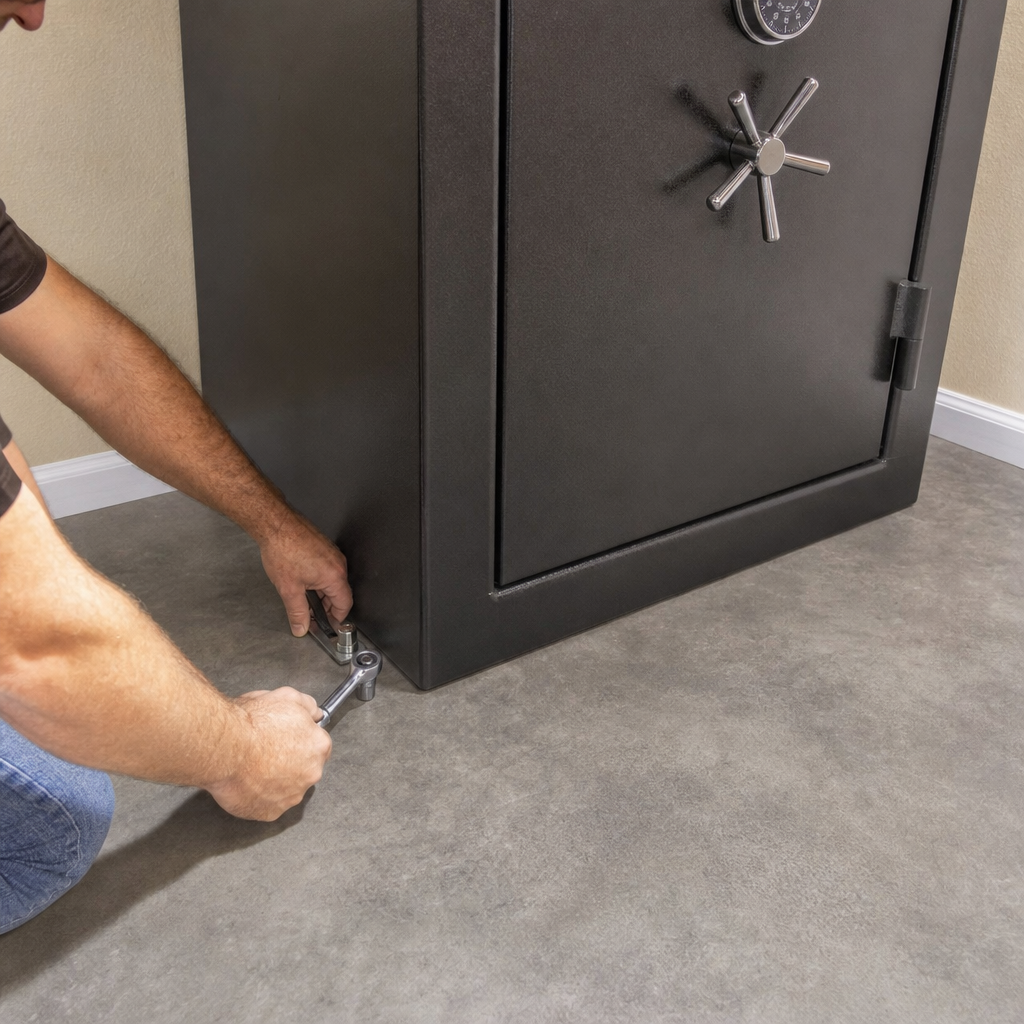
Securing a gun safe to the floor is one of the most effective ways to add theft protection, especially when your safe already has a solid lock, thick steel, and a good fire rating. A gun safe that is merely heavy can still be tipped, pried, or moved with appliance dollies, pry bars, and enough time. A gun safe that is anchored correctly becomes far harder to attack, quieter to operate, and safer in daily use. In practical terms, floor anchoring means fastening the safe through its factory anchor holes or reinforced base into concrete or wood framing with hardware rated for the load and the substrate. For owners who want more than a basic installation, this topic expands into custom and DIY gun safe modifications: improving interior organization, adding lighting, controlling moisture, reinforcing weak points, concealing the safe, and integrating alarms without compromising structural integrity. This matters because a safe is part of a layered security plan, not a magic box. In homes I have worked on, the difference between an unsecured safe and a properly anchored, thoughtfully modified one is substantial: thieves usually target speed, leverage, and visibility. Smart modifications directly reduce all three.
Before drilling a single hole, it helps to understand the goal. You are not trying to make a safe impossible to steal; you are trying to increase time, noise, effort, and uncertainty for an intruder while maintaining safe firearm storage for your household. The most reliable approach combines correct location, proper anchoring, selective upgrades, and routine maintenance. The floor connection is the foundation of that plan, because nearly every meaningful anti-theft upgrade assumes the safe stays where it belongs during an attack. Once that foundation is set, custom and DIY gun safe modifications become genuinely useful rather than cosmetic.
Why floor anchoring matters more than safe weight alone
Many buyers overestimate the value of weight. A 500-pound safe feels immovable until two people use a pallet jack, refrigerator dolly, or steel pipe rollers. In burglary cases, crews often exploit leverage rather than brute strength. If a safe is not bolted down, they can tip it onto its back to attack the door with longer pry strokes, access thinner steel on the rear or side panels, or remove it entirely for later opening in private. Anchoring blocks those options. It keeps the safe upright, limits pry angles, and transfers force into the slab or framing instead of allowing the cabinet to slide.
Floor anchoring also improves day-to-day safety. Tall gun safes are top-heavy when the door is open, especially if rifles are stored in the door organizer or upper racks. A poorly balanced safe on carpet, foam underlayment, or uneven flooring can rock. Bolting it down reduces movement and lowers tip-over risk during loading, cleaning, or reconfiguring shelves. That is particularly important in homes with children, where stable storage matters as much as theft resistance.
There are tradeoffs. Anchoring through a floor can affect warranty language if it is done outside the manufacturer’s instructions, and in rental properties you may not have permission to drill into slab or joists. Some premium safes use composite bases, adjustable feet, or moisture barriers that require a specific hardware stack. Always check the manual first. If the manufacturer provides anchor hole locations and approved hardware sizes, follow them exactly. In my experience, the most common mistake is treating every safe like a steel cabinet and every floor like solid concrete. They are not the same, and the wrong anchor in the wrong material fails when it matters.
Choosing the best location before you drill
The best place to secure a gun safe is usually a low-visibility area on a ground-floor concrete slab, with tight clearance on at least one side and limited line of sight from windows or exterior doors. Closets, corner locations, and utility-adjacent rooms often work better than garages, where visibility and humidity are higher. A corner placement is especially useful because it restricts pry bar access to the side and rear. If you can place the hinge side or back close to a wall without violating door swing requirements, you remove attack space for common hand tools.
Concrete is generally the strongest anchor substrate. A slab allows expansion anchors, wedge anchors, or adhesive anchors sized correctly for the safe and local conditions. Wood subfloors can work well too, but only when the fasteners penetrate structural members such as joists or blocking, not just plywood or OSB. I have seen safes bolted through subfloor sheathing alone; under force, the washers pulled through the wood. That is not a theft upgrade. It is theater.
Environmental conditions matter at this stage because many owners anchor first and address rust, condensation, or electronics later. Basements can be excellent for concealment and concrete anchoring, but they often need a dehumidifier rod, desiccant, and some airflow planning. Garages expose safes to temperature swings and sometimes direct water intrusion. Upstairs rooms reduce visibility but add load concerns. A large safe can exceed what some older floor systems comfortably handle without evaluation. If the total loaded weight approaches several hundred pounds in a concentrated footprint, consult a qualified contractor or engineer rather than guessing.
Anchoring methods for concrete and wood floors
The right anchoring method depends on the floor construction, safe design, and the hardware diameter supported by the anchor holes. For concrete slabs, wedge anchors are the standard choice for many installations because they provide strong mechanical hold in sound concrete and are easy to inspect. Sleeve anchors are acceptable in some lighter applications, while epoxy-set threaded rod is useful where edge distance, cracked concrete, or precise embedment requirements call for a more engineered approach. For wood floors, lag screws can work only if they penetrate solid joists or substantial blocking; through-bolting with backing plates is stronger when access below is possible.
| Floor type | Recommended hardware | Best use case | Common mistake |
|---|---|---|---|
| Concrete slab | Wedge anchors | Most residential gun safes on sound slab | Drilling oversized holes that reduce holding strength |
| Concrete slab | Epoxy-set threaded rod | High-load installs or damaged concrete conditions | Skipping cure time before tightening |
| Wood floor | Lag screws into joists | When anchor holes align with framing | Fastening only into subfloor panels |
| Wood floor | Through-bolts with backing plate | Maximum strength where underside access exists | Using small washers that crush wood fibers |
For most midsize residential safes on a slab, a practical approach is four properly sized wedge anchors installed through the factory anchor points. Use the manufacturer’s specified diameter if given; otherwise, the anchor must match the hole and the expected load. Drill with a hammer drill and the exact bit size required by the anchor manufacturer. Clean each hole thoroughly with compressed air or a blow-out bulb and a brush. Dust left in the hole can reduce performance. Set the safe carefully over the holes, install the anchors with washers, and tighten to the manufacturer’s torque specification. Over-tightening can damage anchor performance or distort the safe floor.
On wood floors, locate joists with absolute confidence. Electronic stud finders help, but I verify with pilot holes and measurements from known framing layout. If the safe holes do not align with joists, add structural blocking between joists below the floor or use a steel backing plate with through-bolts if you have access from underneath. Wide fender washers or, better, a plate spread the load and reduce pull-through risk. If carpet is present, cut it neatly around the anchor locations so the safe base bears on a stable surface rather than compressible pile.
Step-by-step installation and the tools that make it reliable
A clean installation follows a repeatable sequence. First, empty the safe enough to move it safely and remove any interior floor panel that covers anchor holes. Second, place the safe in its final position and confirm door swing, wall clearance, power access, and dehumidifier routing. Third, mark the anchor points precisely. On concrete, I prefer drilling through the safe base as a guide if the tool fits; otherwise, mark, move the safe, drill, clean holes, and reset the safe using temporary guide pins. On wood, drill pilots to verify structure before committing to the final hole size.
The core tools are simple but important: a quality hammer drill or rotary hammer for concrete, carbide masonry bits, a torque wrench where specified, shop vacuum or blow-out tool, socket set, pry bars for positioning, shims approved by the manufacturer if the floor is uneven, and a level. Moving tools also matter. Use a heavy-duty dolly rated above the safe weight, plywood sheets to protect finished floors, and at least one helper. Most installation damage happens before anchoring, when a safe gets dropped on tile or twisted through a doorway.
If the floor is not level, correct that before final tightening. A rocking safe puts uneven stress on anchors and can bind the door. Use steel shims or manufacturer-approved leveling feet, not random scraps of wood that compress over time. After tightening, verify that the door opens smoothly, the bolts extend fully, and the safe does not shift under firm hand pressure. Then reinstall the interior floor panel, ensuring no sharp hardware edges contact stored items or electrical wiring for lights and dehumidifiers.
One detail experienced installers watch closely is anchor access after setup. Some safes hide the anchor points under carpeted floor inserts, rifle racks, or center dividers. If you plan future interior modifications, keep a record of hardware size, embedment depth, torque values, and hole locations. That makes later maintenance or relocation far easier. I also photograph each stage. If you ever sell the home, move the safe, or need to prove proper installation for insurance, those records help.
Custom and DIY gun safe modifications that actually improve security and usability
Once the safe is anchored, modifications should serve one of three purposes: better access, better preservation, or better resistance to attack. Interior lighting is the easiest high-value upgrade. Low-voltage LED kits with motion sensors improve visibility and reduce the time the door stays open while you search for gear. Choose adhesive channels or magnetic mounts that do not interfere with fire lining, relockers, or moving boltwork. Route wires neatly along interior corners, and if you drill for power, only use manufacturer-approved pass-through points. Random drilling can damage fire barriers or wiring paths.
Moisture control is another essential modification, especially in basements and garages. A goldenrod-style dehumidifier rod gently warms the interior air to reduce condensation. Rechargeable desiccant packs provide backup and are useful where power is unavailable. A simple hygrometer lets you monitor humidity rather than guess. In my own installations, keeping the interior around 45 to 50 percent relative humidity has been a practical target for preventing rust without overdrying wood stocks and leather accessories.
Interior organization is often treated as convenience, but it also affects safety. Rifle rods, barrel sleeves, door organizers, and modular shelves allow a smaller safe to store firearms more efficiently without crowding optics or damaging finishes. Better organization means quicker inventory checks and less unnecessary handling. For owners with mixed collections, dedicated bins for documents, suppressor paperwork, and handgun magazines prevent clutter that can block anchor access or interfere with door seals.
Additional security modifications should be selective. Door-contact sensors tied to a home alarm panel add detection. Battery-backed smart sensors can send alerts, though they should complement, not replace, a monitored system. Some owners build concealment around the safe with cabinetry, false walls, or closet systems. Concealment is valuable because many burglars never find what they cannot see quickly. Just preserve ventilation, service access, and full door swing. Reinforcing the room itself, such as upgrading the door strike plate with long screws into framing or adding a solid-core closet door, often yields more practical theft resistance than attempting to weld extra steel onto the safe body. Poorly planned structural modifications can void warranties, damage fire protection, or create corrosion points, so focus on reversible upgrades first.
Safety, legal, and maintenance considerations for long-term protection
Any DIY gun safe modification should respect the safe’s original engineering. Do not drill into walls, doors, or frames unless the manufacturer explicitly permits it. Fireboard, relockers, hard plates, and wiring for electronic locks may sit directly behind the steel skin. Penetrating those areas can reduce both security and fire performance. If you need cable routing for power or sensors, use existing pass-throughs, door jamb channels designed by the manufacturer, or external battery solutions.
Maintenance is part of security. Check anchor tightness periodically, especially after moving the safe, remodeling nearby flooring, or experiencing seismic movement. Inspect for rust at the base where condensation or wet mopping can accumulate. Vacuum concrete dust and debris from around the safe so moisture is not trapped against the steel. Replace electronic lock batteries on schedule with quality alkaline or the manufacturer’s recommended cells, and test codes regularly. Mechanical dial locks need less battery maintenance but still benefit from occasional professional service if operation becomes rough or inconsistent.
Insurance and documentation also matter. Record serial numbers, take photographs of anchored installation points, and store copies of purchase receipts and appraisals in a separate secure location. Some insurers may ask whether the safe is bolted down or monitored by an alarm system. Accurate documentation supports claims and helps establish responsible storage practices. Finally, follow all applicable laws for firearm storage in your state and locality, especially where child access prevention standards apply. A well-anchored safe supports compliance, but legal responsibility still includes controlling keys, codes, and who can access the contents.
Securing a gun safe to the floor is the single most important DIY modification for extra theft protection because it transforms the safe from a heavy object into a fixed security barrier. From that starting point, the best custom and DIY gun safe modifications are practical, reversible, and tied to real risks: better placement, stronger anchors, organized storage, humidity control, lighting, alarms, and selective concealment. Each upgrade should make the safe harder to steal, easier to use correctly, and safer for the household. If you are building out a complete gun safe strategy, start by evaluating your floor type, anchor method, and final location, then move to interior and environmental upgrades in a deliberate order. Done right, these improvements create a safer, more resilient storage system that protects firearms, supports responsible ownership, and stands up better to both time and criminal opportunity. Review your current setup today and make anchoring the first upgrade on your list.
Frequently Asked Questions
Why is it so important to secure a gun safe to the floor if the safe is already heavy?
A heavy gun safe is helpful, but weight alone is not the same as real theft protection. Even large safes can be tipped, rocked, pried, or moved by determined thieves using appliance dollies, pry bars, straps, and leverage. When a safe is not anchored, criminals may be able to pull it away from the wall, lay it on its back or side, and attack weaker points such as the door edge, hinge area, or body seams with more force and better access. That changes the break-in conditions in their favor.
Anchoring the safe to the floor makes that kind of attack much more difficult. A properly bolted safe resists tipping and shifting, which means thieves lose a major advantage. It also reduces the chances that the safe can be carried off to another location where an attacker has more time, better tools, and less risk of being interrupted. In many cases, the goal of securing a gun safe is not to make theft impossible, but to make the attempt so slow, loud, awkward, and risky that the thief gives up.
There are also practical everyday benefits. A floor-secured safe tends to feel more stable when the door is opened, especially on taller or narrower models that can become front-heavy. That improves safety in normal use and helps prevent unwanted movement on smooth surfaces. In short, if your safe already has a good lock, thick steel, and solid fire protection, anchoring it to the floor is one of the smartest next steps you can take to strengthen its overall security.
What is the best floor to anchor a gun safe to: concrete or wood?
Concrete is generally the best surface for anchoring a gun safe because it offers the strongest and most reliable holding power. When a safe is installed on a concrete slab and secured with the correct concrete anchors, it becomes significantly harder to move, pry, or tip. Concrete also handles the concentrated force of a heavy safe well, and it gives you a stable, rigid base that supports both security and long-term durability.
That said, many homeowners install gun safes on wood-framed floors, and that can still work well if it is done correctly. The key with wood is that the safe should be fastened into solid structural members, not just subflooring alone. Bolting only through thin flooring material without catching floor joists can create a weak connection that may fail under stress. Depending on the safe size and floor structure, some installations benefit from reinforcement under the floor, such as steel backing plates or added blocking between joists, to spread the load and improve resistance.
The best choice often depends on where the safe is located. A garage, basement, or ground-floor utility area with a concrete slab is often ideal from a security standpoint. An upstairs closet or interior room with wood framing may be more discreet, but it usually requires more careful planning to ensure the floor can safely support the weight of the safe and that the anchors are actually securing it to something strong. If you are comparing the two, concrete is usually preferred for maximum theft resistance, but a properly reinforced wood floor can still provide a solid and secure installation.
What hardware should be used to bolt a gun safe to the floor?
The right hardware depends first on the type of floor. For concrete, high-quality concrete wedge anchors, sleeve anchors, or other heavy-duty masonry fasteners are commonly used, provided they match the safe manufacturer’s recommendations. For wood floors, lag bolts or through-bolts may be used, but they should be sized appropriately and installed into structural framing whenever possible. In either case, the most important rule is to use hardware that is strong enough for the safe’s size and weight and compatible with the factory anchor holes built into the safe.
You should always check the owner’s manual before choosing hardware. Many gun safe manufacturers specify the number, diameter, length, and type of anchors that should be used. Following those instructions matters because the safe’s anchor hole pattern and internal floor design are engineered with certain fasteners in mind. Using undersized bolts, low-grade hardware, or anchors that are too short can weaken the installation and reduce the theft protection you are trying to gain.
Washers are also important. Proper washers help distribute clamping force and protect the safe’s anchor points from damage. In some installations, especially over wood, backing plates or reinforcement below the floor can dramatically improve performance. The main goal is not simply to “attach” the safe, but to create a connection that resists pull-out, rocking, and twisting forces. If there is any doubt about the right anchor type or bolt size, it is worth contacting the manufacturer or having a qualified installer evaluate the floor and safe together.
Can I install the anchors myself, or should I hire a professional?
Many homeowners can anchor a gun safe themselves if they are comfortable with measuring, drilling, handling heavy objects safely, and following manufacturer instructions exactly. A straightforward installation on a concrete slab with clear access can be a manageable do-it-yourself project, especially if the safe already has factory anchor holes and the required hardware is clearly specified. However, the job must be done carefully. A mistake in location, drilling depth, anchor selection, or floor assessment can reduce the effectiveness of the installation and, in some cases, damage the flooring or the safe.
The biggest challenge is usually not the bolts themselves but the planning around them. You need to position the safe where it can be opened fully, where the floor can support the load, and where the anchor points line up with solid material below. On wood floors, it is especially important to know whether you are fastening into joists or just subfloor. On concrete, you need to drill accurately and avoid weak or damaged areas. You also need to move and position a very heavy safe without injury or damage to the home.
Hiring a professional is often the better option if the safe is very large, the installation site is upstairs, the floor type is uncertain, or you want the strongest possible setup with minimal guesswork. A qualified installer can confirm the structure below the safe, use the proper tools, and make sure the anchoring system is correctly torqued and properly seated. For many owners, professional installation is worth it because a gun safe is a major investment, and anchoring is one of the most important steps in protecting that investment.
Does anchoring a gun safe to the floor affect fire protection, warranty, or everyday use?
In most cases, anchoring a gun safe through the factory anchor holes does not harm the safe’s intended performance, provided the installation follows the manufacturer’s instructions. Gun safe makers commonly design these anchor points into the safe for exactly this purpose. The key is to use the existing holes rather than drilling your own unless the manufacturer specifically allows it. Unauthorized drilling can potentially affect structural performance, fire lining, interior materials, or warranty coverage.
As for fire protection, properly using the factory anchor holes usually has little to no meaningful impact compared with the security benefit gained from anchoring. Manufacturers that include anchor holes have generally accounted for them in the safe’s design. Still, it is wise to review the manual or contact the manufacturer if you have concerns about a specific model’s fire seal, floor insulation, or warranty language. This is especially true for premium safes with proprietary fire barriers or composite construction.
In daily use, a floor-anchored safe often performs better. It feels more secure when the door swings open, especially if the door is heavy and creates forward pull. It is less likely to shift during loading and unloading, and it may operate more quietly because it is not rocking or vibrating against the floor. Perhaps most importantly, anchoring helps keep the safe where it belongs during an attempted theft. So while owners sometimes worry that bolting down a safe might create drawbacks, the reality is that correct anchoring usually improves both security and day-to-day stability without creating problems when done the right way.