
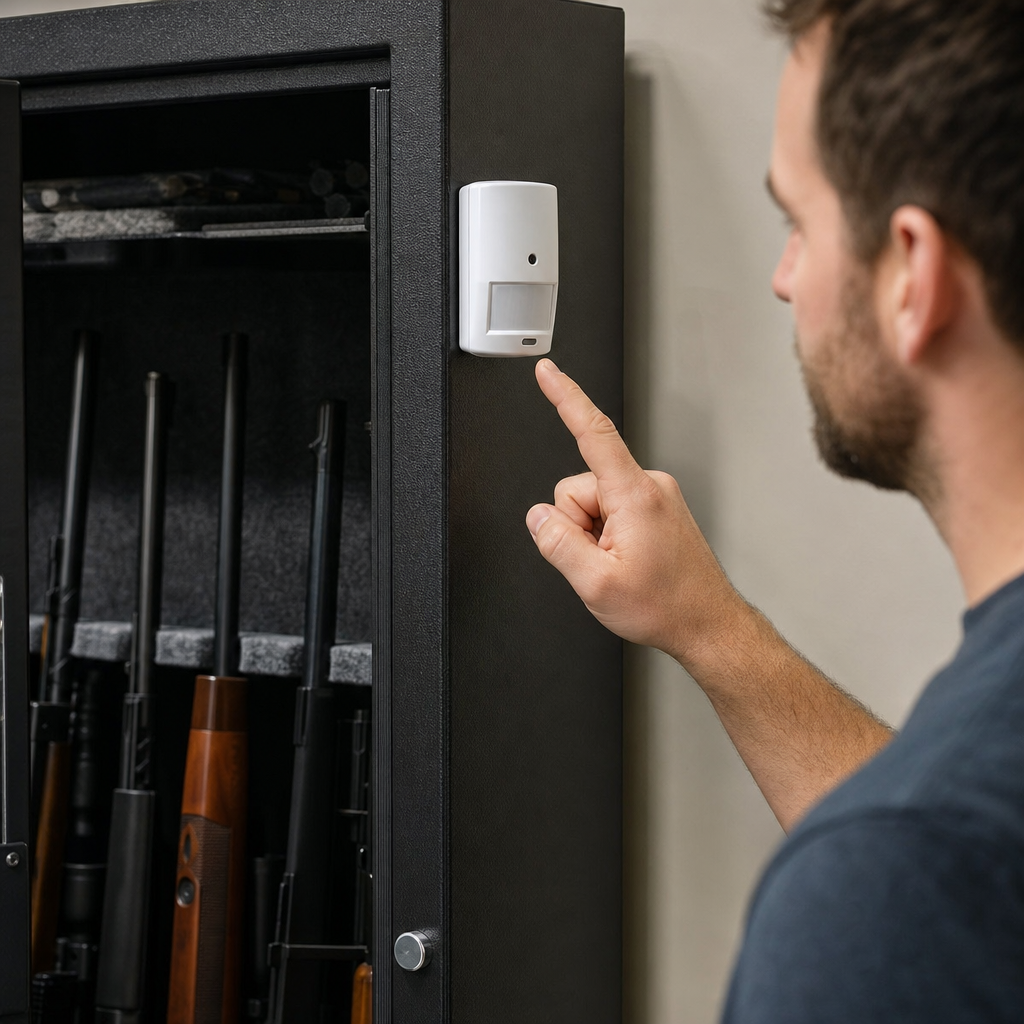
A motion-activated alarm is one of the most practical upgrades you can add to a gun safe because it alerts you the moment unauthorized movement occurs, strengthens layered security, and can usually be installed without changing the safe’s fire rating or structural integrity. In the context of gun safes, a motion-activated alarm typically means a battery-powered or hardwired sensor that detects movement, door opening, vibration, or changes in orientation and then triggers a siren, app alert, monitoring signal, or all three. I have installed these systems on compact handgun safes, mid-size residential security containers, and heavy fire-rated long-gun safes, and the same lesson comes up every time: the best alarm setup is not the loudest one, but the one that detects the right event early, survives real-world conditions, and fits how the safe is actually used. This matters because many safe breaches are fast, opportunistic events involving prying, relocation, or unauthorized access by someone already inside the home. A well-chosen alarm adds immediate awareness, deters tampering, and complements anchoring, locks, dehumidification, interior lighting, and other custom gun safe modifications.
As a hub for custom and DIY gun safe modifications, this guide explains not only how to add a motion-activated alarm to your gun safe, but also how that project connects to the broader upgrade path most owners follow. If you are building a safer, quieter, better organized, and more responsive safe, the alarm should be planned alongside power management, sensor placement, cable routing, backup batteries, door panel storage, and smartphone notification options. Key terms are worth defining up front. Passive infrared sensors detect heat movement across zones. Vibration or shock sensors detect impact and tamper attempts. Tilt sensors react when a safe is moved. Magnetic reed switches monitor door status. Decibel rating measures siren output, while ingress protection helps describe resistance to dust and moisture. UL-listed components, tamper loops, and supervised zones matter if you are integrating the safe into a larger home security system. Done correctly, this upgrade is affordable, scalable, and highly effective.
Choose the Right Motion-Activated Alarm for the Safe and the Room
The first decision is what kind of event you want to detect, because “motion alarm” can mean several different technologies. For a gun safe inside a closet or bedroom, I usually recommend a layered approach: a door contact sensor to know when the safe opens, a vibration sensor to catch hammering or prying, and either an internal motion sensor or a tilt sensor if there is any chance the safe could be moved. Passive infrared sensors are common in consumer alarms, but they are not always ideal inside a tightly enclosed steel box because their field of view can be obstructed by shelves, rifles, and door organizers. In many installs, a magnetic contact on the door plus a vibration sensor on the body provides more reliable detection than PIR alone.
Power source matters just as much as sensor type. Battery-powered alarm kits are easiest for DIY installation and work well for closet safes, small handgun safes, and rented homes where drilling is undesirable. Hardwired systems are stronger for large safes in permanent locations, especially when connected to household AC with battery backup or an existing alarm panel. If you want remote alerts, look for Wi-Fi, Z-Wave, Zigbee, or cellular-enabled devices from established brands such as Ring, Honeywell Home, Yale, Eufy, SimpliSafe, or DSC, but verify signal reliability where the safe sits. Thick steel, concrete garage walls, and basement placement can weaken wireless performance. Before buying anything, test signal strength at the safe’s location, not in the room center.
Plan the Installation Around Safe Construction and Other DIY Modifications
Every gun safe modification should respect the safe’s structure, fire lining, lockwork, and warranty. That is especially important when adding an alarm, because careless drilling can damage relockers, insulation, door bolts, or interior paneling. On many residential security containers, the safest path is to use adhesive-backed sensors, existing cable pass-throughs, factory power ports, or edge channels where wiring can run without crossing moving lock components. I have seen owners mount sensors on the inner door skin only to discover the organizer panel blocks detection, or route a wire through the hinge side where it gets pinched after a week. Planning prevents those mistakes.
Think of this project as part of a larger custom and DIY gun safe modification roadmap. Owners commonly combine alarms with LED lighting, rechargeable dehumidifiers, humidity monitors, handgun holsters on the door panel, rifle barrel rests, shelf upgrades, and USB or low-voltage power distribution. If you are opening interior panels once, it makes sense to route power and mounting points for several upgrades at the same time. This reduces repeat labor and keeps the install cleaner. It also improves internal linking logic for your own maintenance checklist: power, lighting, moisture control, organization, and security are interconnected. An alarm with a dead battery or blocked sensor is not really a security upgrade, so layout and service access need to be part of the design from day one.
Best Sensor Placements for Detection, Reliability, and Fast Alerts
Placement determines whether the alarm catches a genuine threat or becomes an annoyance. A door contact should sit high on the door frame or body where alignment stays consistent and where long guns, shelves, or soft door seals will not strike it during opening. A vibration sensor belongs on a rigid steel surface, usually the sidewall near the door edge or upper body panel, where prying or hammer impact transfers efficiently. A tilt sensor should be mounted on the main safe body, not on a removable shelf or door organizer. If you choose a PIR sensor, mount it where it has a clear line across the opening path or across the interior cavity, then test with the exact firearm and storage layout you will keep in place.
In practice, false alarms usually come from poor mounting, weak adhesive, bad alignment, or misunderstood sensitivity settings. Garages and outbuildings add another complication: temperature swings, dust, and vibration from doors or appliances. In one installation on a 48-gun safe in a detached garage, a high-sensitivity shock sensor triggered every time the overhead garage door slammed shut. Lowering sensitivity and moving the sensor from the side panel to the upper rear body eliminated the problem without reducing tamper detection. That kind of tuning is normal. You want the alarm sensitive enough to recognize attacks, but not so sensitive that ordinary house activity makes you ignore notifications.
| Alarm Component | What It Detects | Best Mounting Location | Main Advantage | Main Limitation |
|---|---|---|---|---|
| Magnetic contact sensor | Door opening | Top corner of door and frame/body | Simple, reliable, low power draw | Does not detect attacks that fail to open door |
| Vibration or shock sensor | Prying, drilling, hammering, impact | Rigid sidewall or upper body panel | Early tamper detection | Needs sensitivity tuning to avoid false alarms |
| Tilt sensor | Safe movement or relocation | Main body near center mass | Excellent for smaller safes that can be carried | May not help on heavily anchored large safes |
| PIR motion sensor | Body heat movement in detection zone | Interior cavity or room facing safe | Useful for broad movement detection | Can be blocked by contents or room layout |
| Standalone siren module | Audible alert after trigger | Inside safe or concealed nearby | Immediate deterrence | Interior mounting can muffle sound |
Step-by-Step Installation for a DIY Motion-Activated Gun Safe Alarm
Start by unloading firearms if practical for safe access, then document the safe interior with photos before moving shelves or organizers. Clean mounting surfaces with isopropyl alcohol so adhesive pads bond properly. Dry-fit each component before peeling any backing or drilling any pilot hole. If your safe has a factory power port, route cables through that path first; if not, prioritize battery devices or use existing gaps that do not compress weather seals. Install the door contact, pair it with the base station or app, and confirm the open-close status registers consistently. Then mount the shock or tilt sensor on the main body and set sensitivity to a middle level for initial testing.
Next, place the siren or enable the integrated alarm output. If the siren is inside the safe, verify the sound level remains audible outside the room; many 100 to 120 dB units become noticeably quieter when enclosed by thick steel and fireboard. In some builds, a concealed external siren nearby works better than an internal siren alone. Add remote alerts through the brand’s app or your alarm panel, and set notification rules so you know whether the event was door opening, impact, or device tamper. Finally, perform realistic tests: open the safe normally, tap and pry lightly at several points, simulate movement if safe to do so, and check whether alerts arrive quickly. Keep a written record of sensor locations, battery types, app credentials, and test dates inside your broader gun safe maintenance log.
Integrate the Alarm With Broader Gun Safe Security Upgrades
A motion-activated alarm works best as one layer in a complete safe security system. If the safe is not anchored to concrete or structural framing, a tilt alarm may tell you it is being moved, but anchoring is what prevents removal in the first place. If the room has no camera, you may hear a siren but still lack evidence or visibility. If interior lighting is poor, you may disable the alarm temporarily during access and create handling errors. That is why custom and DIY gun safe modifications should be planned together. The strongest sequence for most households is anchoring, lock verification, humidity control, lighting, organization, and then alarm integration with cameras or home monitoring.
There are also important legal and household-context considerations. A gun safe alarm does not replace compliance with state storage laws, child access prevention requirements, or insurer recommendations. If minors are in the home, choose alert settings that notify multiple adults, not just one phone. If you store firearms in a vacation property, prioritize cellular backup because local internet service may fail. If you rely on a smart-home platform, confirm whether the safe alarm can trigger routines such as hallway lights, camera recording, or a whole-home siren. Integration adds useful redundancy, but only if you test it end to end. I have seen polished app dashboards hide basic failures like delayed push notifications, low battery warnings ignored for months, or sensors that silently went offline after a router change.
Common Mistakes, Maintenance, and When to Call a Pro
The most common DIY mistake is treating the alarm like a gadget instead of a life-safety-adjacent security component. Owners often skip signal testing, mount sensors on carpeted liners or flexible door organizers, use bargain adhesive that fails in summer heat, or assume a mobile alert is enough without an audible deterrent. Another frequent error is forgetting daily usability. If the alarm is difficult to arm and disarm, people bypass it. If it chirps at night because the entry delay is misconfigured, they remove the batteries. Good design makes secure behavior easy. Use labeled modes, short but workable delays, and clear status indicators that can be read in low light.
Maintenance is simple but nonnegotiable. Test all sensors monthly, replace batteries on a scheduled cycle rather than waiting for failure, inspect adhesive mounts, and review app notification history. Re-test after any major modification, including adding shelves, changing door panel storage, moving the safe, or installing dehumidifier rods and power strips that alter cable routing. Call a professional locksmith, alarm technician, or safe installer if you need to drill through a fire-lined body, integrate with a monitored panel using supervised loops, protect a high-value collection, or troubleshoot interference and wireless dead zones. The best result is a system that is boringly reliable: it arms easily, alerts quickly, and keeps working year after year without damaging the safe.
Adding a motion-activated alarm to your gun safe is one of the smartest custom and DIY gun safe modifications because it turns a passive storage box into an active security layer that can warn, deter, and document tampering in real time. The core decisions are straightforward: choose the right sensors, mount them on stable surfaces, protect power and signal reliability, and test the system under realistic conditions. Door contacts, shock sensors, tilt sensors, and carefully placed sirens each solve a different problem, and the best setup usually combines more than one. Just as important, the alarm should fit into the larger safe upgrade plan that includes anchoring, moisture control, lighting, organization, and optional camera or monitoring integration.
If you are building out this subtopic hub on custom and DIY gun safe modifications, start with the alarm because it forces you to think systematically about power, layout, access habits, and long-term maintenance. From there, expand into related projects such as interior lighting, dehumidifier installation, door panel storage upgrades, shelf reconfiguration, and safe anchoring improvements. Approach each modification with the same standards: protect the safe’s structure, use proven components, and verify performance instead of assuming it. A well-planned gun safe upgrade is not about adding gadgets. It is about reducing risk and increasing control. Review your safe today, identify the most likely tamper scenario in your home, and install an alarm system that addresses it directly.
Frequently Asked Questions
What type of motion-activated alarm works best for a gun safe?
The best alarm for a gun safe is usually a compact sensor designed specifically for enclosed spaces and metal storage units. In practice, that often means choosing between a battery-powered wireless alarm, a hardwired alarm, or a multi-sensor security device that combines motion detection with vibration, tilt, or door-contact monitoring. For many homeowners, a battery-powered unit is the most practical option because it can be installed quickly, does not require drilling into the safe body, and typically will not affect the safe’s fire lining or structural integrity. That makes it a strong choice if you want added security without making permanent modifications.
It is also important to understand that “motion-activated” in a gun safe setting can mean more than one kind of trigger. A passive infrared sensor may detect movement when the door opens and someone reaches inside. A vibration sensor can respond to tampering, prying, or attempts to move the safe. A tilt or orientation sensor can alert you if someone tries to tip or relocate it. A door-contact sensor can trigger the alarm the moment the door is opened. The most effective setup is often a layered one, where the alarm can detect both access and tampering rather than relying on a single trigger type.
When comparing products, look for a loud siren, dependable battery life, low-battery alerts, adjustable sensitivity, and ideally smartphone notifications if you want remote awareness. If your safe is located in a garage, basement, or area with temperature swings, make sure the alarm is rated for those conditions. A good gun safe alarm should be simple, reliable, and difficult for an intruder to disable before it sounds. In most cases, a well-reviewed battery-powered sensor with vibration and door-open detection offers the best balance of security, cost, and easy installation.
Can I install a motion-activated alarm on my gun safe without drilling or damaging it?
Yes, in most cases you can install a motion-activated alarm on a gun safe without drilling, cutting, or otherwise damaging the unit. This is one of the biggest reasons these alarms are such a practical upgrade. Many modern alarm kits use adhesive-backed mounts, magnetic contact sensors, or self-contained battery-powered modules that can be attached to the interior door, sidewall, or frame of the safe. Because they do not require invasive installation, they usually preserve the safe’s original fire protection materials and structural design.
This matters because drilling into a gun safe can create several problems. It may compromise fire insulation, expose internal locking components, weaken a barrier layer, or even void the manufacturer’s warranty depending on the brand and model. Non-invasive installation avoids those risks. Before mounting anything, clean the surface thoroughly so adhesive pads bond well, and choose a location that will not interfere with shelves, door bolts, lighting kits, or dehumidifiers. Interior placement is often ideal because it protects the alarm from being seen or removed before activation.
If you prefer a hardwired option, installation becomes more complicated and may require routing power carefully to avoid damaging the safe. In that case, it is smart to consult the manufacturer or a qualified safe technician before making modifications. For most owners, though, a wireless battery-powered alarm is the easiest and safest route. It gives you immediate tamper awareness, can often be installed in minutes, and adds another layer of security without changing the safe itself.
Where should I place the alarm sensor inside or around the gun safe for the best protection?
Placement has a major impact on how well the alarm performs. The best location depends on the type of sensor you are using and what threat you want to detect first. If the alarm is designed to detect movement inside the safe, mounting it on the interior upper wall or inside the door panel usually works well because it gives the sensor a clear field of view when the door opens. That way, if someone gains entry and reaches inside, the alarm can trigger immediately. For door-contact sensors, the magnetic pieces should be aligned carefully along the door edge and frame so the circuit breaks the moment the door opens.
If you are using a vibration or tilt sensor, placement on the safe body itself is often more effective than placing it nearby. These sensors should be secured to a stable metal surface where they can register prying, striking, dragging, or attempts to tip the safe. For a safe that is bolted to the floor, vibration detection can be especially useful because an intruder may attack the door or body rather than try to carry it away. If the safe is in a low-traffic room, you can also pair the safe-mounted alarm with a room-level motion detector for broader coverage.
Try to avoid locations where shelves, long guns, door organizers, or stored accessories could block the sensor or create false triggers. Test the alarm after installation by opening the door normally, moving items inside, and gently simulating the kind of tampering you want it to detect. Sensitivity should be high enough to catch real threats but not so high that normal household vibrations constantly set it off. The goal is to place the sensor where it gives fast, reliable warning while remaining protected and unobtrusive.
Will a motion-activated alarm replace the need for other gun safe security features?
No, a motion-activated alarm should not be viewed as a replacement for the safe’s core security features. It is best understood as an additional layer in a larger protection strategy. The safe’s lock, steel construction, relocking mechanisms, fire protection, bolt-down installation, and controlled access practices still do the heavy lifting when it comes to physical security. The alarm adds a critical benefit those features alone cannot provide: immediate notification. It tells you that something is happening now, whether that is an unauthorized opening, an attempt to move the safe, or suspicious activity around it.
That real-time awareness can be extremely valuable. A criminal may be able to pry, drag, or attack a safe if given enough time and privacy. An alarm interrupts that timeline by creating noise, drawing attention, and potentially sending an alert to your phone or monitoring service. That can shorten the window an intruder has to work and increase the chances that the attempt is abandoned. In that sense, the alarm strengthens layered security rather than replacing anything.
The strongest overall setup combines multiple defenses. That may include bolting the safe down, placing it in a discreet location, using a high-quality lock, limiting access codes or keys, installing a room security camera, and adding a motion-activated or tamper alarm. If children are in the home, safe storage practices remain essential regardless of how advanced the alarm is. The alarm is a smart upgrade because it closes an important gap, but it works best as part of a complete firearm security plan rather than a standalone solution.
How do I test and maintain a motion-activated alarm on my gun safe so it stays reliable?
Regular testing and basic maintenance are essential if you want the alarm to perform when it matters. Start by following the manufacturer’s setup instructions carefully, then run a full test immediately after installation. Open the safe, move inside the detection area, and if applicable, test vibration or tilt response in a controlled way. Confirm that the siren sounds properly and that app notifications, monitoring alerts, or low-battery indicators work as expected. If the unit has sensitivity settings, fine-tune them during this process so normal household activity does not trigger nuisance alarms while real tampering still sets it off.
After the initial setup, test the alarm on a routine schedule, such as once a month. Replace batteries proactively rather than waiting for them to fail, especially if the safe is located in a climate-controlled room where you expect the alarm to sit quietly for long periods. If you use rechargeable batteries, confirm they hold a charge consistently. For hardwired systems, inspect wiring, power supplies, and backup batteries. Also check that adhesive mounts, sensor alignment, and contact points remain secure. Over time, temperature changes, humidity, dust, or repeated door movement can affect performance.
It is also a good idea to review any mobile app settings, notification permissions, and Wi-Fi or Bluetooth connections if your alarm uses smart features. A siren that works locally is helpful, but remote alerts are only valuable if they actually reach you. Keep the sensor area free from clutter, avoid blocking the detector with gear or documents, and retest after reorganizing the safe interior. With just a little routine attention, a motion-activated alarm can remain a dependable part of your gun safe security setup and continue providing the early warning that makes it such an effective upgrade.