
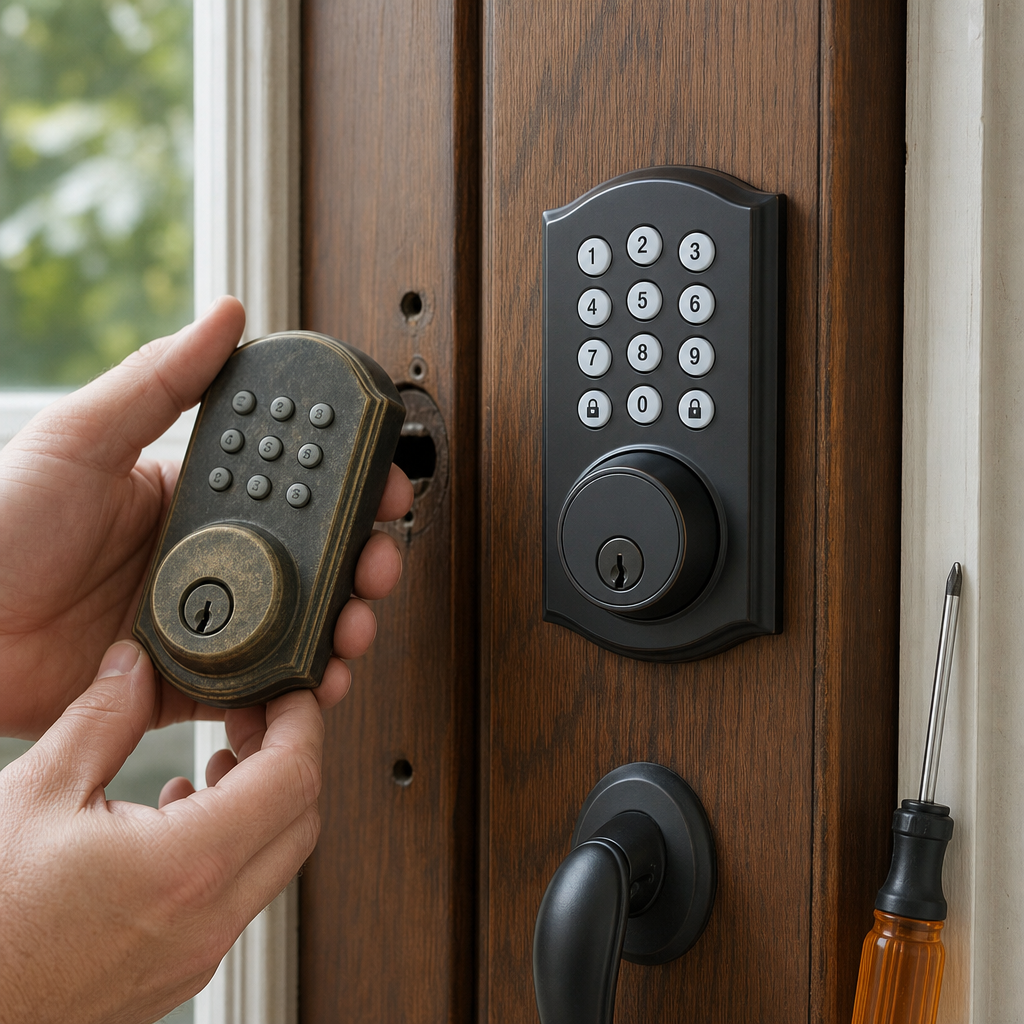
DIY lock upgrade projects are one of the most practical ways to improve a gun safe, especially when an older keypad has become unreliable, slow, or difficult to service. In the context of gun safes, a keypad is the exterior input device that sends a code to an electronic lock body mounted inside the door, and the lock body then retracts or releases a bolt that lets the handle work. Many owners use the term keypad and lock interchangeably, but they are not always the same component, and that distinction matters before you order parts. A full lock replacement may include the keypad, lock body, cable, spindle, mounting plate, and relocker interface, while a keypad-only refresh applies only to compatible systems from the same manufacturer. Understanding that difference is the first step in any safe lock upgrade.
This topic matters because electronic lock failures are rarely convenient. I have seen keypads with worn membrane buttons, corroded battery terminals, lagging displays, and failed ribbon cables turn a routine access check into an urgent lockout risk. A newer model can improve reliability, battery life, code management, audit features, and resistance to casual tampering. For gun owners, that translates into faster authorized access, more predictable maintenance, and fewer surprises when the safe is needed. This hub article covers the full landscape of custom and DIY gun safe modifications through the lens of a keypad swap: evaluating compatibility, choosing between brands and lock types, preparing tools, handling disassembly safely, testing the new hardware, and deciding when a licensed safe technician should take over. It also points to adjacent upgrades, such as lighting, dehumidification, interior organization, and anchoring, because lock work is often the gateway project that leads owners to modernize the whole safe.
Assess the existing safe and define the scope of the lock upgrade
Before buying anything, identify the safe manufacturer, model, lock brand, and door thickness. Look for labels on the inside of the door, paperwork from the purchase, and markings on the keypad ring or lock body. Common names in the residential safe market include Sargent and Greenleaf, SecuRam, La Gard, AMSEC, and NL Lock. Their products are not universally interchangeable even when the keypad footprints appear similar. The standard lock mounting pattern on many swing-bolt and dead-bolt safe locks follows an industry convention, but cable routing, spindle length, keypad communication protocol, relocker interaction, and hardplate clearance can still differ. If your safe uses a UL Type 1 electronic lock, replacing it with another UL-listed Type 1 unit from a recognized manufacturer is usually the safest path.
Define whether this is a keypad-only cosmetic refresh, a like-for-like lock replacement, or a conversion from one brand or lock family to another. A keypad-only change is the simplest scenario but is often impossible across brands. A complete replacement is more common and gives you access to newer features, such as dual control, time delay, penalty lockout, manager code, and audit trail. Measure internal door clearance carefully. Some gun safes have tight paneling, added organizer pockets, or reinforced hardplate assemblies that leave little room for a different lock body. Also inspect the relocker arrangement. Mechanical relockers and glass relockers are designed to trigger if the lock area is punched or attacked, and careless disassembly can complicate reinstallation. If the manufacturer states that field lock swaps void the fire lining, warranty, or burglary rating, factor that into your plan.
Choose the right replacement lock for reliability, compatibility, and daily use
The best replacement is not automatically the newest model; it is the unit that fits your safe, your use pattern, and your tolerance for maintenance. In practice, I advise owners to choose a lock from a mainstream safe-lock manufacturer with established parts support and clear installation documents. UL-listed Type 1 electronic locks remain the benchmark for residential gun safes because they meet recognized manipulation and attack-resistance criteria. If your safe currently has a no-name import keypad with no service literature, moving to a supported platform is usually a substantial upgrade. For households with multiple authorized users, look for features such as multiple user codes, silent entry, and lockout after repeated failed attempts. For a defensive-access safe, prioritize consistent wake-up behavior, easy battery replacement, and a keypad with tactile feedback.
Battery placement is an underrated buying factor. Exterior battery compartments are easier to service than keypads that require partial removal to access the battery. Keypad shape matters too. Round keypads may cover existing paint wear or mounting marks better than smaller rectangular units. If your old lock had a backup key override, think carefully before insisting on the same feature. Mechanical override cylinders can add convenience, but on some low-cost products they also create a weak point. Established lock makers generally avoid consumer-grade override cylinders on higher-security units for that reason. Finally, consider the environment inside the safe room. High humidity, temperature swings, and alkaline battery leakage shorten electronic life. A lock that has a low-battery warning and works well with branded alkaline or lithium cells is easier to live with over time.
| Upgrade factor | What to check | Why it matters |
|---|---|---|
| Lock certification | UL Type 1 or equivalent listing | Confirms recognized attack-resistance standards |
| Mounting compatibility | Bolt pattern, cable path, spindle length | Prevents fitment problems during installation |
| User features | Multiple codes, time delay, audit trail | Matches the safe to household or business use |
| Battery access | Exterior tray versus keypad removal | Reduces service hassle and damage risk |
| Support network | Manuals, parts, locksmith availability | Makes future maintenance and lockout recovery easier |
Prepare tools, protect the safe, and follow a disciplined replacement process
Most successful DIY lock swaps depend less on technical brilliance and more on preparation. Work with the safe door open and locked open with the bolts extended only when the manufacturer’s instructions require it; otherwise keep the mechanism in the recommended test position. Remove all firearms, ammunition, documents, and shelf contents first. That step sounds obvious, but reducing weight and clutter prevents accidental damage while you access the inside door panel. Typical tools include hollow-ground screwdrivers, a 1/4-inch drive set, torque awareness for lock mounting screws, blue threadlocker where specified, painter’s tape to protect the finish, a flashlight, and a phone or camera for reference photos. Avoid power drivers on lock screws unless the manufacturer explicitly permits them, because overtorque can warp the lock case or strip threads in the mounting plate.
Once the inner door panel is removed, photograph the existing cable routing, lock body position, relocker components, and boltwork relationship before touching anything. Disconnect the old keypad cable gently; never yank on it. If adhesive-backed cable clips are present, note their locations so the new cable can follow the same path without crossing moving linkage. Remove the old lock body only after confirming that the relocker is not under spring tension in a way that will complicate reassembly. Clean the mounting surface, inspect for burrs, and test-fit the new components without forcing them. On installation, the cable should have enough slack to avoid pinching yet remain clear of cams, handles, and bolt bars through the full range of movement. Program the new lock with the door open, test it repeatedly, and verify that wrong-code lockout, code change procedure, and low-battery behavior match the manual before closing the safe.
Use the keypad replacement as the hub for broader custom and DIY gun safe modifications
A lock upgrade naturally opens the door to other useful safe improvements, which is why it fits well as the hub project for custom and DIY gun safe modifications. The inside door panel is already off, so it is an ideal time to improve LED lighting, route cleaner power wiring, add a dehumidifier pass-through, tighten handle set screws, and reorganize storage. Many gun safe owners start with a failing keypad and end up solving three or four long-standing usability issues at once. For example, adding motion-activated LED strips after a keypad replacement makes fast retrieval easier without holding a flashlight in one hand. Replacing flimsy factory shelves with modular racks can increase rifle capacity while preserving optic clearance. Installing a goldenrod-style heater or rechargeable desiccant system helps protect finishes and ammunition from moisture, especially in basements and garages.
Other modifications deserve equal attention because security is not only about the lock itself. Anchoring the safe properly to concrete or structural framing remains one of the most effective upgrades against smash-and-grab theft. Fire-rated caulk around utility penetrations, if done according to manufacturer guidance, can reduce drafts that carry moisture and dust into the cabinet. Door organizers can improve access to handguns, magazines, and documents, but they should not interfere with boltwork or create pressure points that stress the lock area when the door closes. If you are considering cosmetic changes such as repainting the door, replacing the keypad first helps you avoid fitting a new lock onto a chipped or contaminated surface later. As a hub topic, keypad replacement ties these projects together because it forces a detailed inspection of the safe’s interior, door hardware, wiring, and daily workflow.
Know the limitations of DIY work and the situations that call for a professional safe technician
Not every outdated keypad should be swapped at home. If the safe is currently closed and the lock is intermittent, stop experimenting and call a qualified safe technician before a nuisance fault becomes a hard lockout. The same advice applies if your safe has a glass relocker, proprietary lock mounting arrangement, severe corrosion, stripped fasteners, or signs of previous forced entry. Some imported gun safes use nonstandard cables or keypad interfaces that look familiar but are not supported by major lock brands. In those cases, a retrofit plate or custom approach may be required, and guessing can become expensive. Professional technicians also have borescopes, scoping points, drill templates, and brand-specific service knowledge that matter when tolerances are tight. The cost of a planned service call is usually far lower than the cost of an emergency opening after a failed DIY installation.
Even when a homeowner completes the physical swap successfully, documentation matters. Record the new lock model, serial number if applicable, installation date, battery type, programming steps, and code storage method in a secure location outside the safe. Run a maintenance schedule: replace batteries annually with premium cells, inspect for corrosion, verify opening speed, and test the lock with the door open after every code change. A good lock upgrade should improve both security and predictability. If your current setup still leaves doubts about fit, certification, or long-term serviceability, use this project as the prompt to review the rest of your gun safe system. Start with a compatible, supported lock, then build outward with lighting, moisture control, interior organization, and anchoring upgrades that make the safe easier to use and harder to defeat. Audit your safe this week, list the modifications that will give you the biggest practical gain, and schedule the first upgrade.
Frequently Asked Questions
What is the difference between a gun safe keypad and the electronic lock body, and why does that matter during an upgrade?
The keypad and the electronic lock body work together, but they are not always the same part. On most gun safes, the keypad is the exterior component mounted on the outside of the door. It is the part you touch to enter a code. The electronic lock body is mounted on the inside of the door and is responsible for receiving that signal and either retracting or releasing the lock so the handle can operate the safe’s boltwork. That distinction matters because some upgrades involve replacing only the keypad, while others require replacing the keypad and the internal lock body as a matched set.
This is one of the most important things to understand before ordering parts. Many safe owners assume a new keypad can simply plug into an older lock body, but compatibility varies by brand, generation, connector type, cable orientation, mounting pattern, and programming protocol. Even if two keypads look similar from the outside, they may not communicate properly with the lock inside the door. Installing an incompatible keypad can leave you with a non-functioning lock, programming errors, or a safe that will not open reliably.
For a successful DIY lock upgrade, identify exactly what you currently have. Look for the manufacturer name, model number, lock type, spindle or cable configuration, and mounting details on both the keypad and the lock body if possible. If your current keypad has become unreliable, slow to respond, or difficult to service, replacing the entire electronic lock system with a newer matched model is often the most dependable solution. It removes guesswork, reduces compatibility issues, and gives you a modernized setup with known programming procedures and support.
How can I tell whether I only need a new keypad or a complete electronic lock replacement?
The answer depends on what symptoms your safe is showing and how the existing system is built. If the keypad buttons are physically worn, cracked, intermittent, or unresponsive, the exterior input device may be the main problem. However, if the safe delays opening, fails to retract the lock consistently, loses programming, produces error codes, or behaves unpredictably even after a fresh battery and correct code entry, the internal lock body may also be at fault. In many older systems, especially those that have seen years of use, replacing only one part can be a temporary fix rather than a long-term repair.
A good first step is basic troubleshooting. Install a new, high-quality battery recommended by the lock manufacturer. Check whether the keypad beeps normally, lights properly, and accepts code input consistently. If the keypad powers on but the lock does not actuate, the issue could be the cable connection, the lock body, or internal wear. If the keypad itself is dead, sticky, or inconsistent, then the keypad may be failing. Still, age matters. When the lock system is outdated and replacement parts are limited, upgrading the full assembly is usually smarter than chasing one aging component at a time.
For many DIY gun safe owners, the most practical route is a complete lock kit designed as a direct replacement or upgrade for the original setup. This approach helps ensure compatibility between the keypad and lock body, simplifies installation, and gives you current manufacturer support. If your safe stores firearms, reliability should outweigh the desire to save a little money on a partial fix. A complete replacement is often the better choice when the existing system is old, unsupported, or showing multiple signs of wear.
What should I check before buying a replacement keypad or lock kit for my gun safe?
Before purchasing anything, confirm the exact lock brand and model currently installed, and determine whether your safe manufacturer has any approved replacement options. Pay close attention to mounting footprint, cable length, connector style, keypad shape, lock handing, and the orientation of the lock body inside the door. You also want to verify whether the new lock is intended to work with your safe’s boltwork and relocker arrangement. A replacement that seems close enough can still create major installation problems if the internal dimensions or bolt interface are different.
Another important consideration is whether the safe door must remain open during installation and programming. In almost every case, the answer is yes. You should never test a newly installed electronic lock with the door closed until you have confirmed repeated successful operation with the door open. That is especially true when upgrading from one model to another. You also need to confirm battery type, programming steps, change code procedures, and any factory default sequences before you begin. Reading the install manual in advance can prevent simple but costly mistakes.
Security and quality should be part of the buying decision too. Choose a reputable lock manufacturer with a track record in gun safes and secure storage, not just a generic keypad that happens to fit the door cosmetically. Look for a lock kit that includes the keypad, lock body, mounting hardware, cable, instructions, and any necessary templates or adapters. If your safe is part of a fire-rated or warranty-sensitive setup, verify whether changing the lock affects factory coverage. In short, measure carefully, confirm compatibility, buy a matched system when possible, and treat the project like a security upgrade rather than a simple cosmetic swap.
What are the basic steps for swapping out an outdated gun safe keypad for a newer model?
The general process starts with opening the safe and keeping the door open for the entire job. Remove firearms, valuables, and anything that could be damaged while you work. Access the inside of the door panel to expose the lock body, mounting screws, cable path, and any retaining clips. Take clear photos before disconnecting anything. Those reference images are extremely helpful when routing the new cable and confirming how the original components were installed. Once you can see the assembly, disconnect the old keypad cable, remove the interior lock body if it is being replaced, and then remove the exterior keypad from the front of the door.
Next, install the new keypad and lock body according to the manufacturer’s instructions. Be careful not to pinch, sharply bend, or twist the cable as it passes through the door. Mount the lock body securely, making sure it lines up properly with the safe’s bolt mechanism or blocking bar. If the new system includes a spindle, shaft, or cable management clip, install those exactly as directed. Small alignment issues can cause incomplete lock movement, drag, or failure to open. This is why slow, careful work matters more than speed on a lock upgrade.
Once the new components are mounted, install the battery, program the lock, and test it repeatedly with the safe door open. Enter the code multiple times and confirm that the lock consistently actuates and resets correctly. Watch the internal mechanism while operating the handle so you can verify smooth movement. Only after several successful open-door tests should you reinstall the interior door panel and consider closing the safe. Even then, many experienced installers recommend one more cycle of testing before locking it fully. A DIY upgrade is very manageable when done carefully, but with a gun safe, testing and verification are just as important as the installation itself.
When should a DIY lock upgrade stop and turn into a job for a professional safe technician?
You should stop and call a professional if the safe is closed and you are already dealing with a lockout, if the lock system is not clearly identifiable, or if the new components do not match the original mounting or bolt interface as expected. A professional safe technician is also the right choice if the safe has hardplate protection, relockers, glass relock components, unusual linkage, or a proprietary lock arrangement from the manufacturer. These features are designed to resist tampering and forced entry, and an incorrect DIY approach can make a simple upgrade much more complicated.
Another warning sign is inconsistent lock behavior after installation. If the keypad accepts input but the lock body does not respond correctly, if the handle binds, if the boltwork does not move freely, or if programming will not save properly, do not keep experimenting with the door closed. Repeated trial and error can create a worse problem, especially if cables are stressed or the lock is misaligned. The same goes for any uncertainty about code change procedures, manager codes, time delay settings, or lock orientation. Security hardware needs to be right, not just close.
There is also a practical side to this decision. If the safe protects firearms used for home defense, hunting, collecting, or professional work, dependable access matters. A professional can often confirm compatibility quickly, install the correct lock cleanly, and test the system in a way that reduces the risk of future failure. DIY lock upgrades are absolutely possible for many owners, but knowing when to pause is part of doing the job responsibly. If you are unsure about fit, function, or safe operation at any point, bringing in a qualified technician is the smart move, not a defeat.