A gun safe does not have to look like industrial security equipment dropped into a carefully designed room. With the right custom and DIY gun safe modifications, you can make secure firearm storage blend with home decor while preserving access control, fire protection, and long-term durability. In practical terms, customization means changing the safe’s exterior appearance, placement, surrounding millwork, and interior organization so it visually fits a bedroom, office, den, mudroom, or closet. Blending means the safe feels intentional within the room, not hidden poorly or disguised so aggressively that function suffers.
This matters for three reasons. First, appearance influences behavior. In homes I have worked in, owners were more likely to keep firearms locked when the safe complemented the space instead of dominating it. Second, visual integration can reduce unwanted attention from visitors, contractors, and thieves who scan for obvious valuables. Third, thoughtful modifications improve daily use. Better lighting, shelves, door panels, dehumidification, and access zones make the safe easier to maintain, which supports safe handling habits.
Not every modification is equal. Some changes are cosmetic and reversible, such as vinyl wraps, surrounding cabinetry, or decorative panels. Others affect installation, such as recessing a safe into framing, anchoring to concrete, or adding custom trim. A few modifications should generally be left to the manufacturer or a certified technician, especially anything involving lock replacement, fire seals, hardplate, relockers, or structural drilling. The goal is not to turn a security product into furniture at the expense of performance. The goal is to combine concealment, usability, and interior design in a way that respects building codes, manufacturer guidance, and basic firearm safety.
This hub article covers the full landscape of custom and DIY gun safe modifications. It explains how to choose a decor strategy, what upgrades are low risk, where the technical limits are, and how to balance aesthetics with security. If you are planning a hidden gun safe in a built-in cabinet, refreshing an older black finish, or reorganizing the inside for rifles, optics, handguns, and documents, start here.
Start With Security, Size, and Room Function
The first rule is simple: choose the room before choosing the style treatment. A gun safe in a primary bedroom serves different needs than one in a garage workshop or finished basement. In a bedroom, sound control, visual calm, and quick authorized access may matter most. In a basement, humidity management and floor loading often matter more. In a home office, the safe may need to coordinate with desks, shelving, and wood tones while also storing documents and media.
Begin by confirming the safe’s specifications. Check exterior dimensions, door swing clearance, unloaded and loaded weight, fire rating method, lock type, bolt coverage, and anchoring points. If the manufacturer specifies minimum wall clearances for handle rotation or door removal, build around those numbers, not around guesswork. I have seen attractive cabinet surrounds fail because the trim projected too far and blocked the handle at full turn. Measure width, depth, height, diagonal path through doorways, and access for a dolly or stair-climbing mover before planning cosmetic work.
Floor capacity is not optional. Many full-size safes exceed 700 pounds empty and can pass 1,200 pounds when stocked. Concrete slabs are usually straightforward. Wood-framed floors require more care. Place the safe near a load-bearing wall when possible, spread weight with a properly sized platform if needed, and ask a structural professional when loads are uncertain. Good design starts with a safe that is stable, level, and anchored correctly. Decorative changes only make sense after that foundation is solved.
Choose a Design Direction That Matches the Home
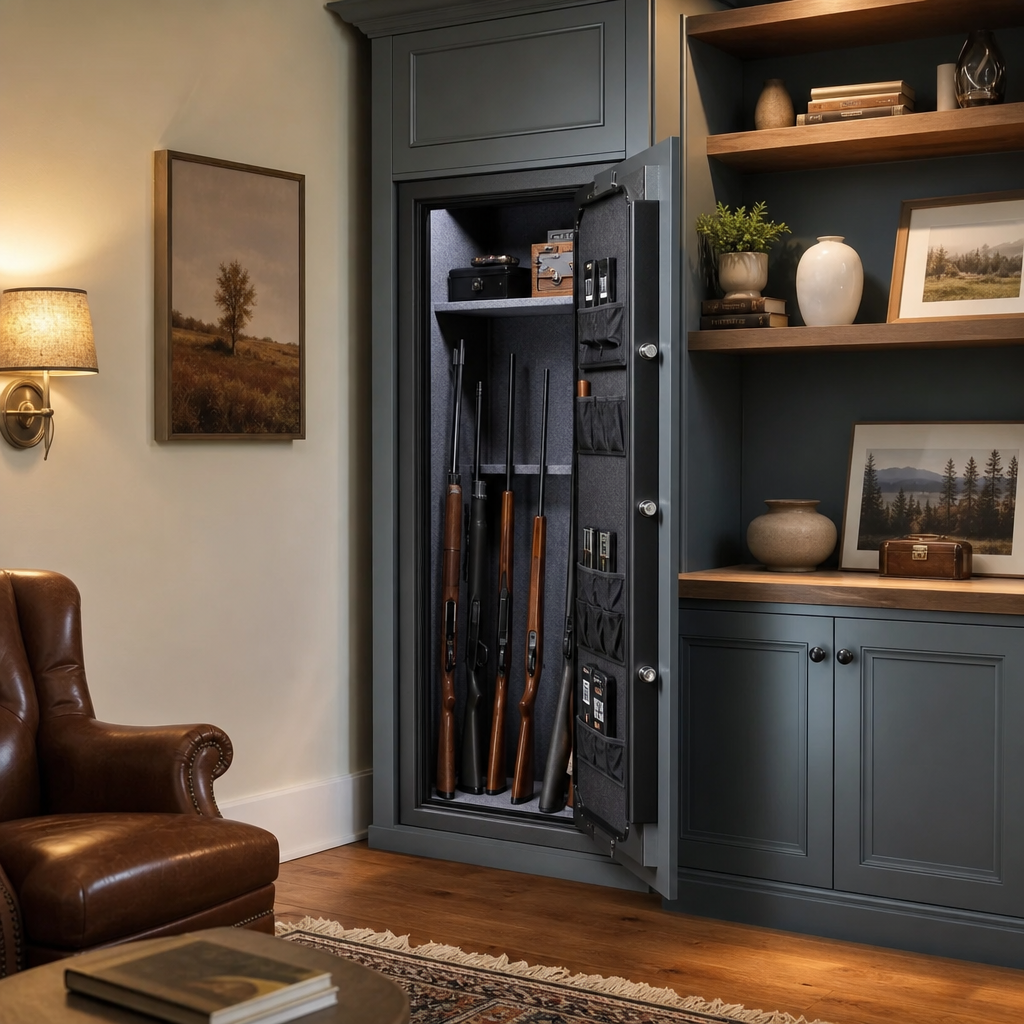
The easiest way to make a gun safe blend with home decor is to treat it like a built-in architectural element rather than a standalone box. Most successful projects fit one of four design directions: integrated cabinetry, closet concealment, furniture-style disguise, or finish coordination. Integrated cabinetry surrounds the safe with millwork that matches existing shelves, wainscoting, or entertainment built-ins. Closet concealment places the safe behind doors or panels while preserving ventilation and access. Furniture-style disguise uses a bench, armoire, or wall unit approach. Finish coordination keeps the safe visible but changes color, sheen, hardware context, and nearby decor so it belongs in the room.
Match materials already present in the house. If the room uses white painted shaker millwork, a glossy automotive-red safe will probably fight the space. If the home leans modern with matte black fixtures, walnut accents, and minimal trim, a satin charcoal safe with clean side panels may fit naturally. For farmhouse or traditional homes, cabinetry with inset doors and crown molding can soften the visual weight of a safe without pretending it is not there.
Color matching matters more than owners expect. Safe finishes are often textured black, gray, or green, which can look harsh indoors. Powder coating by a qualified shop can produce durable neutrals such as warm gray, bronze, cream, or deep navy. For many projects, however, a removable wrap or magnetic paneling is the better choice because it avoids altering the manufacturer’s finish. The key is consistency with the room’s palette, not novelty.
Safe Exterior Modifications That Improve Appearance
The safest cosmetic upgrades are those that do not penetrate the body or door. High-quality vinyl wraps are one of the most practical options. Commercial wrap materials from firms such as 3M or Avery Dennison are durable, removable, and available in woodgrain, matte colors, stone textures, and custom prints. A wrap can tone down logos, camouflage a glossy finish, or coordinate the safe with nearby built-ins. Surface preparation is critical: clean thoroughly, remove oils, and avoid covering vents, labels, or moving components.
Paint is possible, but it is less forgiving. Factory powder coat is tough, and improper prep leads to peeling around edges and the handle hub. If repainting, remove only external hardware that the manufacturer says is user-serviceable, scuff the surface correctly, use adhesion-promoting primer where appropriate, and choose finishes suitable for metal. Keep paint away from door seals, lock interfaces, and data plates. In most cases, professional refinishing produces better results than a garage repaint.
Decorative side panels are another strong option. I have used thin hardwood-faced panels attached to a surrounding cabinet structure rather than directly to the safe. This creates a furniture look while preserving service access. The same principle works with beadboard, fluted panels, or acoustic slat treatments in contemporary rooms. Avoid gluing combustible materials directly over large safe surfaces unless the manufacturer confirms it will not interfere with heat dissipation, service, or warranty terms.
Built-Ins, Concealment, and Hidden Gun Safe Ideas
A hidden gun safe works best when the concealment method matches the architecture. The most reliable approach is a built-in surround with normal-looking doors. Think linen closet, office storage wall, mudroom locker bank, or library cabinet. The concealment should not require moving heavy furniture or memorizing complicated steps during an emergency. If access is needed regularly, a full-overlay cabinet door on quality hinges with magnetic catches is often enough. If discretion is the primary goal, add a false back panel or bookcase-style front, but keep the opening motion intuitive for authorized users.
When framing around a safe, maintain access to anchor points, power pass-throughs, and dehumidifier outlets. Leave service gaps required by the maker. Do not block the emergency key override if the lock has one. If the door needs to open 180 degrees for rack clearance, design for that angle. Concealment that restricts the door to 90 degrees can make rifles with scopes difficult to remove.
| Modification | Main Benefit | Primary Risk | Best Use Case |
|---|---|---|---|
| Vinyl wrap | Fast cosmetic change | Edge lifting in humid rooms | Visible safe needing color coordination |
| Cabinet surround | Strong visual integration | Blocked door swing if poorly measured | Office, den, bedroom built-ins |
| Closet installation | Low visual impact | Ventilation and clearance issues | Primary bedroom or hallway closet |
| Furniture-style concealment | Discreet appearance | Slower access if overcomplicated | Living areas with careful access planning |
| Interior retrofit | Better organization and capacity | Overloading door organizers | Any safe with inefficient factory layout |
For wall and floor safes, concealment takes a different form. These installations can disappear behind artwork, mirrors, millwork panels, or closet fit-outs, but they usually offer less firearm capacity than full-size residential security containers. They are excellent for handguns and documents, less so for long guns. Choose the storage form that fits the collection, not just the design concept.
Interior Customization for Better Storage and Daily Use
Interior upgrades are often the highest-value modifications because they improve both convenience and preservation. Factory interiors are commonly generic: a few shelves, a divider, and basic barrel rests. Customizing the inside can increase usable capacity dramatically. Door organizers add handgun holsters, magazine pockets, choke tube loops, document sleeves, and zippered storage. Adjustable shelving lets you separate optics, suppressor accessories where lawful, ammunition in reasonable quantities, cleaning kits, and valuables. Rifle rods or barrel stabilizers can increase long-gun density while reducing contact between stocks and scopes.
Lighting is one of the first upgrades I recommend. LED strip kits designed for safes produce low heat, low draw, and immediate visibility. Motion-activated systems are convenient, while hardwired door-jamb switches are more reliable than adhesive battery puck lights. Route wires through existing power ports where available; do not drill new holes through the body unless the manufacturer specifically permits it. For moisture control, use a GoldenRod-style dehumidifier, rechargeable desiccants, or both, depending on climate. In humid regions, monitor relative humidity with a small digital hygrometer and aim for a stable range that discourages corrosion without over-drying wood stocks.
Lining materials deserve attention. Soft automotive carpet, marine carpet, and felt all appear in DIY projects, but they vary in durability and off-gassing. Use low-odor, clean materials and adhesives that fully cure before firearms return to the safe. Avoid bulky liners that reduce usable width or trap moisture. Good interior customization should make retrieval smoother, protect finishes, and support a clear inventory layout.
What Not to Modify Yourself
Some gun safe modifications are poor DIY candidates, no matter how confident the owner feels. Do not drill into the body or door without written manufacturer approval. Many safes contain fireboard, composite barriers, relockers, hardplate, glass relocker systems, wiring channels, or moving linkages hidden behind interior panels. A misplaced hole can weaken burglary resistance, compromise fire performance, void the warranty, or disable the lock. The same warning applies to welding exterior attachments, changing hinges, or relocating boltwork components.
Lock changes also deserve caution. Replacing an electronic keypad with a mechanical dial, upgrading to a SecuRam or Sargent and Greenleaf lock, or adding redundant entry hardware can be excellent improvements, but only when done correctly. UL-listed lock components, spindle length, mounting footprint, and relocker compatibility all matter. A bad lock retrofit creates a far more expensive problem than an ugly finish.
Be equally careful with heat and moisture assumptions. Sealing a safe tightly inside decorative cabinetry without ventilation can worsen humidity and trap odors. Installing incandescent lighting can raise temperatures in a confined interior. Adding thick wood cladding or foam-backed panels may change the way surfaces handle ambient moisture. The right approach is measured and reversible. If a modification affects security, fire resistance, or lock reliability, bring in a safe technician or cabinet professional with experience around security containers.
Planning, Budgeting, and Long-Term Maintenance
A polished result comes from sequencing the project correctly. Start with the safe model, room location, path of delivery, and anchor plan. Then design concealment or finish treatment around the installed footprint. After that, add interior organization, lighting, and environmental controls. Finally, style the surrounding room so the safe reads as part of a complete space. This order prevents expensive rework. It also keeps security decisions ahead of cosmetic impulses.
Budget realistically. A basic decor-focused refresh may cost little more than a wrap, a rug, and matching shelving nearby. A full custom cabinet surround with painted doors, trim, electrical access, and ventilation can cost far more than the safe itself. That does not make it wasteful. In many homes, especially custom builds or renovations, integrated storage adds convenience and improves room cohesion. The point is to allocate money where it matters: proper installation first, appearance second, convenience third.
Maintain the result. Check anchor bolts annually, inspect door clearance after seasonal floor movement, replace dehumidifier components as needed, and clean wraps or painted finishes with safe products. Review access procedures with other authorized adults in the home. If decor changes later, choose reversible updates when possible. The best custom and DIY gun safe modifications are the ones that still look intentional and work flawlessly years after installation.
A gun safe can blend seamlessly with home decor when customization starts with function, not camouflage. The most effective projects respect the safe’s job first: secure storage, controlled access, and environmental protection. From there, the winning options are clear. Use cabinetry, closet placement, or coordinated finishes to fit the room. Upgrade interiors with lighting, shelving, and humidity control to improve daily use. Favor reversible exterior treatments like wraps and surrounding panels over risky structural changes. Measure carefully, preserve door swing, and never compromise the lock, fire barrier, or anchor system for appearance.
If you treat the safe as part of the home’s architecture, it stops feeling like an afterthought. A built-in office cabinet, a discreet bedroom closet installation, or a visible safe finished to match the room can all work well. There is no single best style. The right answer depends on collection size, access needs, room design, climate, and budget. What remains constant is the standard: secure first, attractive second, convenient always.
Use this hub as your starting point for custom and DIY gun safe modifications, then map out your own project step by step. Measure the space, review the manufacturer’s limits, choose a design direction, and improve the interior before chasing cosmetic details. Done correctly, a gun safe can protect firearms responsibly and look like it belonged in the room from the beginning.
Frequently Asked Questions
1. What are the best ways to make a gun safe look like it belongs in a well-designed room?
The most effective approach is to treat the gun safe as part of the room’s design plan rather than as a stand-alone security box. Start with the exterior finish. Many safes can be refinished, wrapped, or visually softened with custom paint colors, wood veneer panels, furniture-style trim, or decorative side surrounds that match existing cabinetry, wall color, or flooring tones. In a home office or den, a safe can be integrated into built-in shelving, hidden behind cabinet doors, or framed with millwork so it reads like custom storage. In a bedroom or closet, coordinating the safe with closet systems, dresser finishes, or wall paneling helps it disappear visually.
Placement also matters as much as appearance. A gun safe that is centered awkwardly on a bare wall will always call attention to itself, while one positioned within a closet, alcove, wardrobe system, or recessed niche feels intentional. Some homeowners build cabinetry around the safe, leaving proper clearance for the door swing, ventilation, anchoring access, and fireboard thickness. Others use concealment strategies such as mirror doors, sliding panels, or faux furniture fronts. The key is balance: any cosmetic upgrade should preserve the safe’s structural integrity, lock access, fire seal performance, and serviceability. A well-blended safe should still function like a real security product, not just look better from across the room.
2. Can you customize the outside of a gun safe without compromising security or fire protection?
Yes, but the customization has to be done thoughtfully. Cosmetic changes that do not interfere with the body, door seal, lock, hinges, relockers, or internal fire lining are generally the safest route. For example, repainting the exterior with appropriate surface prep, adding removable decorative panels, surrounding the safe with cabinetry, or installing trim elements around the unit can improve appearance without weakening protection. Magnetic panels, non-invasive wraps, furniture enclosures, and millwork facades are often better options than drilling into the safe body or modifying the door structure.
Problems arise when decorative upgrades block heat-expanding fire seals, interfere with boltwork movement, restrict door opening, or create moisture traps against the steel. It is also important not to cover ventilation requirements specified by the manufacturer or add flammable materials in ways that undermine the fire rating environment. If the safe has an electronic lock, any custom face treatment needs to keep the keypad fully usable and accessible. If it has a mechanical dial, trim details cannot obstruct dial rotation or visibility. Before making any permanent modifications, review the manufacturer’s guidance and, if necessary, consult a safe technician or qualified fabricator. In most cases, you can dramatically improve the look of a gun safe without reducing its purpose-built security features, as long as the modifications remain external, reversible where possible, and respectful of the safe’s operating tolerances.
3. Where should a gun safe be placed so it blends with home decor and still remains practical?
The best location is one that supports both visual integration and daily use. Closets are a top choice because they naturally conceal bulk, reduce the safe’s visual impact, and make it easier to coordinate finishes with shelving, drawers, and hanging systems. A walk-in closet can accommodate a larger safe with surrounding built-ins, while a reach-in closet may work well for a slimmer model. In home offices, dens, or studies, safes often blend best when incorporated into bookshelves, lower cabinetry, or paneled wall systems. In mudrooms or utility-adjacent spaces, the safe can be concealed within storage walls designed to match benches, cubbies, and overhead cabinets.
Practical requirements should guide the final decision. The floor must be able to support the safe’s weight, especially when loaded. The location should allow full door swing, comfortable access to shelves and long guns, and room for interior lighting or power accessories if used. Humidity control is also important, so avoid damp areas unless you are proactively managing moisture. From a security standpoint, the safe should still be anchored correctly and ideally placed where removal is difficult. It is also wise to think about discretion: a beautifully integrated safe should not advertise itself to visitors or contractors. The most successful placements are low-profile, structurally sound, convenient for the owner, and compatible with the room’s existing architecture so the safe feels like part of the home rather than an afterthought.
4. How can you customize the inside of a gun safe to improve organization and long-term usability?
Interior customization is one of the smartest upgrades because it improves both function and the overall ownership experience. Most factory interiors are designed to work for a broad range of users, but not necessarily for your exact firearm collection, storage habits, or accessory needs. Adjustable shelving, pistol racks, magazine bins, document drawers, jewelry inserts, and door-mounted organizers can make much better use of the available space. A well-organized interior also supports safer handling by reducing crowding and making it easier to access specific items without moving everything around. For mixed-use storage, many owners create zones for long guns, handguns, optics, suppressors where legally permitted, important documents, ammunition stored according to best practices, and other valuables.
Long-term usability also depends on preservation features. Interior lighting makes access easier in low-light rooms such as closets or studies. Dehumidifiers, desiccant systems, and hygrometers help protect firearms, wood stocks, optics, and paperwork from moisture damage. Soft-lined shelves, barrel rests, and modular supports can reduce wear and prevent items from knocking into each other. If aesthetics matter, upgraded fabrics, leather-look liners, color-coordinated shelving, and cleaner cable management can make the interior feel more refined and intentional. The goal is not only to make the inside look better, but to create a storage system that supports security, maintenance, inventory control, and efficient access over time. A customized interior often delivers more day-to-day value than exterior upgrades because it affects every interaction you have with the safe.
5. Is it better to use DIY gun safe modifications or hire a professional for a custom built-in look?
That depends on the complexity of the project and how close to a true furniture-grade result you want to get. DIY modifications can be a great choice for cosmetic upgrades such as repainting nearby walls, adding coordinated trim around a closet opening, installing better interior lighting, organizing shelves, or using non-invasive decorative panels and concealment elements. If you are comfortable with measuring clearances, understanding door swing, and working carefully around the lock and hinges, many appearance-focused improvements are manageable without professional help. DIY also tends to be more affordable and gives you full control over the final style.
Professional help becomes worthwhile when the project involves built-in cabinetry, recessed wall integration, custom millwork, flooring transitions, electrical routing, or high-end finish matching. A cabinetmaker, finish carpenter, or safe installer can create a much more seamless result and is more likely to account for issues homeowners sometimes miss, such as service access, structural load, anchoring points, ventilation gaps, and the need to remove the safe in the future if necessary. Professionals are especially helpful when you want the safe hidden behind furniture-quality doors, integrated into a closet system, or designed to match existing architectural details exactly. In general, DIY works well for light visual and organizational upgrades, while professional fabrication is the better route for permanent, polished, built-in designs that need to look intentional and operate flawlessly for years.