A gun safe that resists fire can protect more than firearms; it can preserve legal documents, optics, heirlooms, and serialized equipment that become irreplaceable after a house fire. When owners ask about the best DIY fireproofing materials for your gun safe, they are usually trying to solve two problems at once: increasing the time a safe can withstand heat and reducing the smoke, steam, and moisture damage that often ruins contents before metal ever melts. In my experience upgrading residential safes, the right materials matter far more than marketing labels, because a poorly chosen liner can trap humidity, release corrosive gases, or create a false sense of protection.
Fireproofing, in practical terms, means slowing heat transfer from the outside of the safe to the interior cavity. Most home safes are not truly fireproof; they are fire resistant for a rated duration at a stated external temperature, often thirty to ninety minutes. DIY modification can improve performance, but it cannot magically turn a light-gauge cabinet into a UL Class 350 vault. That distinction matters because paper chars around 451 degrees Fahrenheit, many polymers deform far earlier, and ammunition, lubricants, and wood stocks all react differently under heat. Effective gun safe fire protection is therefore a layered strategy built around insulation, gap sealing, interior moisture control, and realistic expectations.
This sub-pillar guide covers custom and DIY gun safe modifications with fire resistance as the central goal. It explains which materials work, where they should be installed, what tradeoffs to expect, and how to avoid common mistakes. It also serves as a hub topic for related upgrades, including safe organization panels, dehumidifier systems, door seal replacement, shelving changes, anchoring, and document storage inside a gun safe. If you are planning a custom gun safe interior or comparing retrofit options before buying a larger safe, start here. The materials below are the ones I would consider first for a measured, evidence-based DIY fireproofing project.
How DIY Gun Safe Fireproofing Works
Heat moves into a gun safe through conduction, convection, and radiation. Conduction carries heat through the steel shell, convection pushes hot gases through gaps around the door, boltwork penetrations, and pass-through holes, and radiant heat bakes exposed surfaces even before flames make direct contact. A successful retrofit addresses all three. Insulation slows conduction, intumescent seals expand to block hot gases, and interior barriers reduce temperature spikes long enough for firefighters to arrive or for the fire to burn down.
Residential gun safes commonly use gypsum-based fireboard, ceramic wool, or proprietary composite liners. Gypsum works because chemically bound water inside the board is released as steam when heated, absorbing energy and delaying temperature rise. Ceramic fiber works by trapping air in a highly heat-resistant matrix, making it valuable where space is limited. Intumescent seals expand when exposed to heat, helping close the small air paths that can quickly turn a “sealed” safe into an oven. These are proven concepts used in fire doors, commercial cabinets, and insulated enclosures; the DIY challenge is fitting them correctly inside a compact steel box without interfering with lockwork or hinge clearance.
The biggest misconception is that more insulation is always better. In practice, added layers can reduce interior storage volume, increase weight on adjustable shelves, obstruct locking bolts, or create a moisture problem in humid climates. Some materials also release dust or fibers that you do not want circulating around blued steel and optics. Good DIY work starts with measuring the shell, mapping door swing and bolt travel, identifying uninsulated cavities, and deciding whether your goal is to protect firearms only or also paper documents, passports, hard drives, suppressor paperwork, and electronics that demand lower internal temperatures.
Best DIY Fireproofing Materials for a Gun Safe
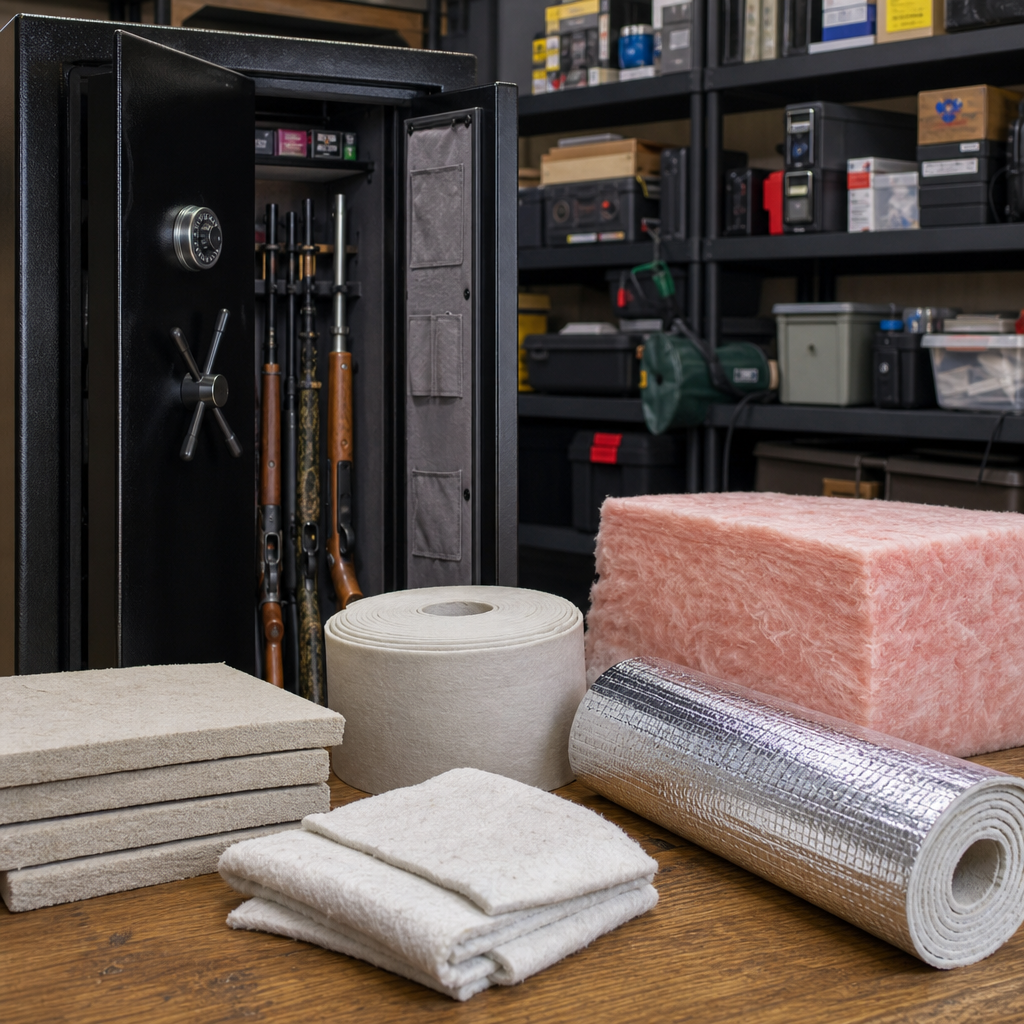
The best DIY fireproofing materials for your gun safe are Type X gypsum board, ceramic fiber insulation, intumescent fire seals, mineral wool, and select high-temperature sealants used in controlled, limited applications. Type X drywall is usually the most practical choice for broad interior coverage because it is affordable, widely available, dimensionally stable, and easy to cut into panels. It is not glamorous, but it has decades of documented use in rated wall systems and many factory-built safes. For DIY retrofits, thin Type X panels behind carpeted liners can materially slow heat transfer.
Ceramic fiber blanket, often sold in 2300 degree Fahrenheit ratings, is the premium space-saving option. It insulates better per inch than drywall and is particularly useful in door cavities, top panels, and narrow side walls where every fraction of an inch matters. However, it must be handled carefully. I use it only when fully encapsulated behind rigid panels or fabric because loose fibers are irritating and should not be left exposed inside a gun safe. Mineral wool is another strong candidate. It resists high heat, does not readily burn, and performs well in irregular cavities, though it is bulkier than ceramic blanket.
Intumescent fire seal is essential, not optional, if the door gap is significant. During heat exposure, the strip swells and reduces the flow of hot gases and smoke. This is one of the most cost-effective upgrades on many entry-level safes and gun cabinets. High-temperature silicone and furnace cement have narrower uses: sealing small penetrations, cable holes, and joints around added panels. They are not primary insulation. Used correctly, these materials complement each other, and the best results come from combining them rather than expecting one product to do everything.
| Material | Best Use in a Gun Safe | Main Advantage | Main Limitation |
|---|---|---|---|
| Type X gypsum board | Wall, ceiling, and floor liner panels | Low cost, proven fire resistance, easy to source | Bulky and heavy for the protection gained |
| Ceramic fiber blanket | Thin cavities, door interior, top panel | High insulation value in limited space | Must be encapsulated to control fibers |
| Mineral wool | Irregular cavities and side walls | Heat resistant, noncombustible, stable | Takes up more interior volume |
| Intumescent seal | Door perimeter and selected joints | Blocks hot smoke and gases during fire | Does not replace insulation |
| High-temp silicone or furnace cement | Small gaps, seams, penetrations | Improves airtightness at weak points | Limited thermal protection by itself |
Type X Drywall and Gypsum Board: The Most Practical Retrofit
If you want the most balanced answer to the best DIY fireproofing materials for your gun safe, start with Type X gypsum board. Factory safes often rely on layers of gypsum because the chemistry is favorable for passive fire protection. As gypsum heats, it releases water vapor, absorbing heat in the process and delaying interior temperature rise. That steam can also raise humidity inside the safe during a fire, which is one reason document pouches and rust prevention remain important, but as a first line of defense gypsum is proven and accessible.
For a DIY build, thin panels cut to fit the interior walls can be adhered mechanically or trapped behind a removable fabric liner. I prefer creating templates from cardboard first, then transferring cuts to the board so boltwork, hinge pockets, and shelving standards remain clear. On many safes, the door panel is the biggest weak spot because manufacturers prioritize appearance and storage pockets over insulation thickness. Adding a carefully fitted gypsum-backed insert behind the interior door organizer can improve performance without changing the exterior. Use caution near electronic lock wiring, relockers, and moving linkage.
The tradeoff is density and thickness. Half-inch Type X board can consume meaningful space in a compact safe, and multiple layers quickly become impractical for long guns with optics. That is why drywall often works best as part of a hybrid system: gypsum on broad wall surfaces, ceramic blanket in thin cavities, and intumescent seals around the door. If your safe already includes factory fireboard, inspect for gaps rather than simply adding more. Better coverage at seams often outperforms indiscriminate extra thickness.
Ceramic Fiber, Mineral Wool, and Door Seal Upgrades
Ceramic fiber blanket earns its place when space is scarce or temperatures may be severe. I have used it successfully behind custom interior panels on safes where adding half-inch board would have blocked rifle scopes or reduced shelf depth too much. A one-inch ceramic blanket can deliver substantial thermal resistance, especially on the roof of the safe where heat often concentrates. It is also easier to shape around internal reinforcements than rigid board. The key is containment. Cover it with sheet metal, hardboard, or tightly bonded fabric-backed panels so fibers do not shed onto guns, magazines, and optics.
Mineral wool is a more user-friendly alternative for some owners. Products from brands such as Rockwool are noncombustible, moisture resistant compared with fiberglass, and easy to friction-fit into voids. In a safe with decorative interior panels and empty gaps behind them, mineral wool can be a practical upgrade. It does not perform exactly like ceramic blanket at extreme temperatures, but for many residential fire scenarios it offers a sensible balance of safety, cost, and handling. Avoid compressing it too tightly, because trapped air contributes to insulation performance.
Door seal upgrades may deliver the highest improvement per dollar. Many affordable gun safes have a visible perimeter gap that leaks air even under normal conditions. An intumescent strip rated for fire doors can expand several times its original thickness when heated, reducing smoke and heat entry. Apply it where expansion will not jam the lockwork or prevent proper closure in everyday use. Replace worn adhesive-backed weather stripping only if it is compatible with the seal design; ordinary foam weather seal is not a fire barrier. On several budget safes I have tested with smoke leakage checks, better perimeter sealing made the interior noticeably less exposed during high-heat simulations.
Installation Strategy, Safety Limits, and Related Safe Modifications
The right installation sequence is simple. First, unload the safe, remove shelving, and photograph the interior so boltwork and wiring can be restored correctly. Second, identify priority zones: the top panel, door cavity, and any thin side wall nearest likely fire exposure. Third, cut and dry-fit insulation before using any adhesive or sealant. Fourth, add panel coverings or carpeting that protect the insulation and keep fibers contained. Fifth, install an intumescent perimeter seal and then verify the door closes, locks, and unlocks smoothly. A retrofit that binds the bolts is a security problem.
Do not ignore moisture management. Any gun safe fireproofing project should be paired with a dehumidifier rod, rechargeable desiccant, or both. Fireboard and enclosed insulation can alter the interior moisture cycle, especially in garages, basements, and humid southern climates. I also recommend including a separate UL-classified document pouch or media box inside the safe for passports, titles, tax records, and backup drives. Firearm safes are usually optimized for steel and wood, not low-temperature media protection. If your subtopic interest includes custom shelving, pistol racks, magazine bins, and door organizers, plan those around airflow so dehumidification still works.
There are firm limits to DIY improvement. Thin steel cabinets with loose doors and exposed seams cannot be upgraded into true fire safes economically. Likewise, adding flammable foam, mass-loaded vinyl, or generic automotive sound deadener is a mistake; these products may smoke, drip, or insulate unpredictably under fire conditions. Follow recognized principles from fire door and enclosure design, and when possible compare your plan to materials used in UL-rated products. The best outcome is not perfection but measurable delay, lower interior temperatures, and better survivability for what matters most. If you are building out a safer, smarter storage system, use this hub as your starting point and prioritize tested materials, careful fitment, and routine maintenance.
The central lesson is straightforward: the best DIY fireproofing materials for your gun safe are the ones that slow heat, control smoke entry, and preserve daily usability without introducing new hazards. Type X gypsum board remains the most practical foundation for many retrofits, ceramic fiber is the premium option where space is tight, mineral wool fills irregular voids effectively, and intumescent seals address one of the most common weak points at the door. High-temperature sealants help at seams and penetrations, but they work best as supporting players, not miracle products.
For most owners, the ideal custom and DIY gun safe modification is a layered system rather than a single material upgrade. Start by inspecting your current safe for gaps, thin panels, unused cavities, and moisture issues. Then improve the top, door, and side walls with proven insulation, add a proper fire seal, and protect documents separately inside a rated pouch. As you expand into related projects such as dehumidifier installation, shelf redesign, handgun racks, and door panel storage, keep fire performance and airflow in balance. Review your safe this week, make a material plan, and upgrade the most vulnerable areas first.
Frequently Asked Questions
What are the best DIY fireproofing materials to use inside or around a gun safe?
The best DIY fireproofing materials for a gun safe are usually fire-rated gypsum board, mineral wool, ceramic fiber insulation, high-temperature fire sealant, and heat-resistant door gasket material. Each one solves a different part of the fire problem. Fire-rated gypsum board is popular because it is affordable, widely available, and contains chemically bound water that helps slow heat transfer during a fire. Mineral wool is another strong option because it handles high temperatures well, does not burn, and adds insulation without the same moisture release concerns associated with some other materials. Ceramic fiber offers excellent thermal resistance, but it can be more expensive and should be handled carefully because the fibers can be irritating during installation.
High-temperature fire caulk or sealant matters because many safes lose protection at seams, corners, and penetrations where hot smoke and heat can enter quickly. Adding an intumescent or heat-resistant gasket around the door can also improve performance by reducing air gaps that feed internal heating. In practical DIY upgrades, the best results usually come from combining materials rather than relying on one product. For example, adding a layer of fire-rated board to the exterior shell, insulating the surrounding enclosure with mineral wool, and sealing joints with high-temp caulk creates a more effective system than using insulation alone. The key is to choose non-combustible, fire-rated materials and install them in a way that does not interfere with the safe’s lock, hinges, relockers, or boltwork.
Is drywall a good fireproofing material for a gun safe, or are there better alternatives?
Drywall, specifically Type X or other fire-rated gypsum board, is one of the most practical DIY materials for improving a gun safe’s fire resistance, but it is not a perfect solution by itself. It helps because gypsum contains water in crystalline form, and that water is released as steam when heated, which can slow the rise of internal temperature for a limited period. That is why many factory fire-lined safes use gypsum-based barriers as part of their design. For a homeowner looking for an affordable and accessible upgrade, fire-rated drywall is often the first material worth considering.
That said, drywall has trade-offs. The biggest one is moisture. During a fire, the same water release that helps with heat resistance can also create steam inside or around the safe, which may damage documents, optics, electronics, wood stocks, and metal finishes. It can also contribute to post-fire corrosion if the safe cools with trapped moisture inside. Because of that, many experienced safe owners prefer to pair gypsum with low-moisture materials such as mineral wool, thermal barriers, and improved door seals. Mineral wool is often considered a better insulation layer for reducing heat transfer without adding as much steam risk. Ceramic fiber can outperform drywall thermally, but it tends to cost more and may be less convenient for a basic DIY retrofit. So yes, drywall is a good option, but it works best as part of a broader fire-mitigation strategy rather than as the only material used.
How can I improve fire protection without trapping moisture and damaging guns, optics, or important documents?
This is one of the smartest questions to ask, because heat is only part of the problem in a house fire. Moisture, steam, and smoke often ruin contents long before the safe body fails structurally. To reduce that risk, focus on balanced protection. Start by limiting air leaks. A better door seal, especially a heat-resistant or intumescent gasket, helps reduce smoke intrusion and slows hot air entry. Then use insulation that does not depend heavily on water release for protection. Mineral wool is especially useful here because it resists heat well and does not create the same level of steam as gypsum-based materials.
Inside the safe, proactive humidity control is just as important. Use rechargeable desiccant packs, a dehumidifier rod if power is available, and sealed document pouches or fire-rated document boxes for paperwork, passports, titles, and small electronics. Fireproofing the safe shell is helpful, but sensitive contents should also have their own secondary protection. For optics, serialized accessories, and heirlooms, use padded and sealed cases where practical. Another overlooked step is placement. A safe in a climate-controlled interior room, away from exterior walls, garages, and attic-adjacent spaces, generally faces less intense and less prolonged heat than one placed in a more exposed area. In short, you improve fire performance by combining insulation, smoke sealing, humidity control, and smart safe placement, not by chasing one “magic” material.
Can I add DIY fireproofing materials to any gun safe, or are there risks and limitations?
You can add DIY fireproofing to many gun safes, but there are real limits and a few important risks. Not every safe is designed to accept added layers of insulation, paneling, or gaskets without side effects. If you add too much material inside, you may reduce usable space, block shelving, interfere with door closure, or create pressure points that affect the lock and boltwork. If you add heavy materials outside, you may change clearances around the door swing, make anchoring more difficult, or trap moisture between layers if the installation is not thought through carefully. On some safes, modifying the body or door may also void the manufacturer’s warranty or compromise a fire label if one exists.
There is also a performance misconception to avoid: DIY upgrades can improve resistance, but they do not automatically turn a basic residential security container into a true high-fire-rated safe. The steel thickness, door design, seam construction, and overall fit all matter. Thin-bodied safes may still transfer heat rapidly even with added lining. Another concern is using the wrong material. Foam boards, household adhesives, weather stripping not rated for high temperatures, or general-purpose construction products can generate toxic smoke, melt, or fail quickly in a fire. The safest approach is to use non-combustible, high-temperature-rated materials and avoid anything that can interfere with the locking system or emergency access. Think of DIY fireproofing as a meaningful upgrade, not a complete substitute for buying a better-rated safe when maximum protection is required.
What is the most effective DIY strategy for increasing the time a gun safe can withstand fire?
The most effective DIY strategy is to build a layered system that slows heat transfer, reduces smoke entry, and protects the contents individually. In practice, that usually means starting with the safe’s weakest points: the door gap, seams, and surrounding environment. Add a high-temperature or intumescent door seal to reduce leakage. Seal any non-moving gaps or exterior seams with fire-rated caulk where appropriate. Then create additional thermal mass or insulation using fire-rated gypsum board, mineral wool, or a combination of both, depending on the design of your safe and where you can add materials without affecting operation.
Beyond the safe itself, one of the most effective upgrades is building a fire-resistant enclosure around the safe. For example, placing the safe in a closet or alcove lined with multiple layers of fire-rated board and insulated with mineral wool can significantly reduce direct flame exposure and slow heat buildup. Positioning the safe on a concrete slab or against an interior masonry surface can also help compared with placing it in a garage or against an exterior wood-framed wall. Finally, protect the most vulnerable contents inside the safe with secondary containers, sealed bags, desiccants, and document-specific fire sleeves or boxes. That combination of enclosure, insulation, sealing, and internal organization is what gives you the best chance of extending survival time during a real fire. It is rarely one material alone that makes the difference; it is how well the whole system manages heat, smoke, and moisture together.