
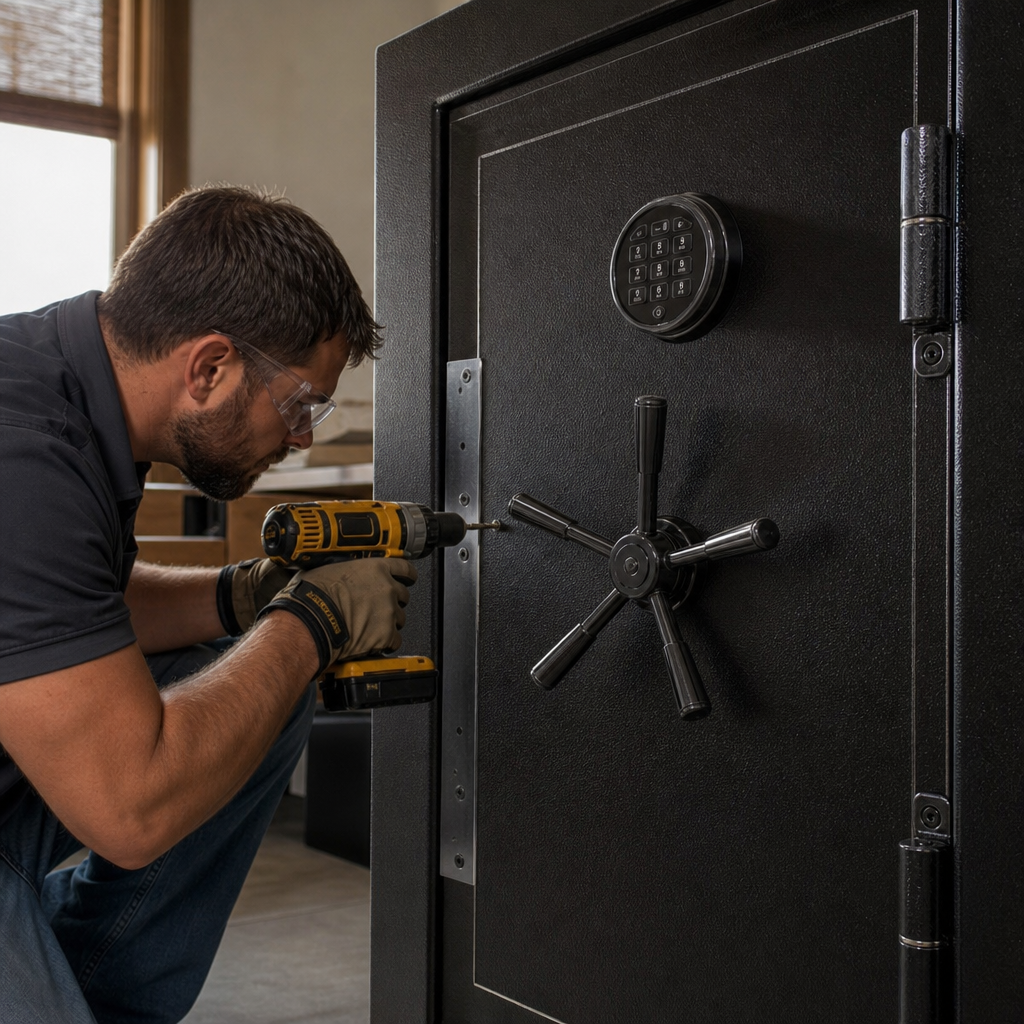
A gun safe that resists a pry bar but fails under a drill is not truly secure, and reinforcing a gun safe against drilling attacks is one of the most practical upgrades an owner can make. Drilling attacks target the lock, relocker area, hardplate, boltwork access points, and thin steel around critical components. In plain terms, an attacker tries to bore through the safe’s face or side panel to reach the lock body, disable the relocker, or manually retract the bolts. I have inspected safes after attempted break-ins, and the pattern is consistent: thieves favor speed, battery-powered tools, and the weakest point they can identify in under a minute. That is why custom and DIY gun safe modifications matter. They let owners improve real-world resistance beyond stock specifications, especially on entry-level residential security containers that may meet basic standards yet still leave vulnerable zones around the lock. Reinforcement also matters because gun safes do more than protect valuables. They help prevent unauthorized access, reduce theft risk, and support responsible firearm storage in homes with children, guests, contractors, or temporary occupants. A drilling attack is not the most common amateur method, but it is increasingly realistic because carbide bits, compact rotary tools, and portable magnetic drill systems are easier to buy than ever. Understanding how drilling attacks work, where factory safes are weakest, and which modifications provide meaningful protection allows you to invest intelligently instead of adding cosmetic steel that does little.
Within the broader topic of gun safes and safety, custom and DIY gun safe modifications form a practical subcategory that includes drill resistance, fire sealing improvements, anchor systems, humidity control, interior organization, lighting, power routing, and lock upgrades. This hub article focuses on anti-drill reinforcement while also framing the larger modification landscape. Some changes are simple owner projects, such as adding hardened inserts behind vulnerable areas or improving anchoring and placement. Others, including welding hardplate or relocating lock components, are better handled by a safe technician or fabricator. The key is knowing which modifications improve delay time against attack, which ones create safety or warranty problems, and how reinforcement should be layered rather than treated as a single fix. A safe that combines better steel, hardplate, thoughtful placement, solid anchoring, and an upgraded lock is far harder to defeat than one relying on any one feature alone.
How Drilling Attacks Defeat Gun Safes
A drilling attack works by creating an access hole at a precise point, usually informed by common lock layouts, manufacturer patterns, or visible clues on the door. On many gun safes, the most valuable target is the lock itself. For mechanical dial locks, attackers may drill to observe the wheel pack or fence area, then manipulate the combination indirectly. For electronic locks, they often aim for the lock body, spindle hole, or relocker region, trying to punch, bypass, or destroy components until the boltwork can move. If the face steel is thin and there is no effective hardplate, a quality cobalt or carbide bit can cut through surprisingly quickly. I have seen imported cabinets marketed as heavy-duty fail because their advertised gauge referred to the body shell, while the lock area lacked concentrated protection where it mattered most.
Attackers also exploit side, top, and rear panels if those surfaces are thinner than the door. This matters because many owners focus entirely on the front. If a thief can tip the safe, expose a side panel, and drill or cut behind the lock linkage, the heavy door becomes irrelevant. Relockers complicate attacks by firing when the lock is punched or compromised, but only if the surrounding steel and mounting arrangement prevent easy access. In practical security terms, the goal is rarely to make drilling impossible. The goal is to increase noise, time, tool wear, uncertainty, and the chance that the attacker gives up or gets interrupted. Every effective DIY or custom modification should be judged by that standard.
Where Gun Safes Are Most Vulnerable to Drilling
The highest-risk area on most gun safes is the lock and relocker zone directly behind the dial or keypad. Better safes use hardplate, often a hardened steel or carbide-infused plate, placed in front of the lock body to deflect or destroy drill bits. Lower-cost units may use a very thin plate, a small plate that protects only part of the mechanism, or no meaningful hardplate at all. Another common weak spot is the spindle hole area, where a dial spindle passes through the door. If that opening is oversized or surrounded by relatively soft steel, it can become a guide for attack. Internal boltwork paths are another concern. If a drilled hole can reach a cam, linkage bar, or actuator, a thief may not need to defeat the lock directly.
Body panels deserve equal attention. Many residential gun safes use steel that deters casual theft but is still vulnerable to concentrated drilling or hole saws. Corner seams, lock-side door edges, and regions adjacent to hinge-side reinforcement can all become alternate entry points. The safe’s installation environment changes the risk profile. A safe placed in a garage with open working space around all sides is easier to attack than one installed in a tight closet with side clearance intentionally minimized. Before making modifications, map the safe’s vulnerable surfaces from the outside and, if manufacturer documentation allows, understand the approximate lock and boltwork layout inside the door. Reinforcement decisions should follow that map, not guesswork.
Best Reinforcements for Drill Resistance
The most effective anti-drill upgrades focus on material hardness, coverage, and layering. First, upgrade or add hardplate over the lock area. Commercial hardplate may be case-hardened steel, tool steel, or composite anti-drill material containing hard aggregates that shred bits. Thickness alone does not guarantee performance; metallurgy matters more. A properly located hardened plate directly in front of the lock body and relocker region is more useful than a thicker mild-steel patch mounted nearby. Second, consider a hardplate with a free-spinning element. Rotating hardplate disks or bearing assemblies can cause the bit to skate instead of bite, especially when paired with hardened surfaces.
Third, reinforce the inside of the door skin around the lock mounting region using additional steel backing that expands the protected footprint. This does not replace hardplate, but it reduces the chance that a thief simply drills next to the protected area and reaches the mechanism from the side. Fourth, upgrade the lock itself if the factory unit is a low-cost model with weak mounting hardware or limited relocker integration. Recognized lock manufacturers such as Sargent and Greenleaf, La Gard, and SecuRam offer models with stronger attack resistance and documented mounting standards. Fifth, strengthen the safe’s anchoring and placement. A safe that cannot be tipped, laid on its side, or moved into a better work area is much harder to drill effectively.
| Modification | What It Protects | Best Use Case | Main Limitation |
|---|---|---|---|
| Hardened hardplate | Lock body and relocker area | Thin factory door around keypad or dial | Needs precise placement |
| Spinner plate or rotating disk | Primary drill point on lock face | Repeated attacks with carbide bits | May require fabrication |
| Interior steel backing plate | Area surrounding lock mechanism | Attackers drilling adjacent to hardplate | Adds weight to door |
| Lock upgrade | Bypass and punch resistance | Older or budget electronic lock | Installation must be exact |
| Anchoring and constrained placement | All attack surfaces | Garage or basement installs | Does not harden steel itself |
DIY Modifications That Help and Those That Do Not
Some DIY projects meaningfully improve drill resistance. Adding a correctly sized hardened plate on the interior face of the door over the lock area is one. Using grade-rated fasteners, backing washers where appropriate, and threadlocker can keep the reinforcement stable under impact and vibration. Another worthwhile project is building a close-fitting alcove or cabinet surround that reduces access to the safe’s sides and top while preserving ventilation and door swing. Installing the safe on a level concrete slab with quality anchors, then limiting side clearance to a few inches, changes the attack geometry in your favor. Even simple measures such as covering obvious lock-center reference points on the exterior can reduce easy targeting, although concealment is only a minor layer.
Other DIY ideas are far less effective. Adding mild steel sheet from a hardware store usually increases thickness without adding significant drill resistance. Standard A36 steel is easy to penetrate with the same bits used on the original door skin. Filling door cavities with concrete, epoxy, or miscellaneous scrap can create moisture issues, interfere with fire insulation, upset door balance, and complicate future lock service. Decorative external plates can even help an attacker identify where the lock sits if placement is obvious. Magnetic tool holders, interior pegboard, and lighting kits improve usability but should not be mistaken for security upgrades. The rule I use is simple: if a modification does not increase hardness, delay access, restrict working space, or strengthen the lock pathway, it is not an anti-drill upgrade.
When to Use a Professional Safe Technician or Fabricator
Professional work is justified when the upgrade touches the lock footprint, relocker integration, or welding near heat-sensitive fire lining. A trained safe technician can identify the exact lock body position, choose compatible mounting patterns, and avoid disabling internal safety features. That matters because drilling resistance depends heavily on placement. A hardplate offset by an inch can leave the critical target exposed. Fabricators can also install tool steel or specialty anti-drill material that is difficult to cut, shape, and mount accurately with consumer tools. If your safe uses a listed lock installation pattern, maintaining that pattern matters for reliability and future serviceability.
Professional help is also wise if the safe is under warranty. Many manufacturers void coverage when owners drill the door, weld reinforcement, or change lock hardware without authorization. Ask about approved modifications, relocker compatibility, and the door’s existing composite structure before starting. In some cases, the smartest investment is not retrofitting an economy safe extensively but reallocating that budget toward a higher-rated model with factory hardplate, thicker steel, and tested lock protection. A technician should also inspect any safe that has already suffered an attack. Hidden damage to boltwork alignment, lock mounting screws, or relocker springs can make a safe unreliable even if it still opens and closes.
Placement, Anchoring, and Layered Security
The safest gun safe is one that is both harder to drill and harder to approach. Placement is a security upgrade because it controls tool angles, body position, lighting, and time on target. In homes I have worked in, the best installations were rarely in the open garage bay. They were in interior closets, utility rooms with tight side walls, or basement corners where the lock face remained accessible to the owner but not to a kneeling attacker with full tool movement. A surrounding structure can be built with framed walls or cabinetry, but maintain enough clearance for maintenance, dehumidifier cords, and emergency service. If humidity is a concern, pair placement changes with a rod-style dehumidifier or desiccant system rather than sealing the safe into a dead-air cavity.
Anchoring is equally important. Use anchors matched to the substrate: wedge anchors for sound concrete, sleeve anchors where appropriate, or structural lag systems into substantial framing when concrete is unavailable. Follow the safe manufacturer’s floor hole pattern whenever possible, and use large-diameter hardened washers if the base metal is thin. Once anchored, the safe should resist tipping because drilling side panels is easier when the unit is laid over. Layered security completes the picture. Add monitored alarms, cameras covering the safe location, solid room doors, and habits that reduce information leakage about your firearm storage. Reinforcing against drilling works best when the attacker never gets quiet, private time with the safe.
Building a Smart Custom Modification Plan
A smart plan starts with identifying the safe model, steel thickness, lock type, current anchor status, and room layout. Then rank upgrades by security gain per dollar. In most cases, the best sequence is anchoring and placement first, lock-area hardening second, lock upgrade third, and convenience modifications after that. Document every change with photos and measurements for future service. Keep manuals for the lock, anchor hardware, and any aftermarket parts inside your household records, not inside the safe. Test door swing, bolt operation, and lock reliability after each modification. If anything feels rough, stop and correct it immediately. Security upgrades should not compromise dependable daily access.
As the hub for custom and DIY gun safe modifications, this topic connects to related improvements such as interior reconfiguration, power pass-through management, fire gasket maintenance, lighting, and humidity control. Those upgrades improve ownership, but anti-drill reinforcement protects the safe’s core purpose. The main takeaway is straightforward: focus on the lock area, use hardened materials instead of ordinary steel, control the safe’s environment through tight placement and anchoring, and bring in a professional when precision matters. A gun safe does not need to be invincible to be effective; it needs to impose enough delay and uncertainty that an attacker fails. Review your current setup, identify the weakest point, and make the next upgrade count.
Frequently Asked Questions
Why are drilling attacks such a serious threat to a gun safe?
Drilling attacks are serious because they target the exact components that allow the safe to stay locked. A gun safe may have an impressive exterior, thick bolts, and decent pry resistance, but if an attacker can drill through a vulnerable area and reach the lock body, relocker, or boltwork, the safe can be defeated far faster than many owners expect. In practical terms, a criminal is not trying to neatly “open” the safe the way the owner does. The goal is to create a path to manipulate or disable the internal security system directly.
Common drill targets include the lock area on the door, the hardplate that protects the lock, the relocker region, and any thinner steel sections around the face or side panel that give access to the internal mechanism. On lower-end or lightly protected safes, these areas may not be reinforced enough to stop a determined attacker with quality drill bits and time. That is why drill resistance matters so much: it addresses one of the most realistic forced-entry methods used against residential security containers and some entry-level safes.
The key takeaway is that pry resistance and drill resistance are not the same thing. A safe that can survive leverage on the door edges may still have a weak lock zone. Reinforcing against drilling helps close that gap by making it harder to reach critical components, slowing the attacker down, increasing noise and tool wear, and improving the odds that the attack will fail or be abandoned.
What parts of a gun safe should be reinforced first to improve drill resistance?
The first priority is the lock and relocker protection area, because that is usually the most valuable target in a drilling attack. If a criminal can reach the lock body or disable the relocker, the rest of the safe’s defensive features may become irrelevant. Reinforcement in this zone often centers on adding or upgrading hardplate protection and improving the surrounding barrier so drilling does not easily create a direct path to the lock mechanism.
The next area to evaluate is the steel thickness and structure around the door face, especially near the lock spindle hole, dial or keypad mounting area, and the internal linkage that connects the lock to the boltwork. Thin outer steel with minimal internal protection can allow a drill to penetrate quickly. Side panels also deserve attention if the safe design leaves the boltwork exposed from the side or if a thief could access those surfaces during an attack. Some safes are vulnerable not because the front is especially weak, but because the side panel offers a shorter route to the locking system.
Owners should also pay close attention to boltwork access points and any manufacturer cutouts, seams, or internal openings that could help an attacker bypass major protective elements. If the safe includes relockers, hardplate, or glass relocking systems from the factory, it is worth confirming how extensive that protection actually is. In many cases, the smartest reinforcement plan is to strengthen the lock zone first, then assess the door structure and nearby body panels, and finally address installation factors such as anchoring and placement that reduce access to vulnerable surfaces.
What upgrades are most effective for reinforcing a gun safe against drilling attacks?
One of the most effective upgrades is improved hardplate protection. Hardplate is designed to resist drilling and protect the lock from direct attack. Depending on the safe’s construction, this can involve replacing inadequate factory protection with more robust material or adding an additional hardened barrier in front of critical lock components. The objective is simple: force the drill to hit something that rapidly slows penetration, deflects the bit, or destroys cutting efficiency before the attacker can reach the lock or relocker.
Another valuable upgrade is adding internal reinforcement around the lock pocket and relocker area. This may include hardened steel plates, strategically positioned barriers, or redesigned shielding that blocks common drill paths. In better setups, reinforcement is not just a single plate directly in front of the lock, but part of a layered system that also protects the surrounding path an attacker might take to reach the mechanism from an angle. Layered defense is important because many drilling attacks do not go straight into the center of the lock; they target nearby points that provide indirect access.
Lock upgrades can also matter. Some locks and lock mounting arrangements are better protected than others, especially when paired with strong internal shielding and proper relocker integration. Beyond the lock itself, anchoring the safe and limiting side or rear access can be a meaningful security improvement because it restricts the attacker’s ability to position tools on weaker panels. In short, the best anti-drill upgrade strategy usually combines better hardplate, stronger lock-zone reinforcement, thoughtful internal shielding, and installation choices that deny easy attack angles.
Can you reinforce any gun safe against drilling, or are some safes too weak to upgrade effectively?
Not every gun safe responds equally well to reinforcement. Many can be improved, sometimes significantly, but there is a practical limit based on the original build quality. If the safe has very thin steel, weak door construction, minimal internal space for proper reinforcement, or poor overall engineering, adding a single protective plate may not transform it into a truly drill-resistant unit. It can still become harder to attack, but expectations need to remain realistic.
Higher-quality safes tend to benefit more from reinforcement because they already have a stronger foundation. Thicker steel, better lock placement, more robust boltwork, and a better-designed door structure make upgrades more worthwhile. In those cases, reinforcing vulnerable drill paths can materially improve security. With budget models, the issue is often that the attacker has multiple easy paths to the locking system. If you harden one spot but the door skin, sidewall, or adjacent access point remains weak, the attacker may simply shift tactics.
The best approach is to assess the safe as a system. Look at steel thickness, lock protection, relocker design, body construction, fire liner layout, and whether side access to the boltwork is a concern. If the safe is fundamentally light-duty, reinforcement may be a useful interim step, but replacement with a more robust model could be the better long-term investment. Reinforcement is most effective when it strengthens an already decent platform rather than trying to compensate for major structural weaknesses across the entire container.
Should gun safe drill-resistance upgrades be handled by the owner or by a professional?
In most cases, professional evaluation and installation are the safer and smarter choice. Reinforcing a gun safe against drilling attacks is not just a matter of attaching more steel. The upgrade has to account for the exact lock type, relocker position, hardplate layout, boltwork geometry, and internal clearances of that specific safe. Poorly placed reinforcement can interfere with lock operation, reduce relocker effectiveness, create service issues, or even leave the real drill path unprotected while giving the owner a false sense of security.
A qualified safe technician or specialist can identify the actual weak points, determine where an attacker would most likely drill, and recommend reinforcement that works with the safe’s design rather than against it. This is especially important if the safe uses specialized lock mounting hardware, proprietary door construction, or relocking components that must remain functional after modification. A professional can also evaluate whether the upgrade is cost-effective or whether the safe would be better replaced with a model offering stronger factory drill resistance.
Owners can still take useful steps on their own, such as improving safe placement, limiting access to side panels, anchoring the safe securely, and documenting the existing construction before making decisions. But when it comes to modifying the lock zone, adding hardened drill barriers, or working near relockers and boltwork, precision matters. If the goal is meaningful anti-drill protection rather than cosmetic change, professional guidance is usually the best way to achieve it.