DIY gun safe upgrades for enhanced nighttime accessibility can make the difference between confident, controlled access and fumbling in the dark when seconds matter. In practical terms, nighttime accessibility means being able to locate, open, illuminate, and retrieve secured firearms or critical items from a gun safe under low-light conditions without compromising safety, security, or reliability. DIY gun safe modifications are owner-installed improvements such as interior lighting, shelf reconfiguration, door organizers, label systems, humidity control, backup power, and access enhancements that tailor a factory safe to real household needs. This matters because most safes are sold as general-purpose boxes, while actual use happens in specific rooms, specific lighting conditions, and specific emergency scenarios. After working with safe interiors that looked organized in daylight but became unusable at 2 a.m., I have learned that accessibility is not about convenience alone. It is about reducing errors, maintaining muzzle discipline, preserving secure storage, and ensuring that every movement inside the safe is intentional. A well-planned upgrade path also supports the broader Gun Safes & Safety category, because custom organization, child resistance, moisture management, and maintenance all intersect with fast, safe access. The best DIY approach improves speed without creating new failure points, and every modification should be judged by that standard.
Start With Risk Assessment, Safe Type, and Access Goals
Before adding lights or organizers, define what kind of safe you own and what problem you are solving. A bedside handgun safe, a full-size long-gun safe, and a modular cabinet need different upgrades because their lock types, interior depth, and retrieval angles differ. Biometric safes may offer fast entry but still suffer from poor interior visibility. Mechanical simplex locks are highly dependable in darkness, but owners often need tactile indexing points to align their hands correctly. Large electronic safes can open quickly yet become difficult to use if shelves block access to a defensive handgun staged inside. The first step is mapping your actual nighttime sequence: approach the safe, orient your body, identify the keypad or dial, open the door, illuminate the interior, retrieve the intended item, and close or secure the safe again. If any part of that sequence requires guesswork, the safe needs modification.
I recommend evaluating upgrades against four criteria: visibility, reach, consistency, and redundancy. Visibility means you can identify contents immediately. Reach means you can retrieve the intended firearm or document without moving unrelated items. Consistency means the setup is intuitive every time, not only when you are fully awake. Redundancy means there is a fallback if batteries die, house power fails, or one component breaks. Established safe makers such as Liberty Safe, Fort Knox, Browning, Vaultek, Hornady, and SecureIt all provide strong baseline products, but even premium interiors often benefit from owner tuning. If your subtopic is custom and DIY gun safe modifications, this is the core principle tying every supporting article together: each upgrade should reduce cognitive load under stress while preserving secure storage and compliance with local law.
Install Interior Lighting That Works Without Causing Glare
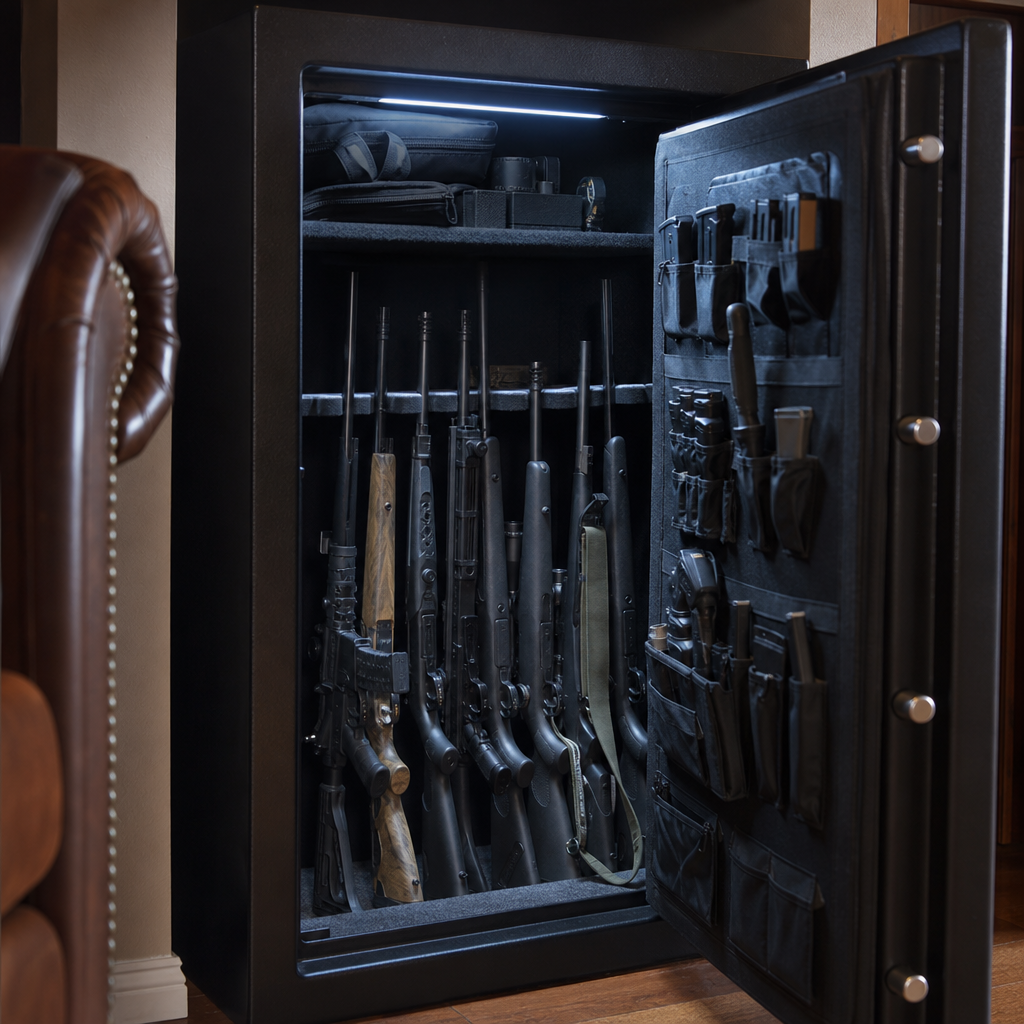
The single most effective nighttime upgrade is interior lighting, but the wrong light creates glare, hard shadows, and dead batteries. For most full-size safes, low-heat LED strip lighting with an automatic door-activated switch is the best starting point. Warm white or neutral white strips in the 3000K to 4000K range usually produce better contrast than harsh cool-white strips, especially against black foam, matte firearms finishes, and dark fabric panels. I have found that mounting strips vertically along the front door frame and upper sidewalls gives more even illumination than placing one bright strip at the top. Top-only lighting often throws shadows under shelves and behind long guns, which is exactly where hands end up searching in the dark.
Use adhesive-backed LED kits carefully. Safe interiors can experience heat variation and textured fabric surfaces that weaken adhesive over time, so reinforce strips with mounting clips where possible. Power choices matter. USB-rechargeable lights are simple for small handgun safes, but larger safes benefit from hardwired low-voltage kits or battery packs mounted where they can be changed without unloading the safe. Motion-activated puck lights are convenient, yet they often trigger inconsistently and can fail to illuminate the lower half of the interior. A magnetic reed switch tied to the door is more dependable because it turns the lights on as soon as the door opens. Avoid extremely bright lighting; the goal is instant recognition, not a flashlight blast that constricts your pupils. If the safe stores optics, spare batteries, passports, and documents alongside firearms, test the setup in total darkness and verify that every shelf remains readable at a glance.
Reconfigure the Interior for Touch-Based Retrieval
Good nighttime accessibility depends as much on layout as on illumination. The safest arrangement allows one intended item to be retrieved without shifting others. In practice, that means creating dedicated zones: defensive firearm access, long-term storage, documents, magazines, suppressor accessories where lawful, and maintenance supplies. Full-size safes often waste space because factory shelves are set for showroom appearance rather than use. Adjustable shelving, rifle rods, barrel standoffs, and modular panels can dramatically improve access. SecureIt-style organization principles are useful here because they emphasize visible, separated storage instead of dense stacking. Dense stacking saves space but increases confusion and accidental contact.
For handgun safes, use foam cutouts or fitted holster mounts only if they preserve a consistent grip angle. If a pistol sits differently after every use, nighttime retrieval becomes slower and less safe. For long-gun safes, stagger scopes and optics to avoid snagging, and reserve the easiest-to-reach position for the firearm most likely to be accessed under pressure. This is also where labeling helps. Small tactile markers, glow tape used sparingly, or raised dots on shelf edges can identify zones by touch without advertising contents externally. Owners sometimes overbuild interiors with too many bins, pouches, and hanging accessories on the door. Door organizers are valuable, but if they intrude into shelf depth or contact long-gun optics when closed, they create the very access problem they were meant to solve.
Choose DIY Upgrades Based on Function, Complexity, and Failure Risk
Not every popular modification belongs in every safe. Some upgrades are nearly universal, while others only make sense for specific layouts. The best way to decide is to compare each option by purpose, install difficulty, and what can go wrong if it is done poorly.
| Upgrade | Main Benefit | Best For | Typical DIY Difficulty | Primary Caution |
|---|---|---|---|---|
| LED strip lighting with door switch | Immediate interior visibility | Full-size safes | Low to medium | Poor adhesive or bad wire routing |
| Rechargeable puck lights | Simple low-cost lighting | Small handgun safes | Low | Uneven light and battery neglect |
| Door panel organizer | Uses vertical space efficiently | Document and handgun storage | Low to medium | Can reduce interior clearance |
| Adjustable shelf reconfiguration | Faster item separation and reach | Mixed-use safes | Medium | Unstable load distribution |
| Dehumidifier or desiccant system | Protects firearms and optics | Humid climates or basements | Low | Ignoring recharge or power checks |
| External power kit or battery backup | Maintains lock and light reliability | Electronic lock owners | Medium | Unsafe cable routing through seals |
This comparison highlights a practical truth: the safest upgrade is usually the one that improves repeatability without adding mechanical complexity. If you publish supporting articles on lighting, shelf systems, dehumidifiers, or power backup, link them from this hub because owners often need a staged plan rather than a single overhaul.
Add Door Organization, Labels, and Silent Hardware
Door storage is one of the most useful custom gun safe modifications because it moves frequently accessed items into the first visual plane. A quality door panel can hold handguns, magazines, flashlights, medical gear, ear protection, documents, and maintenance items. For nighttime use, placement matters more than capacity. Put small, high-importance items at chest or waist height, not at the bottom where they disappear in shadow. Keep weight balanced so the door does not feel different as it swings open. Most factory doors can handle reasonable organizer loads, but overloading with steel magazines and boxed ammunition adds unnecessary strain.
Silent operation is another upgrade that owners appreciate immediately. Replace loose metal hooks, rattling bins, and hard contact points with hook-and-loop retainers, thin neoprene pads, or felt where appropriate. If keys, rods, or accessory tins click against the door panel when opened, remove or isolate them. Noise control is not just about discretion. It helps you identify important sounds, such as a latch not fully engaging or an item shifting unexpectedly. Labeling should be subtle and internal. Printed shelf tags, high-contrast text, or tactile dots can identify medical supplies, batteries, important documents, and defensive gear. I prefer simple labels over memory-based systems because households change over time. A spouse, trusted adult family member, or authorized user should be able to find the flashlight, trauma kit, and batteries without a briefing.
Manage Power, Humidity, and Maintenance as Accessibility Issues
Many owners treat humidity control and maintenance as preservation topics only, but they are also accessibility issues. Corrosion on a lock battery terminal, a swollen alkaline battery, a sticking interior hinge point, or a musty document pouch can slow access at the worst time. In humid regions, use either a goldenrod-style dehumidifier rod or rechargeable desiccants, and verify performance with a small digital hygrometer. For most firearm storage, keeping relative humidity roughly in the 40 to 50 percent range helps prevent rust while avoiding unnecessary drying of wood stocks and paper materials. Basements and garages demand closer monitoring because temperature swings can create condensation even in a heavy steel safe.
Electronic locks deserve a maintenance schedule. Replace batteries on a calendar, not after a low-battery warning. Use quality cells from established brands and avoid mixing old and new batteries. If the safe offers an external battery jump feature, test it before you need it. Some owners run interior power through factory passthroughs for lights, dehumidifiers, or charging docks, but any cable route must avoid pinching, drilling into fire lining, or interfering with the seal. Follow manufacturer guidance because unauthorized drilling can void fire ratings or warranties. Mechanical parts need attention too. Hinges, bolts, and relock mechanisms should be serviced according to the maker’s recommendations or by a qualified safe technician. A safe that opens beautifully in daylight but sticks at night is not truly accessible.
Protect Safety and Security While Modifying the Safe
DIY does not mean casual. The central rule is simple: never make a safe easier for unauthorized users to open in the process of making it easier for you to use. Avoid exterior glow markers that reveal the safe location, keypad position, or lock type to anyone else in the room. Be cautious with biometric add-ons, aftermarket smart sensors, or wireless devices that create privacy, interference, or battery concerns. Mechanical reliability still matters more than novelty. If children are in the home, every modification must be checked against the original child-resistance objective. Faster access for an authorized adult must not become easier discovery or easier tampering for a minor.
Also consider legal and insurance implications. Some jurisdictions impose specific storage obligations, especially when minors or prohibited persons may access the premises. Insurance carriers may ask about safe ratings, anchoring, and inventory practices after a loss. That is why anchoring, fire lining integrity, and lock compliance should never be compromised by ad hoc drilling or hardware changes. Use manufacturer-approved accessory mounting points when available. Document your modifications with photos and keep model numbers for lights, organizers, and lock components. That record helps with troubleshooting, warranty questions, and future upgrades. The most successful custom safe projects are disciplined, reversible where possible, and tested repeatedly in the same low-light conditions in which they are expected to perform.
The best DIY gun safe upgrades for enhanced nighttime accessibility are practical, not flashy. Start by identifying the exact obstacles you face in darkness, then improve the safe in the order that matters most: reliable entry, clear interior lighting, intuitive layout, organized door storage, power backup, and moisture control. When those elements work together, access becomes faster, safer, and more repeatable without sacrificing security. This hub on custom and DIY gun safe modifications is meant to guide that entire process, from simple light installs to full interior reconfiguration. Use it as your starting point, then build a staged upgrade plan based on your safe type, room conditions, and household needs. Test every change at night, correct weak points immediately, and keep only the modifications that improve both safety and control. If your safe is hard to use in the dark, now is the right time to fix it.
Frequently Asked Questions
What are the most effective DIY gun safe upgrades for better nighttime accessibility?
The most effective upgrades are the ones that improve visibility, speed, and consistency without reducing security. For most gun safe owners, that starts with interior lighting. Motion-activated LED light strips, magnetic puck lights, and low-profile rechargeable bars can dramatically improve visibility inside the safe so you are not searching blindly for a firearm, magazine, flashlight, or important document. Soft white or neutral LED lighting is often preferred because it provides a clear view of shapes, controls, and labels without being harsh on night-adjusted vision.
Another high-value improvement is interior organization. Shelf reconfiguration, handgun holsters mounted to door panels, magazine racks, rifle barrel supports, and labeled bins all help create predictable item placement. At night, predictability matters as much as illumination. If your defensive firearm, spare magazine, hearing protection, or handheld light are always in the same exact location, access becomes faster and more controlled under stress.
Tactile enhancements can also make a major difference. Textured pull tabs, grip tape on shelves, glow markers on key access points, and raised labels can help you orient yourself by touch. Some owners add non-slip liners to shelves or install door organizers that keep items from shifting when the door opens. These upgrades reduce fumbling and help maintain muzzle discipline by making retrieval more deliberate.
Finally, consider the access method itself. If your safe uses an electronic keypad, subtle keypad marking, low-light keypad visibility, or backup access planning can improve reliability at night. If it is a mechanical dial safe, surrounding task lighting and repeated dry practice with the lock are especially important. The best nighttime upgrade strategy usually combines lighting, organization, tactile reference points, and routine practice so the safe is not just brighter, but genuinely easier and safer to use when visibility is limited.
How can I add lighting inside a gun safe safely and reliably?
Adding lighting safely begins with choosing the right type of fixture. Low-heat LED products are the standard for gun safes because they are energy efficient, compact, and do not generate the kind of heat that could damage contents or create unnecessary risk in an enclosed space. Battery-powered or rechargeable LED strips are popular for DIY installations because they avoid the need for hardwiring. If your safe includes a power outlet or pass-through, plug-in LED systems can offer a more permanent and maintenance-friendly solution.
Placement matters just as much as the light itself. Mount lights along the door frame, upper interior edges, or vertical corners so they illuminate the contents without being blocked by long guns, shelves, or door organizers. Avoid placing a single light at the top center and assuming it will light the entire interior. Deep safes and heavily organized interiors often need multiple light sources to eliminate shadows. Before final mounting, test the light position with the safe loaded the way you actually use it at night.
For activation, motion sensors and door-activated switches are both effective. Motion sensors are convenient, but they should be tested carefully to ensure they trigger quickly and consistently. Door-activated systems can be even more dependable if installed properly, because the light comes on automatically as soon as the safe opens. Whichever method you choose, reliability should take priority over novelty. Nighttime access is not the place for finicky gadgets that occasionally fail to turn on.
Use secure mounting methods that will not damage the safe’s finish or interfere with the door seal or locking mechanism. Strong adhesive-backed channels, magnetic mounts, or manufacturer-approved clips are usually better than improvised fasteners. Also keep batteries fresh, test rechargeable units regularly, and include lighting checks in your normal safe maintenance routine. A lighting upgrade only improves accessibility if it works every time, so dependable installation and ongoing testing are essential.
Will DIY upgrades affect the security, fire protection, or warranty of my gun safe?
They can, depending on the type of upgrade and how it is installed. Cosmetic and non-invasive changes such as magnetic lighting, removable organizers, shelf liners, and battery-powered accessories usually have little to no effect on the core structure of the safe. However, drilling holes, modifying door panels, altering lock components, routing wiring through seals, or attaching hardware directly to fire-lined walls can create real concerns. These changes may compromise the safe’s burglary resistance, weaken fire barriers, interfere with door closure, or void part of the manufacturer’s warranty.
Before making any permanent modification, review the owner’s manual and the manufacturer’s warranty terms. Many safe owners assume that small changes are harmless, but even a minor penetration in the wrong location can affect insulation layers, relocker systems, or internal moving parts. If your safe has a factory-installed electrical pass-through or accessory mounting points, use those instead of creating your own. Manufacturer-provided pathways are designed to preserve performance while allowing approved upgrades.
It is also important to distinguish between convenience upgrades and lock-related modifications. Changing how the lock operates, replacing keypad housings, adjusting boltwork access, or altering the door edge area is generally not a casual DIY task. Those components are central to security and should be handled only according to manufacturer guidance or by a qualified technician. For most owners, the safest DIY path is to focus on removable lighting, interior layout improvements, tactile organization, and other upgrades that do not alter the safe’s structural or locking integrity.
If there is any doubt, contact the manufacturer before starting. A quick confirmation can prevent expensive mistakes and preserve both security and warranty coverage. The goal is enhanced nighttime accessibility, not a modification that unintentionally makes the safe less secure or less reliable when it matters most.
How should I organize a gun safe so I can access firearms and essential gear quickly in the dark?
The key is consistency. Nighttime organization should be built around repeatable placement so your hand naturally goes to the correct item without hesitation. Start by assigning fixed positions to your most important items, especially any defensive firearm, spare magazine, flashlight, medical kit, and hearing protection. These should not be buried behind range gear, paperwork, or infrequently used accessories. Priority items belong in the easiest-to-reach locations with clear hand access and minimal obstruction.
Door panel organizers are especially useful because they move handguns, magazines, and small essentials into a vertical layout that is easy to identify and retrieve. Interior shelves can then be reserved for larger items, ammo storage, or documents. If your safe stores long guns, consider using barrel rests, stock supports, or spacing dividers to prevent crowding. Tight, cluttered rifle arrangements may maximize capacity, but they are much less practical for calm, controlled access in low light.
Tactile cues add another layer of efficiency. For example, a specific holster texture for the home-defense handgun, a raised marker on the shelf edge where the flashlight sits, or a distinct organizer pocket for spare magazines can help you confirm placement by feel. Labels can help during setup and training, but tactile reference points are often more useful in actual darkness. Non-slip shelf liners and rigid organizers also help prevent items from shifting out of place when the safe door is opened or closed.
Just as important, your layout should support safe handling. Keep muzzle orientation in mind, avoid stacking loaded items loosely, and ensure there is enough clearance to remove a firearm without snagging optics, slings, or neighboring gear. Once your layout is established, rehearse with it. Open the safe in low light, activate the interior lighting, and practice locating each key item deliberately and safely. Good organization is not simply neatness. In the context of nighttime accessibility, it is a safety system built around speed, control, and predictability.
What safety practices should I follow when testing and using nighttime gun safe upgrades?
Safety starts with separating setup from live use. Whenever you install or test upgrades such as lighting, shelf changes, holsters, or access markers, begin with unloaded firearms and follow your normal clearing procedures carefully. Verify condition visually and physically, keep ammunition separate during setup, and make sure every item is returned to the safe in a way that supports safe retrieval. Any modification that changes the position, angle, or accessibility of a firearm should be tested slowly and deliberately before you rely on it.
Low-light practice is valuable, but it should be structured. Test how quickly the lights activate, whether shadows hide important items, whether any adhesive or organizer blocks your grip, and whether the safe door opens fully without shifting stored contents. Pay attention to snag points from slings, optics, charging handles, and door pockets. Something that seems minor in daylight can become a serious problem when visibility is limited and stress is elevated. The purpose of testing is to remove uncertainty before an emergency ever occurs.
You should also build redundancy into your plan. Batteries fail, rechargeable lights get neglected, and electronics can malfunction. Keep a handheld flashlight in a known location, know your safe’s backup access method, and confirm that all household members who are authorized to access the safe understand the layout and procedures. At the same time, maintain proper child-access prevention and overall secure storage practices. Better nighttime accessibility should never mean making the safe easier for unauthorized users to open or manipulate.
Finally, reassess your setup periodically. Safe contents change over time, accessories get added, and lighting systems wear down. A nighttime-accessible safe is not a one-time project; it is an ongoing system that should be inspected, cleaned, and practiced with regularly.