A gun safe that survives burglary but topples in a quake has not done its job, because earthquake protection depends on more than steel thickness and lock quality. To reinforce a gun safe for earthquake protection, you need to improve anchoring, control the safe’s center of gravity, strengthen the surrounding structure, and prevent damaging movement inside the safe itself. In practice, that means treating the safe, the floor, the wall, and the room as one system rather than a standalone box. I have helped homeowners retrofit residential security containers in seismic regions, and the same pattern appears every time: the safes that stay upright are the ones planned like structural installations, not furniture.
Before getting into methods, define the key terms. Earthquake protection for a gun safe means reducing sliding, tipping, racking, door distortion, and internal impact damage during seismic motion. Reinforcement means adding or upgrading mechanical support beyond the factory configuration, usually with anchor bolts, backing plates, anti-tip brackets, shims, wall restraints, and interior retention accessories. Custom and DIY gun safe modifications cover owner-installed changes that improve safety, organization, and structural stability without compromising lock operation or fire lining. This matters because a fallen safe can injure occupants, jam shut, damage firearms, and defeat child-access and theft-prevention goals at exactly the worst moment.
Many gun safe owners ask the same questions: Is bolting to concrete enough? Can you anchor a safe on wood framing? Should you strap it to a wall? Will drilling void the warranty or reduce fire protection? The short answer is that concrete anchoring is usually strongest, wood anchoring can work when tied into joists or engineered reinforcement, wall straps are secondary restraints rather than primary anchors, and any drilling must follow the manufacturer’s approved anchor locations. Good reinforcement is not guesswork. It is a deliberate set of modifications based on safe weight, footprint, floor construction, local seismic risk, and the contents you are trying to protect.
Assess the Safe, the Site, and the Earthquake Risk Before Modifying Anything
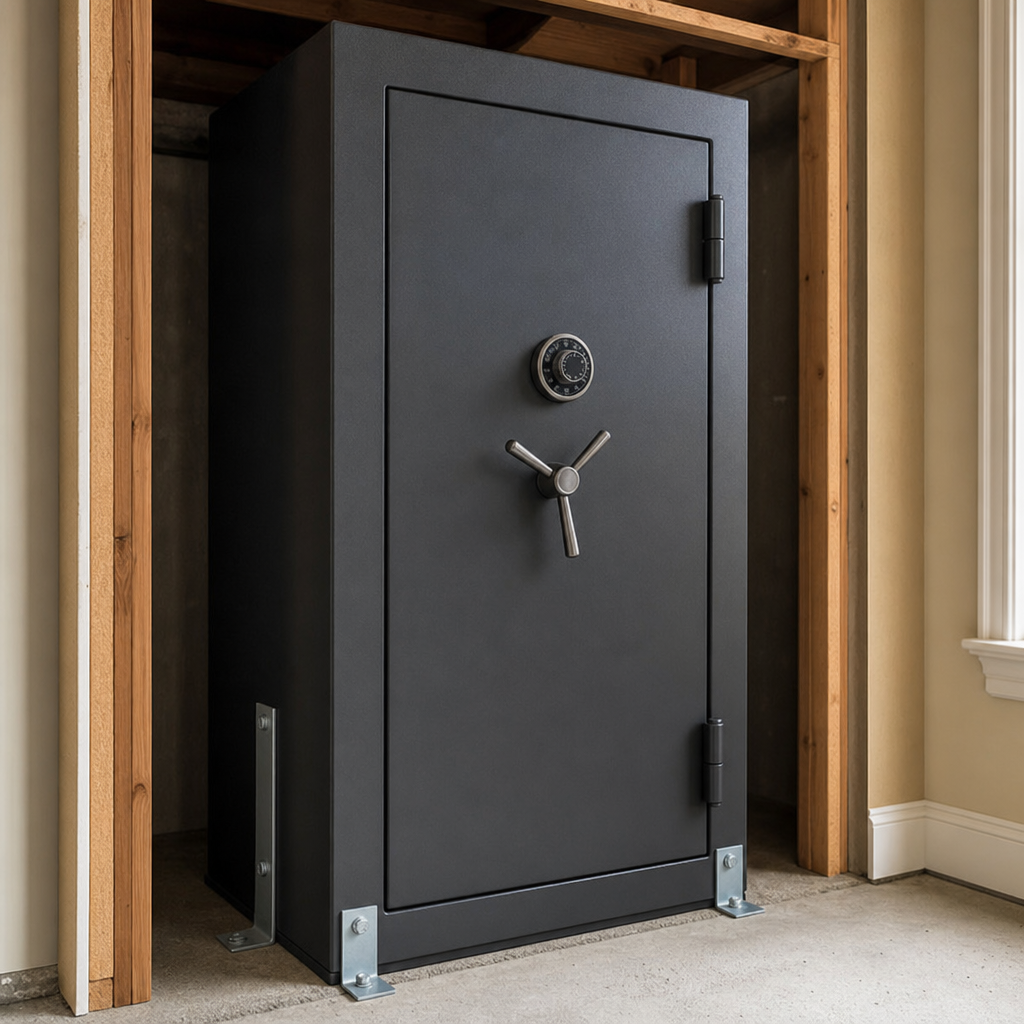
The first step in reinforcing a gun safe for earthquake protection is evaluation. Start with the safe itself: note the unloaded weight, loaded weight, height, width, depth, door swing direction, and whether the safe is top-heavy when the door is open. A tall 700-pound safe with ammunition on upper shelves behaves very differently from a squat 1,200-pound safe with weight concentrated low. Measure the bolt-down hole pattern provided by the manufacturer and confirm the safe body construction around those holes. Many residential gun safes include pre-drilled anchor points in the floor panel, and those are the correct places to attach because they avoid weakening critical areas.
Then inspect the installation surface. A concrete slab in a garage offers different options than a second-floor wood-framed room. In concrete, you need slab thickness, condition, and whether there are cracks, radiant heat tubes, or post-tension cables. In wood framing, you need joist direction, joist size, spacing, subfloor thickness, and whether the safe can sit over a bearing wall or reinforced platform. In seismic retrofits, I often find owners relying on lag screws into subfloor plywood alone, which is inadequate for a heavy safe under lateral load. The anchor has to engage the structural members, not just the finish surface.
Finally, consider the hazard environment. Seismic maps from the U.S. Geological Survey show wide regional variation in expected ground shaking, and local building departments often publish retrofit guidance for nonstructural heavy items. If you live in California, the Pacific Northwest, Alaska, or Intermountain seismic zones, the standard for “good enough” should be higher. Also think about room use. A safe in a closet may have side confinement that limits travel, while a garage install may allow uninterrupted tipping or sliding. This assessment phase determines whether a basic bolt-down job is sufficient or whether you need a more comprehensive DIY gun safe modification plan.
Use Proper Anchoring: Concrete Is Best, Wood Requires Structural Reinforcement
The single most important earthquake upgrade for a gun safe is anchoring it correctly. On concrete, the preferred method is usually heavy-duty wedge anchors or approved concrete anchors sized to the safe and slab. Many installers use 1/2-inch anchors, but the right specification depends on manufacturer guidance, slab condition, embedment depth, and seismic demands. Follow the anchor manufacturer’s installation instructions precisely, including hole diameter, hole cleaning, torque values, and minimum edge distance. Anchors fail in the field less from weak steel than from poor installation: dusty holes, shallow embedment, and over-torquing are common problems.
Wood floors require more engineering. If the safe sits over floor joists, through-bolting with steel backing plates below the subfloor is much stronger than relying on lag bolts alone. A backing plate spreads load and reduces pull-through during sharp lateral motion. If the safe does not align with joists, build a reinforced platform tied across multiple joists with blocking and structural screws, then anchor the safe to that platform. On upper floors, also verify load capacity. A fully loaded safe can weigh well over 1,000 pounds, and concentrated loads should be reviewed carefully, especially in older homes.
Wall attachment can help, but it is not a substitute for floor anchoring. Anti-tip brackets or seismic restraint straps connected to studs can limit rocking if the floor anchor experiences some movement, yet they should act as secondary restraints. Do not simply run a light-duty strap around the safe and assume the job is finished. The weak point may be drywall compression, undersized lag screws, or a stud location that cannot resist the load path. The best systems create restraint low and wide at the base, with supplemental upper restraint only where needed.
| Installation Surface | Best Primary Method | Typical DIY Upgrade | Main Risk if Done Poorly |
|---|---|---|---|
| Concrete slab | Manufacturer-approved concrete anchors | Upgrade to correct diameter, embedment, and torque | Sliding or anchor pullout from bad hole prep |
| Wood floor over joists | Through-bolting into structural members | Steel backing plates plus blocking between joists | Pull-through of subfloor or joist splitting |
| Raised platform | Engineered platform tied across multiple joists | Double-layer plywood and structural screws | Platform racking or concentrated load failure |
| Closet corner install | Floor anchoring with optional wall restraint | Add anti-tip bracket to studs | False confidence from nonstructural wall fastening |
Reduce Tipping Forces by Lowering the Center of Gravity and Improving Base Support
Even a well-anchored safe benefits from lower tipping forces. Earthquakes create lateral acceleration, and tall narrow safes are especially vulnerable because the center of gravity sits high relative to the footprint. One of the most effective custom gun safe modifications is internal weight management. Store ammunition, lead shot, documents, and dense gear on the bottom shelf rather than the top. Avoid stacking heavy bins in the door organizer if the door is already substantial. I have seen safes that were stable closed but became alarmingly front-heavy when owners loaded pistol pouches, magazines, and accessory panels onto the door.
Base support matters too. If the floor under the safe is uneven, shim it with steel shims or manufacturer-approved noncompressible material before final tightening. Never leave a corner unsupported, because rocking amplifies anchor stress. On wood floors, a rigid platform wider than the safe footprint can improve stability if it is structurally tied to the framing below. In garages, some owners place safes on decorative risers to avoid moisture; that is acceptable only if the riser is engineered for the load and securely anchored. A flimsy stand increases leverage and makes a heavy safe easier to tip.
Placement in the room also changes performance. Installing the safe in a corner can reduce sideways travel and create passive confinement, especially when combined with proper clearances for the door. However, do not wedge the safe so tightly that the door rubs walls or trim, because body distortion during a quake could jam operation. Leave enough service clearance to inspect anchors and operate dehumidifiers, lighting, and power pass-throughs. Good seismic positioning balances restraint with practical access.
Protect the Structure Around the Safe and Avoid DIY Changes That Weaken It
Reinforcement is not only about adding hardware; it is also about avoiding harmful modifications. Drilling random holes through the safe body can compromise fire insulation, create corrosion points, and void warranties. Use only factory-designated bolt-down holes or manufacturer-approved pass-through locations. If you need power inside the safe for a dehumidifier rod or lighting, route it through approved ports rather than improvising a new opening. Likewise, avoid cutting interior shelves or removing fireboard in ways that expose anchor points or reduce structural bearing around the base.
The surrounding structure deserves attention. In garages, cracked slabs should be evaluated before anchoring a heavy safe, because anchors placed too close to damaged concrete edges are unreliable. In finished rooms, remove baseboard where necessary so the safe sits flat against the wall plane instead of rocking on trim. If the safe is near water heaters, laundry appliances, or shelving, account for adjacent items that could strike it during a quake. Nonstructural hazards matter. A safe may remain upright yet suffer dented hinges or scratched finishes from nearby tool chests, ladders, or falling storage bins.
For owners pursuing DIY gun safe modifications as part of a broader safety project, this hub topic extends beyond anchoring. Common related upgrades include humidity control, interior LED lighting, pistol rack systems, shelf reconfiguration, door panel organizers, and cosmetic refinishing. Those changes should support the seismic goal, not conflict with it. For example, adding an oversized door organizer increases convenience but may require rebalancing interior loads. Installing a raised plywood deck can tidy storage but should not block inspection of anchor hardware. Every customization should be judged by one standard: does it preserve or improve the safe’s stability and function under violent movement?
Secure Firearms and Contents Inside the Safe So Protection Continues After the Shaking Starts
Many owners focus on keeping the safe upright and overlook what happens inside. During an earthquake, long guns can strike each other, optics can be damaged, shelves can dump contents, and hard cases can batter the interior walls. Reinforcing a gun safe for earthquake protection therefore includes internal retention. Use fitted rifle racks with enough spacing to prevent side-to-side collision. Add muzzle and buttstock supports that actually contact the firearm rather than leaving it loosely balanced in a slot. Handguns stored on door panels should fit tightly in holsters or pouches that close securely.
Shelves deserve the same attention. Use bins with latching lids for small parts, magazines, and optics accessories. Keep heavy ammunition cans low, and if you use pull-out organizers, verify that their slides have positive stops. Documents and valuables should go in secondary containers or fire-rated document bags so they do not scatter if shelves flex. Moisture-control devices such as GoldenRod dehumidifiers or rechargeable desiccants should be mounted so they cannot become projectiles. In one retrofit, simply replacing loose upper-shelf ammo boxes with latching low-profile containers noticeably reduced internal shifting during shake simulation.
After installation, test and maintain the system. Open and close the door fully, confirm that boltwork remains smooth, and recheck anchor torque after initial settling if the manufacturer permits torque verification. Inspect annually for corrosion, floor movement, crushed shims, or wood shrinkage around fasteners. If you remodel the room, revisit the safe setup instead of assuming the old restraint still works. Earthquake protection is not a one-time purchase; it is an installation standard sustained through maintenance. If you want the best outcome, audit your current safe, upgrade the anchoring, rebalance the load, and make your next DIY modification serve stability first.
The essential lesson is simple: a gun safe is only as secure as the structure that holds it and the plan behind the installation. Proper earthquake reinforcement starts with assessment, continues with correct anchoring, and finishes with smart interior organization that limits damage when the ground moves. Concrete anchors, wood-floor reinforcement, center-of-gravity control, approved attachment points, and internal retention each solve a different failure mode, and together they produce a safer, more reliable storage system.
For anyone building out a complete custom and DIY gun safe modification plan, use this page as the hub. Start with seismic stability before adding convenience features, because lighting, shelving, organizers, and accessories only help if the safe stays upright and functional. Review your manufacturer documentation, inspect the floor beneath the safe, and upgrade weak points methodically. A few well-chosen modifications can prevent injuries, preserve firearms, and keep access controlled after a major earthquake.
If your current safe is freestanding, top-heavy, or loosely fastened, do not wait for the next tremor to reveal the problem. Measure the installation, choose the right anchoring method, and reinforce it properly now.
Frequently Asked Questions
Why isn’t a heavy gun safe automatically earthquake-proof?
A lot of owners assume that because a gun safe is extremely heavy, it will naturally stay put during a seismic event. In reality, earthquake forces do not work like normal static weight. A safe that feels immovable under everyday conditions can still rock, slide, tip, or twist when the ground shifts laterally and repeatedly. Once that movement starts, the safe’s height, narrow footprint, and concentrated weight can actually make it more vulnerable to toppling than people expect. In other words, sheer mass helps, but it does not replace proper reinforcement.
The biggest issue is center of gravity. Many safes are tall and heavy above the midpoint, especially when long guns, shelves, and ammunition are stored higher up. During an earthquake, that upper mass creates leverage. Even a very robust safe can become unstable if it is not anchored correctly and if the floor beneath it is not capable of resisting those forces. That is why earthquake protection is not just a question of steel thickness, door strength, or lock quality. Stability depends on how the safe interacts with the floor, wall, and surrounding structure.
To think about it practically, treat the safe as one part of a complete system. A well-protected installation usually includes anchoring the safe to a structurally sound slab or reinforced framing, placing it where lateral movement is limited, reducing top-heaviness where possible, and arranging the room so nearby objects do not strike it or get crushed by it. A burglary-resistant safe that falls over in an earthquake can still suffer structural damage, compromise its fire seal, damage firearms and optics inside, or block access to the room. True earthquake reinforcement means preventing dangerous movement, not just owning a heavy container.
What is the best way to anchor a gun safe for earthquake protection?
The best anchoring method depends first on what the safe is sitting on. A concrete slab is generally the strongest and most reliable base for earthquake reinforcement, because it allows the use of properly sized expansion anchors, wedge anchors, or epoxy-set concrete anchors installed to the manufacturer’s specifications. In that setup, the safe should be positioned carefully, the anchor holes should align with structurally sound concrete, and each fastener should be torqued correctly. This creates a direct load path from the safe into the slab, which is exactly what you want when the ground starts moving.
If the safe is installed over a wood-framed floor, anchoring becomes more complicated. In that case, simply bolting into subflooring is usually not enough. The fasteners need to tie into floor joists or into a reinforced platform designed to spread load and resist uplift and lateral motion. Depending on the size of the safe and the seismic risk in your area, it may make sense to add blocking between joists, use steel backing plates, or build a dedicated base that distributes weight over multiple framing members. The goal is not just to keep bolts from pulling out, but to keep the entire floor assembly from flexing excessively under dynamic loads.
For even better performance, many installations use both floor anchoring and wall restraint, but wall restraint must be done correctly. A wall should not be treated as the primary support unless it is structurally suitable. Light drywall alone offers no meaningful protection. However, tying the upper portion of the safe to wall studs, masonry, or a reinforced seismic brace can help limit rocking motion. The most effective approach is one that matches the safe’s size, the building’s construction, and the expected seismic exposure. If there is any doubt, a contractor familiar with structural anchoring or a seismic retrofit professional can help verify that the installation is truly resisting earthquake forces rather than just looking secure.
Should a gun safe be bolted to the wall, the floor, or both?
In most cases, the floor should be the primary anchoring point, because it carries the safe’s weight and provides the strongest resistance against sliding and overturning. A safe that is only attached to a wall can place enormous leverage on wall framing during an earthquake, especially if the safe is tall and heavily loaded. That kind of setup can damage studs, fasteners, drywall, or masonry and still allow the safe to tip or twist. Floor anchoring is usually the foundation of any serious earthquake reinforcement plan.
That said, using both floor and wall restraint can provide better stability when done thoughtfully. The floor anchors keep the safe from walking, lifting, or overturning, while a properly engineered upper restraint can reduce rocking and side-to-side sway. This is particularly helpful for tall safes with a relatively small footprint. The key point is that the wall connection should tie into real structure, such as wood studs, reinforced framing, masonry, or a seismic-rated support system. It should never rely on drywall anchors or cosmetic trim components.
There are also placement advantages to combining methods. Installing the safe in a corner or alcove can help reduce movement because the surrounding surfaces limit travel, though the safe still must be anchored. A recessed location can also reduce tipping leverage compared with a fully exposed installation in the middle of a room. Ultimately, the best answer is usually: bolt the safe securely to the floor first, then add wall restraint if the surrounding structure can support it and if the safe’s height, weight distribution, and room layout justify the extra protection.
How can I reduce the risk of damage to firearms and valuables inside the safe during an earthquake?
Protecting the safe itself is only part of the job. Earthquake movement can cause significant internal damage even if the safe remains upright. Firearms can slam into each other, optics can get knocked out of alignment, shelves can shift, and loose ammunition, documents, or accessories can become impact hazards inside the cabinet. That means earthquake preparation should include internal stabilization, not just external anchoring.
Start by controlling how items are stored. Heavier objects should go as low as possible to keep the center of gravity down and reduce internal shifting. Ammunition cans, spare parts, and dense equipment belong on lower shelves or on the floor of the safe if the layout allows it. Long guns should be secured in racks that hold them firmly at both the stock and barrel level, rather than simply leaning loosely in place. If the interior configuration is adjustable, tighten spacing so firearms do not have room to sway into one another. Adding padded barrel rests, non-slip shelf liners, and compartment dividers can make a noticeable difference during sudden movement.
Small valuables should be placed in latching containers, padded organizers, or purpose-built interior compartments so they cannot scatter. Shelves should be checked to ensure support clips are seated properly and rated for the load they are carrying. In some safes, aftermarket shelf retention solutions or edge lips can help prevent contents from sliding off. It is also wise to avoid stacking fragile accessories high up where they can fall. Think of the inside of the safe the same way you would think of cabinets in a seismic zone: every item should either be secured, cushioned, or stored low enough that movement will not create damage. A well-anchored safe with poorly organized contents can still leave you with broken gear after the shaking stops.
Does the room or structure around the gun safe matter for earthquake protection?
Yes, and it matters more than many people realize. A gun safe does not exist in isolation during an earthquake. The performance of the installation depends heavily on the strength of the floor beneath it, the framing or masonry around it, and even the way the rest of the room is arranged. If the floor flexes too much, if the wall is weak, or if nearby objects can collide with the safe, the overall level of protection drops quickly. That is why the safest approach is to think in terms of a complete room-and-structure system rather than just a single reinforced box.
Start with the base. A ground-floor concrete slab generally offers the most stable installation option, while elevated wood floors need more careful evaluation because they may deflect under load and transmit more motion. If the safe must sit on an upper level or over crawlspace framing, structural reinforcement may be necessary. Next, consider location. Corners and alcoves can be advantageous because they limit travel, but the surrounding walls still need to be structurally meaningful. Avoid placing the safe where it could fall into a doorway, block an exit, strike utility lines, or be struck by heavy furniture, appliances, or shelving.
The room should also be arranged with secondary hazards in mind. Secure nearby cabinets, wall-mounted items, and storage racks so they do not collapse into the safe or pin it in a dangerous position. If the safe is in a garage, basement, or utility area, check for water heaters, fuel lines, and overhead storage that could create added risk during a quake. In higher seismic regions, it can be worthwhile to consult a structural professional if the safe is especially large, the building is older, or the installation involves wood framing, raised floors, or masonry with uncertain strength. The safest installations come from viewing the safe, its anchoring, the supporting structure, and the room layout as one coordinated earthquake-resistance strategy.