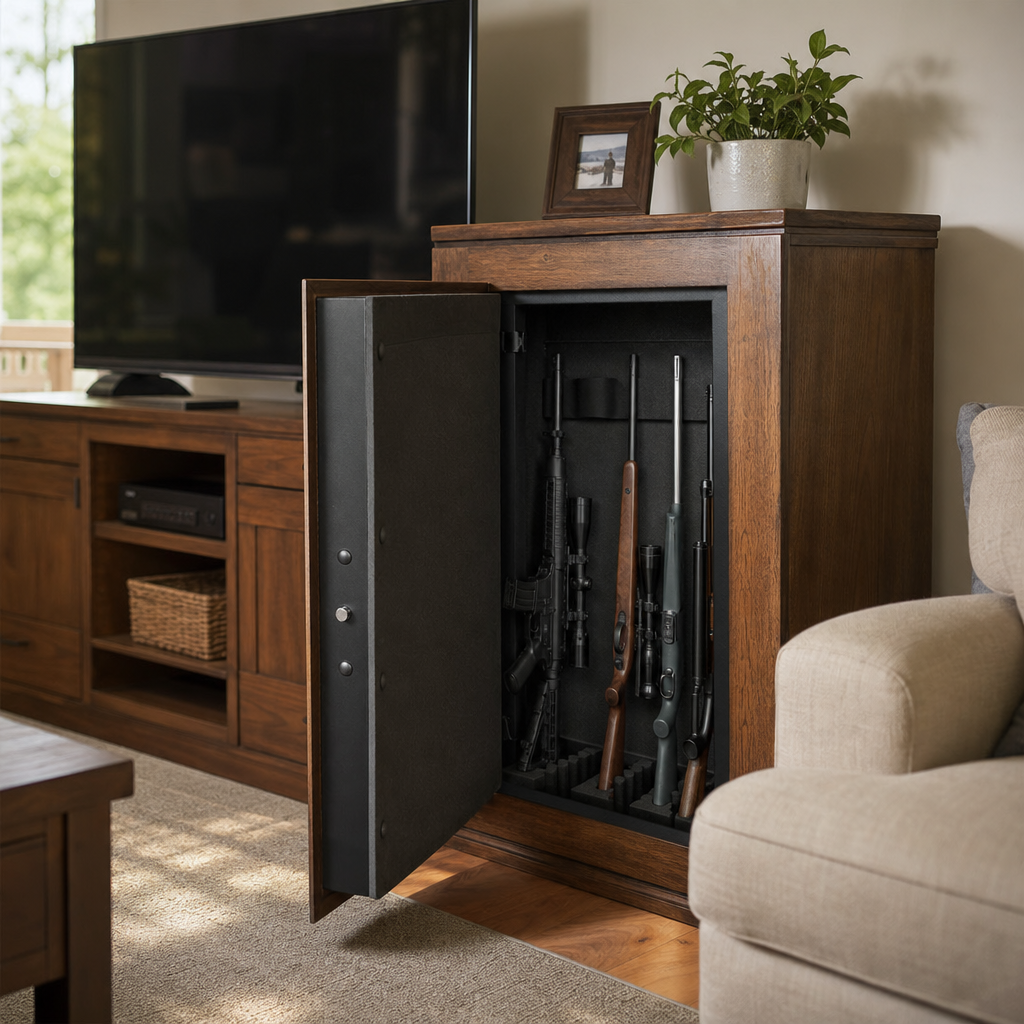
DIY gun safe camouflage turns a visible security container into something that blends with normal home décor, such as a cabinet, dresser, bookcase, or workbench, without reducing access, structural integrity, or safe operation. For owners who want discreet storage, this approach solves a common problem: many gun safes are secure, but their size, finish, and placement advertise exactly what they contain. I have worked on safe concealment projects in bedrooms, offices, garages, and hunting cabins, and the same lesson always holds true. The best disguise is not theatrical. It is practical, proportionate to the room, and built around the safe’s dimensions, swing clearance, ventilation needs, anchoring points, and fire-rating limitations.
Gun safe camouflage means adding exterior finishes, surrounding cabinetry, false fronts, furniture-style panels, or room-specific enclosures so the safe reads visually as everyday furniture. Custom and DIY gun safe modifications include cosmetic changes, organizational upgrades, lighting, dehumidification, door panel systems, shelving conversions, anchor improvements, and concealment structures. These modifications matter because security is layered. A burglar who never recognizes a safe loses the chance to attack it, pry around it, or return with better tools. Discretion also helps in homes with guests, contractors, cleaners, or social media exposure, where a visible safe can reveal more than many owners intend.
This hub article explains how to make a gun safe look like everyday furniture while covering the broader custom and DIY modification category. It addresses the key questions owners ask before starting: Which safes are easiest to disguise? What materials are safe to use? How do you preserve door clearance, lock access, and humidity control? Which projects are cosmetic, and which affect warranty, fire performance, or resale value? By the end, you should understand not only how to plan a camouflage build, but also how this subtopic connects to interior organization, power management, concealment strategy, and long-term maintenance.
Start with the safe, room, and threat model
The right camouflage project starts with measurement, not materials. Record the safe’s exterior height, width, depth, handle projection, hinge type, door swing arc, lock location, power inlet, and anchor footprint. Then measure the room, including baseboards, outlet placement, trim, carpet thickness, and the viewing angles from the doorway. In practice, the room determines the disguise. A tall 60-inch safe may become a wardrobe in a bedroom, a pantry-style cabinet in a mudroom, or a utility cupboard in a garage. A squat wide safe is often easier to hide as a credenza, bench cabinet, or low bookcase base than as an armoire.
Your threat model matters just as much as fit. Camouflage works best against casual observation and opportunistic theft. It does not replace steel thickness, boltwork, hardplate, relockers, anchoring, or a monitored alarm. If your concern is smash-and-grab burglars with limited time, concealment adds meaningful delay because the safe may go unnoticed. If your concern is a targeted attacker who knows your collection and has time, the disguise should be part of a broader plan that includes room hardening, cameras, entry sensors, and careful information control. I advise owners to think in layers: conceal, anchor, monitor, and control humidity.
Also check manufacturer documentation before drilling, gluing, paneling, or framing tightly around the body. Many residential security containers and higher-end safes have specific guidance on fire seals, electrical ports, warranty exclusions, and minimum clearances. If the safe has an electronic lock, confirm battery access remains simple. If it has an internal outlet kit, plan cable routing so you are not pinching cords behind wood panels. Good DIY work looks seamless because the planning is precise, not because the build is complicated.
Furniture styles that work in real rooms
The most convincing gun safe camouflage matches local design language. In traditional homes, a safe often disappears behind shaker-style panels, beadboard accents, crown molding, or stained wood that matches nearby casework. In modern spaces, flat slab panels, matte paint, and minimal hardware work better than ornate trim. Rustic cabins can support barn-door aesthetics, distressed finishes, or hutch-style upper shelving, but even then, restraint is important. A fake antique wardrobe with obvious proportions can draw more attention than a simple painted cabinet that looks built-in.
Some disguises consistently outperform others. A bookcase surround is popular because books, framed photos, baskets, and décor create natural visual noise. However, the shelf depth must look believable. If the face frame suggests 10-inch shelves but the enclosure projects 28 inches from the wall, the room starts to look wrong. Office installations often work best as printer cabinets, storage cupboards, or file credenzas because those forms naturally have depth. In garages and workshops, a safe hidden inside a tool cabinet wall, supply locker, or bench base usually looks more credible than residential-style furniture transplanted into a utility space.
Bedrooms create special opportunities because wardrobes, dressers, and linen cabinets are expected there. One project I completed used a freestanding furniture shell with scribe molding to the wall, turning a matte black safe into what read as a built-in armoire. The critical detail was preserving the door’s full opening angle by using deep side returns and removable interior stop trim. Another project used a low safe beneath a window, concealed by a bench seat with lift-up storage flanking panels. The safe itself remained fully accessible, yet from the hallway it looked like standard millwork.
| Camouflage style | Best room | Why it works | Main caution |
|---|---|---|---|
| Wardrobe or armoire shell | Bedroom | Natural height and depth for tall safes | Allow full door swing and handle clearance |
| Bookcase surround | Office or den | Books and décor break up outlines | Shelf depth must appear realistic |
| Credenza or sideboard enclosure | Living room or office | Ideal for shorter, wider safes | Top surface load and rear ventilation |
| Workbench or utility cabinet | Garage or shop | Matches practical storage environment | Protect from dust, moisture, and chemicals |
| Bench seat built-in | Mudroom or bedroom | Excellent for low-profile safes | Access can be awkward in tight spaces |
Materials, finishes, and construction details that protect safe function
Most DIY camouflage builds rely on plywood, MDF, hardwood face frames, trim, cabinet panels, magnetic catches, and furniture-grade paint or stain. Plywood is usually the best structural choice because it holds screws well and stays dimensionally stable. MDF gives a smooth painted finish but is heavier and vulnerable to moisture, so I reserve it for dry interior spaces and non-load-bearing decorative parts. If you need removable access panels, use threaded inserts, figure-eight fasteners, rare-earth magnets, or concealed euro screws rather than permanent adhesives. The goal is serviceability. You should be able to remove cladding to inspect anchors, wiring, or the safe finish without destroying the disguise.
Avoid modifications that interfere with heat expansion gaps, intumescent door seals, lock escutcheons, or hinge travel. Never block external vents on a safe that has them, and do not create a sealed wood box around a safe in a humid environment. Even if the safe body appears dry, trapped moisture can drive condensation and surface rust on guns, optics, and metal shelving. Use a hygrometer inside the safe and maintain humidity with a GoldenRod, desiccant canisters, or a compact dehumidifier designed for enclosed storage. In garages or basements, monitor relative humidity regularly; many owners aim for roughly 45 to 50 percent as a practical compromise for mixed wood-and-metal firearms storage.
Finishes matter for realism. Matching surrounding trim and furniture is more effective than drawing attention with elaborate craftsmanship. If your room uses satin white trim and natural oak furniture, a disguise should choose one language and follow it consistently. Hardware should also support the illusion. False drawer fronts, dummy doors, soft-close hinges, or standard cabinet pulls can work, but they must not obstruct the safe handle or lock. In high-use households, use durable coatings such as conversion varnish, pre-catalyzed lacquer, or quality enamel rather than chalky decorative paint that chips and exposes the project’s true purpose.
Step-by-step approach to a clean DIY camouflage build
First, choose whether the project will be a freestanding furniture shell, a wall-adjacent built-in surround, or a concealed compartment integrated into existing cabinetry. Freestanding shells are often simplest because they do not require altering the room and can move with the owner. Built-ins look the most natural but demand precise scribing, trim matching, and floor leveling. Integrated cabinetry can be excellent in remodels, especially when planned before flooring and baseboards go in. In every case, anchor the safe before building around it. A disguise should never make anchoring harder or tempt you to skip it.
Second, build a mockup with painter’s tape or cardboard. This old cabinetmaker trick saves mistakes. Tape the proposed front outline on the wall and floor, then check sightlines from the doorway, bed, hallway, and windows. Open the safe door fully and note where trim or side panels might collide. Third, create a support structure that does not rely on the safe body as a load-bearing cabinet wall unless the manufacturer explicitly permits contact. A separate carcass, cleated to the wall or floor, is safer and easier to service. Leave enough clearance for the door, handle rotation, lock keypad use, and battery replacement.
Fourth, skin the structure with panels and trim that match the room. Install removable sections where maintenance or emergency lock service may be needed. Fifth, stage the exterior like normal furniture. A bookshelf should contain believable items, not empty rows arranged to hide a steel box. A bench should include baskets, folded blankets, or mudroom accessories. Finally, test everything repeatedly: open the safe in low light, replace the lock battery, check dehumidifier power, inspect anchor bolts, and verify that no decorative element jams the door or catches your clothing during quick access.
Beyond camouflage: the broader world of custom and DIY safe modifications
This subtopic is bigger than appearance. Many owners start with camouflage and then realize the interior needs equal attention. Factory interiors are often generic, especially in entry-level safes. Rifle spacing may be too tight for scoped carbines, shelves may waste vertical room, and door organizers may be absent or poorly placed. Practical DIY upgrades include adjustable shelving, barrel rests for optics clearance, magazine bins, document drawers, pistol racks, and LED lighting triggered by motion or magnetic reed switches. These changes improve daily usability, which in turn encourages consistent safe storage.
Power and environmental control are the next major category. Internal electrical kits support lighting, dehumidifiers, and charging for accessories, but cable routing must stay tidy and protected from pinch points. Adhesive LED strips are common, though aluminum channels with diffusers look cleaner and dissipate heat better. For humidity control, passive desiccants work in smaller enclosures if recharged regularly, while powered rods offer steady protection in larger safes. I have seen more gun damage from neglected humidity than from poor shelving, particularly in coastal areas, basements, and detached garages where temperature swings are sharp.
Another branch involves access and ergonomics. Owners often add holsters to door panels, convert shelves for suppressors or optics, label bins, and create dedicated zones for defensive firearms versus hunting rifles or documents. Some add felt, marine carpet, EVA foam, or closed-cell inserts, but these materials should be chosen carefully. Cheap foam can off-gas, trap moisture, or crumble over time. Mechanical modifications deserve even more caution. Changing boltwork covers, lock types, relockers, or hinge systems is not a casual DIY task. Those jobs should go to qualified safe technicians because mistakes can disable the safe or reduce security.
Common mistakes, legal considerations, and maintenance
The most common camouflage mistake is prioritizing appearance over operation. If the safe door cannot open fully, if the lock is awkward to reach, or if the disguise slows access during an emergency, the project has failed. The second major mistake is making the furniture shell too interesting. Hidden storage works because it looks ordinary. Oversized crown molding, fake secret latches, unusual proportions, or a sudden style mismatch can invite inspection. A third mistake is forgetting floor load and anchor strategy. Larger safes can weigh several hundred to more than one thousand pounds before contents, so upper-floor placement and concentrated loads may require consultation with a contractor or engineer.
Legal considerations vary by state and household circumstances. If children are present, concealment is helpful but not sufficient; secure locking remains essential, and quick-access needs must be balanced against unauthorized access risk. Some states impose storage requirements when minors may gain access, and civil liability can be severe after negligent storage. Renters should review lease terms before anchoring through finished floors or building attached surrounds. Insurance also matters. If you have riders for firearms, optics, or collectibles, document the safe and any modifications with photos and receipts. A custom surround may add value to you, but insurers care more about verified security features and inventory records.
Maintenance is simple but non-negotiable. Vacuum dust from hidden cavities, inspect for corrosion, test lights and dehumidifiers, and open removable panels every few months to check for condensation, insect activity, cable wear, or loose fasteners. Recheck anchor bolts annually. Touch up finish damage before it spreads, especially in garages where temperature swings and humidity are harsher. A good camouflage build should age like real furniture. If it starts rattling, binding, or looking gimmicky, correct the problem early rather than layering on more trim or clutter.
DIY gun safe camouflage works best when it treats the safe as part of a complete storage system, not just an object to hide. Measure carefully, choose a disguise that belongs in the room, preserve clearance and humidity control, and use removable construction details that keep the safe serviceable. From there, expand thoughtfully into interior organization, lighting, dehumidification, and access improvements that make the safe easier to use every day.
As the hub for custom and DIY gun safe modifications, this guide gives you the framework to evaluate every related project: cosmetic concealment, built-in surrounds, shelf conversions, door storage, power routing, and environmental control. The main benefit is simple. A well-modified safe is both less noticeable and more functional, which increases security in real life, not just on paper. If you are planning your first project, start by measuring your safe and room, then sketch the most ordinary furniture form that fits. Discreet, durable, and serviceable should be your standard on every build.
Frequently Asked Questions
What is the safest way to camouflage a gun safe so it looks like everyday furniture?
The safest approach is to disguise the exterior without changing the safe’s structure, door function, locking system, fire lining, or anchor points. In practical terms, that means treating the safe like a core security appliance and building a furniture-style shell, surround, or façade around it. Common examples include wrapping the safe with trim so it resembles a cabinet, adding side panels and a top to make it look like a dresser, building a bookcase face around it, or incorporating it into a workbench or storage wall. The key is that the camouflage should be cosmetic and removable, not structural. You do not want to drill into critical body panels, interfere with hinges, block ventilation gaps recommended by the manufacturer, or add material that prevents the door from opening fully.
A good concealment project starts with exact measurements, including door swing, handle clearance, keypad access, and any protrusions. Once those are accounted for, choose a disguise that makes sense for the room. In a bedroom, a dresser or wardrobe look usually blends better than a shop cabinet. In a home office, a bookcase, printer cabinet, or file credenza is often more believable. In a garage or hunting cabin, a workbench, utility cabinet, or supply locker can look completely natural. The best camouflage is not just visually convincing; it fits the function and style of the space so it does not attract a second look.
Just as important, the safe must remain easy for the owner to access under normal and stressful conditions. A concealment design that requires moving heavy objects, unlocking extra compartments, or removing awkward panels may defeat the purpose. The ideal result is simple: to everyone else, it looks like ordinary furniture, but to you, access remains quick, predictable, and safe.
Can I make my gun safe look like a dresser, cabinet, or bookcase without affecting security?
Yes, as long as the project is designed around the safe rather than imposed onto it. Security is affected when concealment materials weaken anchoring, limit the ability to close and lock the door properly, or create leverage points that did not exist before. If you build a decorative surround correctly, you can preserve the safe’s original theft resistance while making it much less obvious. In many homes, concealment actually adds a practical layer of protection because a safe that does not announce itself is less likely to be targeted during a quick burglary.
For a dresser-style build, many owners use a false front with decorative drawer faces mounted on a panel or frame, giving the appearance of furniture without installing real drawers that interfere with door movement. For a cabinet look, side panels, face frames, trim, and matching stain or paint can visually integrate the safe with existing furniture. For a bookcase disguise, shelves can be built around the safe body, and a false shelf section or hinged book-spine panel can help break up the visual outline. The important part is preserving full access to the lock, handle, and door edge while ensuring the safe is still anchored to the floor or wall according to manufacturer recommendations.
You should also think about weight distribution and room function. A real gun safe is much heavier than standard furniture, so the floor must support both the safe and any added finish materials. If the safe is in an upper room, loft, or older structure, confirm load capacity before adding cabinetry. Also remember that concealment should not create obvious clues. For example, a “dresser” with no realistic top use, no matching room style, or impossible proportions may attract more attention than an exposed safe. The most secure camouflage is believable, stable, and built in a way that leaves the safe operating exactly as intended.
What materials and design choices work best for a DIY gun safe camouflage project?
The best materials are lightweight, durable, and easy to remove for maintenance or future repositioning. Plywood, MDF, furniture-grade panels, hardwood trim, and paintable or stainable molding are common choices because they let you create a finished furniture appearance without placing unnecessary stress on the safe or floor. In garages and cabins, shop-grade plywood, beadboard panels, butcher-block-style tops, and rugged trim can create a convincing utility cabinet or workbench look. In bedrooms and living spaces, cleaner furniture materials with matched paint, stain, hardware, and molding usually produce the most natural result.
From a design standpoint, simplicity usually wins. The goal is not to build a theatrical hidden room effect unless that is truly appropriate for the space. Most successful projects rely on familiar lines and proportion: a cabinet with believable doors, a dresser with realistic drawer spacing, a bookcase with normal shelf depth, or a bench with practical storage elements nearby. Matching surrounding décor matters as much as the build itself. If your room contains modern flat-panel furniture, an ornate rustic hutch façade will stand out. If the room has farmhouse or lodge styling, a sleek office cabinet may look out of place. Camouflage works when it belongs visually.
Hardware also deserves attention. Decorative pulls, hinges, and trim should support the illusion but not interfere with the safe’s real hardware. Avoid anything that blocks the keypad, catches on the handle, or limits the door swing. Magnetic panels, hinged outer faces, removable trim sections, and concealed fasteners are often useful because they allow easy service access while keeping the finished appearance clean. If the safe generates moisture concerns in a basement, garage, or cabin, use materials and finishes that tolerate humidity well and do not trap condensation around the safe body. A good DIY project balances appearance, access, durability, and environmental common sense.
Will camouflage interfere with quick access, fire protection, or the safe’s normal operation?
It can if it is done carelessly, which is why planning matters so much. Quick access is usually compromised when the camouflage adds extra steps, such as removing decorative panels, moving furniture in front of the safe, or reaching through awkward openings to use the keypad or dial. A better design allows the safe door to open freely and lets you reach the lock naturally from a normal standing or seated position. If you rely on the safe for defensive access, this is especially important. Concealment should reduce visibility to others, not create delay for you.
Fire protection can also be affected if modifications interfere with the safe’s factory construction or expose it to materials that create heat traps, moisture issues, or operational problems. The safest practice is not to alter the safe body itself. Do not drill through fire-lined walls, replace factory components, or seal the unit so tightly inside a decorative enclosure that moisture accumulates or service access becomes impossible. If the manufacturer specifies clearance needs, electrical routing considerations for dehumidifiers or lights, or anchoring instructions, those should be followed exactly. When in doubt, check the owner’s manual or contact the manufacturer before adding built-in surrounds.
Normal operation includes more than locking and unlocking. You also need full door swing, shelf access, interior lighting function if equipped, battery replacement access for electronic locks, and enough room to maintain the exterior finish. In projects I have seen work well in bedrooms, offices, garages, and cabins, the best builds are the ones that account for daily use from the beginning. They feel like furniture to everyone else, but they still behave like a proper safe for the owner. That balance is what makes camouflage practical rather than just decorative.
Where should I place a camouflaged gun safe in the home for the most realistic and effective concealment?
The best location is one where the safe’s size, shape, and disguised function make complete sense. In a bedroom, a safe often disappears well as part of a dresser, wardrobe, or chest-style furniture arrangement, especially if it sits among other large pieces. In a home office, it can blend into a built-in cabinet wall, bookcase, printer station, or file storage area. In a garage, mudroom, workshop, or hunting cabin, a safe can be especially easy to hide because utility cabinets, workbenches, gear lockers, and supply storage already look heavy-duty and functional. The goal is not merely to “hide” the safe, but to place it where its disguised identity is believable.
At the same time, placement still has to support security fundamentals. The safe should remain anchored properly, located on a floor that can carry the load, and positioned so the door can open fully. Avoid placing it where concealment forces you into a cramped access pattern or where the camouflage itself becomes suspicious. For example, a large “bookcase” with almost no books, or a “cabinet” that never gets used in a high-traffic area, may draw curiosity. Effective concealment uses normal household behavior as cover. If the furniture style and room use align, people tend to ignore it.
You should also consider privacy, traffic flow, and who regularly enters the space. A discreet safe in a private bedroom or dedicated office generally attracts less attention than one in a family room used by guests, contractors, and service personnel. In cabins and garages, choose spots that do not immediately catch the eye when the door opens. Corners, alcoves, and built-in wall sections often work better than isolated standalone placement. The most effective camouflaged safe location is one that combines realistic appearance, convenient owner access, strong anchoring potential, and low likelihood of casual scrutiny.